manual lymphatic drainage contraindications

Manual Lymphatic Drainage (MLD) is a gentle, specialized massage technique that promotes the movement of lymph fluid through the lymphatic system. It is commonly used to alleviate lymphedema, reduce swelling, and support overall lymphatic health. While MLD is beneficial for many, certain conditions make it unsuitable, highlighting the importance of understanding its contraindications.

General Contraindications for Manual Lymphatic Drainage

MLD is contraindicated in conditions where increased lymph flow could worsen health, such as infections, fever, or severe circulatory issues, emphasizing the need for careful assessment before treatment.

Absolute Contraindications

Absolute contraindications for Manual Lymphatic Drainage (MLD) are conditions where the treatment could lead to serious health complications. These include active infections, severe acute inflammation, or systemic infections like cellulitis, as MLD could spread the infection. Deep vein thrombosis (DVT) is another absolute contraindication, as the treatment might dislodge a blood clot, leading to a pulmonary embolism. Active cancer or the presence of cancerous tissues is also contraindicated, as MLD could inadvertently spread cancer cells. Additionally, severe kidney failure, where the body cannot process lymphatic fluid effectively, and congestive heart failure, where increased lymph flow could overload the heart, are absolute contraindications. Radiation dermatitis or severely damaged skin should also avoid MLD, as the treatment might exacerbate tissue damage. Venous thrombosis and acute fever are similarly contraindicated, as they indicate the body is in a fragile state. In these cases, MLD could worsen the condition, making it essential to avoid treatment entirely. Professional consultation is crucial to ensure safety and avoid potential risks.

Relative Contraindications

Relative contraindications for Manual Lymphatic Drainage (MLD) involve conditions where the treatment may need to be adjusted or approached with caution, rather than being entirely avoided. These include chronic infections, where MLD might be used cautiously under medical supervision. Conditions like moderate kidney dysfunction or stable heart conditions may require modified techniques to prevent overloading the system. MLD should also be used with care in cases of pregnancy, as certain techniques might stimulate the uterus. Patients with implanted medical devices, such as pacemakers, should consult their healthcare provider to ensure safety. Additionally, MLD may be adapted for children, requiring specialized techniques suited to their smaller anatomy. Relative contraindications emphasize the need for personalized assessment and professional guidance to ensure safe and effective treatment. They highlight the importance of tailoring MLD to individual health circumstances, balancing potential benefits against possible risks.

Specific Contraindications for Manual Lymphatic Drainage

Specific contraindications include infections, fever, deep vein thrombosis, kidney failure, congestive heart failure, active cancer, radiation dermatitis, cellulitis, and venous thrombosis. These conditions require careful consideration to avoid complications.

Infections or Fever

Active infections or the presence of a fever are absolute contraindications for Manual Lymphatic Drainage (MLD). When the body is fighting an infection, the lymphatic system is already under stress, working to neutralize pathogens and reduce inflammation. MLD, while gentle, can inadvertently spread the infection or overload the lymphatic system, exacerbating the condition. Performing MLD during an active infection may lead to systemic complications, such as sepsis or the spread of infectious agents through the lymphatic network. Fever, as a sign of the body’s immune response, indicates that the system is already compromised, and any additional manipulation could disrupt the natural healing process. It is crucial to postpone MLD sessions until the infection has fully resolved and the fever has subsided. Consulting a healthcare professional is essential to ensure safe and effective treatment. This precaution helps protect the patient from potential harm and allows the lymphatic system to recover naturally before resuming therapy.

Deep Vein Thrombosis (DVT)

Deep Vein Thrombosis (DVT) is a significant contraindication for Manual Lymphatic Drainage (MLD). DVT occurs when a blood clot forms in the deep veins, typically in the legs, and can be life-threatening if the clot dislodges and travels to the lungs, causing a pulmonary embolism. MLD involves gentle manipulation of the lymphatic system, which, in the presence of a DVT, could inadvertently dislodge the clot. This poses a serious risk of the clot migrating through the bloodstream, leading to potentially fatal complications.

Individuals with a confirmed or suspected DVT should avoid MLD until the condition is medically managed and the risk of clot dislodgement has been eliminated. Healthcare providers must exercise extreme caution and ensure that patients are cleared for MLD by a physician if DVT is suspected. The risks associated with MLD in this context far outweigh any potential benefits, making it an absolute contraindication.

Kidney Failure

Kidney failure is another critical contraindication for Manual Lymphatic Drainage (MLD). The kidneys play a vital role in filtering waste and excess fluids from the body, and when they fail, toxins can accumulate in the bloodstream. MLD, which stimulates lymphatic flow, may overload the lymphatic system, potentially pushing more toxins into an already compromised system.

In individuals with kidney failure, the lymphatic system is often under strain due to fluid retention and electrolyte imbalances. Aggravating this condition with MLD could worsen symptoms or lead to further complications. Additionally, patients with kidney failure may have comorbidities that make MLD unsafe, such as severe edema or cardiovascular instability.

Therefore, MLD should not be performed on individuals with kidney failure unless explicitly cleared by a healthcare provider. The risks of exacerbating the condition outweigh any potential benefits, making it an absolute contraindication in most cases. Professional consultation is essential to determine the safest approach for such patients.

Congestive Heart Failure

Congestive heart failure (CHF) is a serious condition where the heart cannot pump blood effectively, leading to fluid retention and swelling. Manual Lymphatic Drainage (MLD) is contraindicated in such cases because it may exacerbate fluid overload.

MLD stimulates lymphatic flow, which can increase the volume of fluid returning to the bloodstream. In CHF, the heart is already struggling to manage blood volume, and additional fluid can worsen congestion in the lungs and other organs. This could lead to severe complications, such as pulmonary edema or increased symptoms of heart failure.

Additionally, patients with CHF often have compromised lymphatic and circulatory systems, making it difficult for their bodies to handle the rapid movement of lymph fluid. Therefore, MLD should not be performed on individuals with CHF unless under strict medical supervision. The risks of aggravating the condition far outweigh any potential benefits, making CHF an absolute contraindication for MLD.

Active Cancer or Cancerous Tissue

Active cancer or the presence of cancerous tissue is a significant contraindication for Manual Lymphatic Drainage (MLD). This is because the gentle pressure applied during MLD can potentially dislodge cancer cells, leading to their spread (metastasis) through the lymphatic system.

Additionally, cancer treatment, such as surgery, radiation, or chemotherapy, can weaken the lymphatic system, making it more vulnerable to complications. MLD may exacerbate lymphedema in cancer patients, especially those who have undergone lymph node removal or radiation therapy.

While MLD is sometimes used in palliative care for cancer patients, it must be performed with extreme caution and only under medical supervision. Directly massaging over cancerous tissue or damaged skin from radiation is strictly avoided to prevent further harm. Therefore, MLD is contraindicated during active cancer treatment unless specifically approved by a healthcare provider.

Radiation Dermatitis or Damaged Skin

Radiation dermatitis, a common side effect of radiation therapy, involves skin inflammation and damage. This condition, along with other forms of compromised skin integrity, is a contraindication for Manual Lymphatic Drainage (MLD).

The fragile state of the skin in radiation dermatitis makes it highly susceptible to further irritation or injury. MLD involves gentle, targeted strokes, but even this light pressure can exacerbate skin damage, leading to discomfort, infection, or prolonged healing.

Similarly, damaged skin, such as burns, ulcers, or open wounds, should not be subjected to MLD. The technique could disrupt the healing process or introduce bacteria into the lymphatic system, increasing the risk of infection.

While MLD is beneficial for lymphatic health, caution is paramount when dealing with skin compromised by radiation or other injuries. Professional consultation is essential to determine safe and appropriate treatment options.

Cellulitis

Cellulitis, an infection of the skin and underlying tissues, is a significant contraindication for Manual Lymphatic Drainage (MLD). This condition, typically caused by bacterial infection, leads to redness, swelling, and warmth in the affected area.

Performing MLD on a patient with cellulitis can worsen the infection by spreading bacteria through the lymphatic system. This may result in systemic complications, such as sepsis, especially in immunocompromised individuals.

MLD should not be administered until the infection is fully resolved, typically after a course of antibiotics. Even gentle lymphatic techniques can disrupt the body’s natural barriers against infection, potentially leading to further inflammation or the spread of pathogens.

Therefore, it is crucial to avoid MLD in cases of active cellulitis to prevent exacerbating the condition and ensuring patient safety. Professional assessment is necessary to determine when it is safe to resume lymphatic drainage after recovery.

Venous Thrombosis

Individuals with venous thrombosis should avoid MLD, as even light massage techniques can interfere with the stability of the clot. The lymphatic system’s role in circulating fluid makes it risky to manipulate areas with existing clots, as this could force the clot into the bloodstream.

MLD should only be considered once the clot is fully resolved or stabilized under medical supervision. Patients with a history of venous thrombosis must consult their healthcare provider before undergoing lymphatic drainage to ensure it is safe and appropriate.

This precaution highlights the importance of assessing vascular health before administering MLD, as the risks associated with venous thrombosis far outweigh any potential benefits of the treatment.

Additional Considerations for Manual Lymphatic Drainage

MLD requires careful consideration for specific populations, including pregnant individuals, children, and those with implanted medical devices. Each case demands tailored approaches to ensure safety and effectiveness, avoiding complications. Professional guidance is essential in these scenarios.

Pregnancy and MLD

While MLD can be beneficial during pregnancy, it is crucial to approach it with caution. Pregnant individuals should consult a certified therapist to ensure safe and appropriate techniques. MLD may help reduce swelling in the extremities, a common issue during pregnancy, by promoting lymphatic flow. However, certain conditions such as preeclampsia or a history of miscarriage may necessitate avoiding MLD. Gentle techniques and avoiding deep pressure are essential to prevent complications. Additionally, MLD should not be performed over areas with stretch marks or sensitive skin, which are common during pregnancy. The therapist must be experienced in working with pregnant clients to modify techniques according to the trimester and individual health status. Regular communication with healthcare providers is also recommended to ensure MLD aligns with overall prenatal care. In summary, MLD during pregnancy requires careful consideration and professional guidance to maximize benefits while minimizing risks.

MLD in Children

Manual Lymphatic Drainage (MLD) can be adapted for children, but it requires careful consideration of their unique physiology and medical conditions. While MLD is generally safe for children, certain contraindications must be evaluated. Conditions such as active infections, fever, or cancerous tissue are absolute contraindications, as they may worsen the child’s health. Relative contraindications include sensitive skin or young age, where the technique must be modified to ensure comfort and safety. MLD can be beneficial for children with lymphatic system disorders, such as congenital lymphedema or post-surgical swelling. However, the session should be conducted by a trained therapist with experience in pediatric care. The pressure applied must be extremely gentle, and the duration adjusted to the child’s tolerance. Parents or guardians should be involved in the decision-making process, and the therapy should complement other medical treatments. Regular monitoring is essential to assess the child’s response and ensure the therapy remains appropriate. In summary, MLD in children requires a tailored approach to address their specific needs while minimizing potential risks.

MLD for Patients with Implanted Medical Devices

Manual Lymphatic Drainage (MLD) must be approached with caution in patients with implanted medical devices, such as pacemakers, deep brain stimulators, or drug delivery systems. The primary concern is the potential for mechanical interference or displacement of the device during the massage. Gentle MLD techniques may be permissible in some cases, but therapists must avoid direct pressure or manipulation near the implant site. For example, patients with venous access devices or implanted ports should not receive MLD in the vicinity of these devices to prevent complications. Additionally, the therapist should consult with the patient’s healthcare provider to confirm the safety of MLD and ensure it aligns with the patient’s treatment plan. In some instances, modified techniques or alternative therapies may be recommended. Open communication and careful assessment are crucial to provide safe and effective care for these patients. MLD can still offer benefits, but only when performed with appropriate precautions and professional guidance.

Side Effects and Precautions

Manual lymphatic drainage may cause mild side effects such as fatigue, headaches, or nausea. These reactions are typically temporary but should be monitored. It is crucial to consult a healthcare provider before undergoing MLD, especially for individuals with underlying health conditions.

Fatigue, Headaches, or Nausea

Fatigue, headaches, or nausea are potential side effects of manual lymphatic drainage (MLD), particularly if the body is sensitive to the treatment or if the lymphatic system is overwhelmed. These reactions often occur as the body responds to the release of toxins or excess fluids during the process. While these side effects are generally mild and temporary, they can be uncomfortable for some individuals.

Individuals with pre-existing conditions or those undergoing intensive MLD sessions may be more prone to these reactions. It is essential to communicate any discomfort to the practitioner, as they can adjust the technique to minimize adverse effects. In rare cases, these symptoms may persist, requiring further medical evaluation to rule out underlying issues.

Practitioners often recommend rest and hydration after MLD to help the body recover and reduce the likelihood of such side effects. Consulting a qualified professional ensures that the treatment is tailored to the individual’s health status, minimizing risks and maximizing benefits.

Importance of Professional Consultation

Consulting a qualified healthcare professional or certified lymphatic therapist is crucial before undergoing manual lymphatic drainage (MLD). A professional can assess individual health conditions, ensuring MLD is safe and appropriate. They evaluate contraindications, such as infections, deep vein thrombosis, or active cancer, to prevent potential harm. MLD, while gentle, requires expertise to avoid complications, especially in sensitive cases like pregnancy or implanted medical devices. A professional tailors the treatment to address specific needs, maximizing benefits while minimizing risks. They also monitor for side effects like fatigue or nausea, adjusting techniques as necessary. Proper consultation ensures personalized care, avoiding generic approaches that might worsen conditions. It’s vital to seek guidance from a trained specialist to safely integrate MLD into a treatment plan, particularly for those with complex medical histories. This expertise guarantees a safe and effective experience, aligning with individual health goals and avoiding unintended consequences.

design your life pdf

“Design Your Life” by Bill Burnett and Dave Evans offers a transformative approach to creating a fulfilling life using design thinking principles. This New York Times bestseller empowers readers to build a joyful‚ well-lived life by applying creative problem-solving to their personal and professional journeys. The book provides practical tools and mindset shifts to help individuals navigate life’s challenges with curiosity and intention. It’s a must-read for anyone seeking to redefine their path and find purpose in an ever-changing world. The authors‚ both Stanford professors‚ share actionable steps to design a life that aligns with your values and passions. Whether you’re just starting out or reassessing your path‚ this guide offers timeless wisdom and inspiration. Available in various formats‚ including PDF‚ it’s accessible to everyone. The book also includes downloadable resources and interactive workshops to further support your journey. Join a growing community of life designers who are co-creating meaningful lives with courage and creativity.”

Overview of the Book

“Design Your Life” by Bill Burnett and Dave Evans introduces a revolutionary approach to life planning using design thinking. The book‚ a New York Times bestseller‚ empowers readers to create a fulfilling life by applying creative problem-solving. It offers practical tools like the five-line framework and designing three possible lives. The authors‚ Stanford professors‚ provide actionable steps to align life choices with personal values and passions. The book is ideal for anyone seeking purpose‚ whether starting fresh or reassessing their path. Available in PDF and other formats‚ it includes downloadable resources. This guide inspires readers to embrace curiosity and intention‚ helping them navigate life’s challenges and build a joyful‚ meaningful future. Its timeless wisdom makes it a valuable resource for all life stages.

Authors: Bill Burnett and Dave Evans

Bill Burnett and Dave Evans are renowned innovators and educators who co-authored the transformative book Design Your Life. Burnett‚ the Executive Director of Stanford University’s Design Program‚ brings extensive experience in design thinking. Evans‚ a lecturer in Stanford’s Product Design Program‚ combines his expertise in tech and education. Their collaboration began in 2008 with a popular life design course at Stanford‚ which inspired the book. Their work challenges conventional career advice‚ emphasizing creativity and curiosity. They advocate for prototyping lives and iterating through challenges. Burnett and Evans are celebrated for making design thinking accessible to everyone‚ helping individuals worldwide build joyful‚ purposeful lives. Their approach has resonated globally‚ making them leading voices in life design.

Key Principles of Life Design

Life design emphasizes curiosity‚ creativity‚ and taking action. It encourages embracing uncertainty‚ prototyping ideas‚ and iterating through challenges. This approach helps create a fulfilling and purposeful life.

What is Life Design?

Life design is a process of applying design thinking to create a fulfilling and meaningful life. It involves curiosity‚ creativity‚ and taking action to explore possibilities. By embracing uncertainty and prototyping different life scenarios‚ individuals can navigate life’s challenges with intention and purpose. This approach‚ inspired by the principles of design‚ encourages people to view life as a dynamic and iterative journey rather than a fixed plan. It’s about co-creating a life that aligns with your values and passions‚ whether in your career‚ relationships‚ or personal growth; Life design empowers you to experiment‚ learn‚ and evolve‚ helping you build a well-lived‚ joyful life. It’s a mindset that celebrates exploration and radical collaboration‚ offering practical tools to shape your future with confidence and clarity; Through this framework‚ anyone can design a life that feels authentic and purposeful.

The Five-Line Framework for Life Design

The Five-Line Framework is a core concept in life design‚ helping individuals create a balanced and fulfilling life. It involves five key areas: Work‚ Love‚ Play‚ Health‚ and a fifth line for personal growth or spirituality. Each line represents a different aspect of life‚ and the framework encourages you to explore and design each area intentionally. By focusing on these five lines‚ you can create a holistic life that aligns with your values and aspirations. This approach emphasizes the importance of balancing professional and personal goals while leaving room for exploration and joy. The framework is a practical tool for visualizing and designing a life that feels complete and meaningful. It’s a simple yet powerful way to map out your priorities and create a life you love.

Design Thinking for Life

Design thinking is a problem-solving approach that applies creative methods to real-life challenges. It encourages curiosity‚ empathy‚ and experimentation to navigate life’s uncertainties. By embracing design thinking‚ individuals can reframe problems as opportunities for growth. This mindset shifts focus from finding the “perfect” solution to exploring multiple possibilities. It emphasizes prototyping and testing ideas in small‚ manageable ways. Design thinking fosters resilience and adaptability‚ allowing you to pivot when circumstances change. The process involves five stages: empathize‚ define‚ ideate‚ prototype‚ and test. Applying these steps to life helps you design a path that aligns with your values and passions. It’s a powerful tool for creating a joyful‚ meaningful life by transforming challenges into opportunities for innovation and fulfillment.

Core Mindsets for a Well-Lived Life include curiosity‚ creativity‚ bias to action‚ reframing‚ and radical collaboration. These mindsets empower you to explore‚ innovate‚ and co-design a fulfilling life.

Curiosity: Embracing Exploration

Curiosity is the cornerstone of life design‚ encouraging you to explore possibilities and question assumptions. It fosters a mindset of continuous learning and experimentation‚ helping you navigate uncertainty. By embracing curiosity‚ you open yourself to new experiences and perspectives‚ which are essential for creating a fulfilling life. This mindset prompts you to ask meaningful questions‚ seek insights‚ and discover opportunities that align with your passions and values. Cultivating curiosity allows you to approach challenges with creativity and resilience‚ transforming obstacles into stepping stones for growth. It’s about staying open-minded and engaged‚ ensuring that your life remains dynamic and purposeful. Curiosity is the spark that ignites the journey of designing a life you love.

Creativity: Generating New Ideas

Creativity is a powerful tool for generating new ideas and envisioning possibilities in life design. It allows you to think outside traditional boundaries and explore unconventional solutions. By embracing creativity‚ you can reimagine your future and craft a life that aligns with your values and aspirations. This mindset encourages brainstorming‚ experimentation‚ and innovation‚ helping you uncover opportunities that might otherwise go unnoticed. Creativity isn’t just for artists; it’s a practical skill for designing a fulfilling life. It empowers you to envision multiple scenarios‚ prototype ideas‚ and iterate toward a life that feels authentic and meaningful. Cultivating creativity ensures that your life remains dynamic‚ adaptable‚ and full of potential.

Bias to Action: Taking Small Steps

Bias to action emphasizes the importance of taking small‚ meaningful steps toward your goals. It’s about moving forward even when the path isn’t fully clear. By prioritizing action over analysis paralysis‚ you can gain momentum and clarity. Small steps allow you to test ideas‚ learn from outcomes‚ and refine your approach. This mindset encourages experimentation and iteration‚ helping you build confidence and progress. It’s not about making perfect decisions but about taking consistent‚ incremental actions that align with your values and aspirations. Bias to action transforms ideas into reality‚ ensuring that your life design remains dynamic and purposeful. It’s a practical way to turn intentions into tangible results‚ fostering growth and fulfillment. Small steps today can lead to significant progress tomorrow.

Reframing: Changing Your Perspective

Reframing is a powerful tool in life design that involves shifting your perspective to uncover new possibilities. By challenging your assumptions and viewing challenges as opportunities‚ you can transform obstacles into stepping stones. This mindset helps you see beyond limitations and explore fresh solutions. Reframing encourages you to question your beliefs and reinterpret experiences‚ fostering resilience and creativity. It’s about finding meaning in unexpected places and approaching life with a growth-oriented mindset. By changing how you see the world‚ you open yourself to innovation and progress. Reframing is not about denying reality but about seeing it differently‚ enabling you to navigate life’s complexities with greater ease and optimism. It’s a cornerstone of designing a life that is both fulfilling and meaningful.

Radical Collaboration: Co-Designing Your Life

Radical collaboration is a key mindset in life design‚ emphasizing the importance of working with others to co-create your path. By engaging in open‚ empathetic‚ and iterative exchanges‚ you can gain new insights and perspectives that enrich your journey. This approach encourages shared problem-solving and mutual support‚ helping you navigate life’s complexities more effectively. Radical collaboration isn’t just about teamwork; it’s about embracing diverse viewpoints to design a life that resonates with your values and aspirations. By involving others in your life design process‚ you foster meaningful connections and unlock opportunities that might otherwise remain hidden. This collaborative mindset transforms life into a dynamic‚ shared adventure‚ where collective creativity leads to personal and professional growth.

Applying Design Thinking to Life

Design thinking transforms life into a creative process‚ helping you build a well-lived‚ joyful existence; It encourages empathy‚ experimentation‚ and iterative problem-solving to craft meaningful experiences and solutions.

How to Build a Well-Lived‚ Joyful Life

Building a well-lived‚ joyful life involves embracing design thinking to create meaningful experiences. Start by identifying your values and passions‚ then prototype and test different life scenarios. Cultivate curiosity‚ creativity‚ and a bias toward action to navigate uncertainties. Reframe challenges as opportunities for growth and collaborate with others to co-design your path. Prioritize small‚ actionable steps over grand‚ overwhelming plans. Embrace failure as a learning tool and maintain flexibility to adapt as circumstances change. By applying these principles‚ you can craft a life that is purposeful‚ fulfilling‚ and aligned with your true self. This approach fosters resilience and joy‚ helping you thrive in any stage of life.

Designing Your Career

Designing your career involves applying life design principles to create a fulfilling professional path. Start by exploring your passions‚ skills‚ and values‚ then prototype potential career scenarios. Use the five-line framework to map out different work possibilities‚ considering both traditional roles and unconventional opportunities. Test these ideas through informational interviews‚ job shadowing‚ or side projects to gain insights. Embrace a bias toward action‚ prioritizing small steps over perfection. Collaborate with mentors and peers to refine your approach. Remember‚ your career is not a fixed destination but a dynamic journey. By iterating and adapting‚ you can build a career that aligns with your purpose and brings satisfaction. This mindset allows you to navigate uncertainties and thrive in an ever-changing professional landscape while staying true to your aspirations.

Designing Your Relationships

Designing your relationships involves intentionally crafting connections that bring joy and fulfillment. Start by understanding your needs and values‚ then prototype interactions that align with them. Practice curiosity by exploring new ways to connect and creativity in nurturing existing bonds. Use bias to action to initiate meaningful conversations and collaborate with others to co-create relationships. Embrace reframing to shift perspectives and improve communication. By applying life design principles‚ you can build relationships that support your growth and well-being. Remember‚ relationships are dynamic and evolve over time. Iterate and adapt to maintain harmony and depth. This approach fosters empathy‚ understanding‚ and lasting connections‚ enriching your personal and professional life.

Practical Steps for Life Design

Start where you are‚ design three possible lives‚ and prototype to test them. Iterate and refine your path to create a fulfilling life aligned with your values.

Step 1: Start Where You Are

Begin by assessing your current situation‚ including your strengths‚ passions‚ and values. Understand where you are in life to map your next steps effectively. Avoid overplanning and instead focus on small‚ actionable moves. Reflect on past experiences to identify patterns and opportunities for growth. This step encourages self-awareness and acceptance‚ helping you build a foundation for meaningful change. By starting where you are‚ you create a realistic baseline to design a life that aligns with your aspirations. Use tools like the “Life Dashboard” to visualize your current status and identify areas for improvement. This practical approach ensures you’re grounded in reality while envisioning your future possibilities.

Step 2: Design Three Possible Lives

Designing three possible lives encourages you to explore different paths aligned with your passions and values. This step helps you avoid limiting yourself to a single option. Create three plausible scenarios: one that continues your current path‚ another that represents a significant change‚ and a third that aligns with your wildest aspirations. Use these designs to identify common themes and elements that bring fulfillment. This exercise fosters creativity and helps you envision a future that aligns with your true self. By exploring multiple possibilities‚ you gain clarity and confidence in shaping a life that reflects your aspirations and strengths‚ making it easier to take actionable steps toward your desired future.

Step 3: Prototyping and Testing

Prototyping and testing are essential steps in the life design process‚ allowing you to explore your ideas in real-world scenarios. Start by creating low-stakes prototypes—small‚ manageable experiments—that reflect your curiosity and aspirations. For example‚ if one of your designed lives involves a career change‚ test it by attending industry events‚ networking with professionals‚ or taking a relevant course. This step helps you gather insights and refine your ideas. Testing reveals what works and what doesn’t‚ enabling you to iterate and improve. Remember‚ prototypes are not final; they’re tools for learning. By embracing this mindset‚ you can make informed decisions and move closer to a life that aligns with your values and passions.

Overcoming Challenges in Life Design

Overcoming challenges in life design involves balancing goals while keeping options open and embracing failure as a natural part of growth.

Balancing Goals and Keeping Options Open

Balancing goals while maintaining flexibility is crucial in life design. According to Bill Burnett and Dave Evans‚ it’s essential to pursue clear objectives without limiting opportunities. By designing multiple potential lives‚ individuals can explore diverse paths while staying aligned with their values. This approach prevents over-commitment to a single plan‚ allowing for adaptation as circumstances change. The book emphasizes the importance of curiosity and creativity in navigating life’s uncertainties. Keeping options open encourages continuous growth and prevents stagnation. By embracing a mindset of exploration‚ readers can make intentional decisions that align with their evolving goals. This balance fosters resilience and adaptability‚ key to thriving in an unpredictable world. The authors provide practical tools to help readers strike this balance effectively‚ ensuring they remain open to new possibilities while pursuing meaningful objectives.

Embracing Failure as Part of the Process

Embracing failure is a cornerstone of the life design approach. Bill Burnett and Dave Evans emphasize that failure is not a setback but an essential part of the iterative design process. By viewing failure as a learning opportunity‚ individuals can gain valuable insights and refine their path forward. The book encourages readers to experiment and prototype different aspects of their lives‚ understanding that missteps are inevitable and informative. This mindset shifts failure from a source of fear to a catalyst for growth. By reframing failure as a natural part of exploration‚ individuals can approach challenges with resilience and confidence. The authors provide practical strategies to reframe setbacks‚ fostering a growth-oriented perspective that fuels personal and professional development.

The Role of Passion and Purpose

Passion and purpose are central to designing a fulfilling life. They guide decisions‚ sparks joy‚ and create meaning. Discovering your passion and aligning life with purpose leads to a life of fulfillment and impact‚ as emphasized in “Design Your Life.”

Rediscovering Your Passion

Rediscovering your passion involves identifying activities that spark joy and fulfillment. According to “Design Your Life‚” passion isn’t necessarily about grand gestures but often found in everyday moments. The book guides readers to reflect on past experiences and explore new interests‚ helping them uncover what truly excites them. By embracing curiosity and creativity‚ individuals can reignite dormant passions or discover new ones. Passion serves as a compass‚ aligning life choices with personal values and desires. The authors emphasize that passion is not static—it can evolve over time. Through practical exercises and mindset shifts‚ readers learn to prioritize activities that bring meaning and joy‚ creating a foundation for a purpose-driven life.

Aligning Your Life with Your Purpose

Aligning your life with your purpose involves creating a clear vision and taking intentional steps to achieve it. According to “Design Your Life‚” purpose is the foundation of a fulfilling life‚ guiding decisions and actions. The book encourages readers to reflect on their values‚ passions‚ and long-term goals to identify their purpose. By applying design thinking‚ individuals can craft a life that resonates with their core beliefs. This alignment fosters a sense of direction and meaning‚ leading to a more joyful and intentional existence. The authors emphasize the importance of embracing purpose as a dynamic process‚ allowing for evolution and growth over time. Through practical exercises and mindset shifts‚ readers can harmonize their lives with their purpose‚ creating a path that truly reflects who they are and what they stand for.

Additional Resources and Tools

The book provides downloadable resources and interactive workshops to support life design. These tools help readers apply design thinking to their lives effectively.

Downloadable Resources from the Book

The book “Design Your Life” offers a range of downloadable resources to support readers in applying its principles. These include PDF worksheets‚ exercises‚ and templates designed to help individuals map out their life goals and explore possibilities. The resources are available online and complement the book’s content‚ providing practical tools for designing a fulfilling life. Readers can access these materials to guide them through the process of creating a well-lived‚ joyful life. The resources are particularly useful for those looking to apply design thinking to their career and personal relationships. They are an essential companion for anyone embarking on the life design journey outlined in the book. These tools are designed to be actionable and user-friendly‚ making the concepts accessible to everyone. By leveraging these resources‚ readers can take the first steps toward designing a life that aligns with their passions and values. The downloadable materials are a valuable addition to the book‚ offering a hands-on approach to life design. They encourage readers to experiment‚ explore‚ and refine their ideas. The resources are also ideal for those who prefer a structured approach to personal development. Overall‚ they provide a comprehensive toolkit for anyone serious about creating a meaningful and purposeful life. The availability of these resources underscores the authors’ commitment to empowering readers with practical tools for lasting change. They are a testament to the book’s focus on actionable advice and real-world application. By utilizing these resources‚ readers can transform the book’s insights into tangible results. The downloadable materials are a key part of the “Design Your Life” experience‚ offering a pathway to a more intentional and fulfilling life. They are designed to inspire and equip readers to take control of their life’s design. The resources are a powerful extension of the book’s message‚ ensuring that readers have everything they need to start designing their lives immediately. They are a valuable investment for anyone seeking to create a life of purpose and joy. The downloadable resources from “Design Your Life” are a must-have for anyone committed to the life design process. They provide the structure and guidance needed to turn ideas into action. With these tools‚ readers can confidently navigate the process of designing a life that truly reflects their aspirations and values. The resources are a seamless extension of the book‚ offering a holistic approach to life design. They are a powerful catalyst for personal growth and transformation. By incorporating these resources into their journey‚ readers can ensure they stay on track and achieve their goals. The downloadable materials are a testament to the authors’ dedication to helping readers succeed in designing a well-lived‚ joyful life. They are an indispensable part of the “Design Your Life” experience. The resources are designed to be flexible‚ allowing readers to use them at their own pace. They are ideal for individuals who prefer a self-directed approach to personal development. The materials are also suitable for group or workshop settings‚ making them versatile for various learning environments. Overall‚ the downloadable resources from “Design Your Life” are a comprehensive and practical addition to the book. They empower readers with the tools they need to create a life of purpose‚ joy‚ and fulfillment. By leveraging these resources‚ readers can overcome obstacles and achieve their life design goals. The downloadable materials are a valuable asset for anyone committed to the life design process. They provide the structure‚ guidance‚ and inspiration needed to transform life’s challenges into opportunities for growth. With these resources‚ readers can confidently embark on the journey of designing a life that aligns with their passions and values. The materials are a powerful reminder that life design is a continuous process‚ and with the right tools‚ anyone can create a well-lived‚ joyful life. The downloadable resources from “Design Your Life” are a must-have for anyone serious about taking control of their life’s direction. They offer a practical and actionable approach to personal development. By utilizing these tools‚ readers can turn the book’s insights into tangible results‚ ensuring they stay on the path to a fulfilling life. The resources are a testament to the authors’ commitment to empowering readers with the tools they need to succeed. They are an essential part of the “Design Your Life” experience‚ offering a pathway to a more intentional and meaningful life. The downloadable materials are a powerful catalyst for personal growth and transformation. They provide readers with the confidence and tools needed to design a life that truly reflects their aspirations and values. The resources are a valuable investment for anyone seeking to create a life of purpose and joy. By incorporating these tools into their journey‚ readers can ensure they achieve their life design goals and live a well-lived‚ joyful life. The downloadable resources from “Design Your Life” are a comprehensive and practical addition to the book‚ empowering readers with everything they need to succeed in designing their lives. They are a must-have for anyone committed to personal growth and transformation. With these resources‚ readers can confidently navigate the life design process and create a life that aligns with their passions and values. The materials are a powerful reminder that life design is a continuous journey‚ and with the right tools‚ anyone can achieve their goals. The downloadable resources from “Design Your Life” are a valuable asset for anyone serious about taking control of their life’s direction. They offer a practical and actionable approach to personal development‚ ensuring readers have everything they need to create a fulfilling life. By leveraging these tools‚ readers can turn the book’s insights into tangible results‚ staying on the path to a joyful and purposeful life. The resources are a testament to the authors’ dedication to helping readers succeed in designing a well-lived‚ joyful life. They are an indispensable part of the “Design Your Life” experience‚ offering a holistic approach to life design. The downloadable materials are a powerful catalyst for personal growth and transformation‚ providing readers with the confidence and tools needed to achieve their life design goals. They are a must-have for anyone committed to creating a life of purpose and joy. The resources are a valuable investment for anyone seeking to take control of their life’s direction. By incorporating these tools into their journey‚ readers can ensure they stay on track and achieve their aspirations. The downloadable resources from “Design Your Life” are a comprehensive and practical addition to the book‚ offering a seamless extension of the life design process. They empower readers with the tools they need to create a life that truly reflects their values and passions. The materials are designed to be flexible‚ allowing readers to use them at their own pace or in group settings. They are ideal for individuals who prefer a structured approach to personal development. Overall‚ the downloadable resources from “Design Your Life” are a must-have for anyone serious about designing a well-lived‚ joyful life. They provide the structure‚ guidance‚ and inspiration needed to overcome obstacles and achieve life design goals. With these tools‚ readers can confidently embark on the journey of creating a life that aligns with their aspirations and values. The resources are a powerful reminder that life design is a continuous process‚ and with the right tools‚ anyone can create a fulfilling life. The downloadable materials are a valuable asset for anyone committed to personal growth and transformation. They offer a practical and actionable approach to applying the book’s principles. By utilizing these resources‚ readers can turn insights into tangible results‚ ensuring they stay on the path to a joyful and purposeful life. The resources are a testament to the authors’ commitment to empowering readers with the tools they need to succeed. They are an essential part of the “Design Your Life” experience‚ offering a pathway to a more intentional and meaningful life. The downloadable resources from “Design Your Life” are a must-have for anyone serious about taking control of their life’s direction. They provide a comprehensive toolkit for designing a life of purpose and joy. With these resources‚ readers can confidently navigate the life design process and achieve their goals. The materials are a powerful catalyst for personal growth and transformation‚ offering a practical and actionable approach to personal development. The downloadable resources from “Design Your Life” are a valuable investment for anyone seeking to create a well-lived‚ joyful life. They empower readers with the tools they need to succeed in designing a life that aligns with their passions and values. By incorporating these tools into their journey‚ readers can ensure they stay on track and achieve their aspirations. The resources are a testament to the authors’ dedication to helping readers succeed in designing a fulfilling life. They are an indispensable part of the “Design Your Life” experience‚ offering a holistic approach to life design. The downloadable materials are a powerful catalyst for personal growth and transformation‚ providing readers with the confidence and tools needed to achieve their life design goals. They are a must-have for anyone committed to creating a life of purpose and joy. The resources are a valuable asset for anyone serious about taking control of their life’s direction. By leveraging these tools‚ readers can turn the book’s insights into tangible results‚ ensuring they stay on the path to a joyful and purpose

Interactive Workshops and Courses

Interactive workshops and courses based on “Design Your Life” offer hands-on opportunities to apply life design principles. Led by experts‚ these sessions provide structured guidance‚ group discussions‚ and practical exercises. Participants can engage in activities like prototyping life designs‚ exploring career paths‚ and practicing design thinking. Workshops are available online and in-person‚ catering to diverse learning preferences. Stanford University‚ where the Life Design Program originated‚ hosts many of these sessions. Additionally‚ organizations like ASSETT offer book clubs and interactive programs to facilitate deeper exploration of the book’s concepts. These courses are ideal for those seeking a collaborative learning environment to refine their life design skills and gain actionable insights. They complement the book by offering real-time feedback and community support‚ making the life design process more dynamic and engaging. Workshops are particularly beneficial for individuals looking to apply the book’s strategies in a guided setting‚ ensuring they stay motivated and focused on their goals. The interactive nature of these programs fosters creativity and collaboration‚ helping participants co-design their lives effectively. By combining theoretical knowledge with practical application‚ these workshops empower individuals to create meaningful‚ purpose-driven lives aligned with their values and aspirations. They are a valuable resource for anyone committed to the life design journey‚ offering a supportive environment to explore and implement the book’s teachings. The workshops also provide opportunities to connect with like-minded individuals‚ sharing experiences and gaining diverse perspectives. This collective approach enhances the learning process‚ making it easier to overcome challenges and stay committed to life design goals. Overall‚ interactive workshops and courses are a powerful way to bring the principles of “Design Your Life” to life‚ offering a comprehensive and engaging experience for all participants. They are a testament to the book’s impact and its ability to inspire transformative change in people’s lives. By participating in these programs‚ readers can ensure they maximize the benefits of the life design process and achieve their full potential. The workshops are a must-attend for anyone serious about designing a well-lived‚ joyful life. They provide the tools‚ support‚ and motivation needed to turn life design into a reality. With expert guidance and interactive activities‚ participants can confidently navigate the process of creating a life that aligns with their passions and values. The workshops are a valuable extension of the book‚ offering a dynamic and engaging way to apply its principles. They are a powerful catalyst for personal growth and transformation‚ ensuring that participants leave with a clear plan and the confidence to pursue their goals. The interactive nature of these programs makes them an ideal choice for those who thrive in collaborative environments. By leveraging the collective wisdom of the group‚ participants can gain new insights and perspectives that enrich their life design journey. The workshops are a testament to the book’s commitment to empowering readers with the tools they need to succeed. They are an essential part of the “Design Your Life” experience‚ offering a pathway to a more intentional and fulfilling life. The interactive workshops and courses are a must-attend for anyone serious about taking control of their life’s direction. They provide a comprehensive and practical approach to life design‚ ensuring participants have everything they need to create a life of purpose and joy. By engaging in these programs‚ readers can turn the book’s insights into tangible results‚ staying on the path to a joyful and purposeful life. The workshops are a valuable asset for anyone committed to personal growth and transformation. They offer a dynamic and engaging way to apply the book’s principles‚ ensuring participants achieve their life design goals. With expert guidance and interactive activities‚ these programs empower individuals to design a life that truly reflects their aspirations and values. The workshops are a powerful reminder that life design is a continuous process‚ and with the right tools‚ anyone can create a well-lived‚ joyful life. They are a must-attend for anyone serious about designing a life of purpose and fulfillment. By participating in these programs‚ readers can ensure they stay on track and achieve their life design aspirations. The workshops are a testament to the book’s dedication to helping readers succeed in designing a meaningful and joyful life. They are an indispensable part of the “Design Your Life” experience‚ offering a holistic approach to life design. The interactive workshops and courses are a valuable investment for anyone seeking to create a life of purpose and joy. They provide the structure‚ guidance‚ and inspiration needed to overcome obstacles and achieve life design goals. With these programs‚ readers can confidently embark on the journey of designing a life that aligns with their passions and values. The workshops are a powerful catalyst for personal growth and transformation‚ offering a practical and actionable approach to life design. They are a must-attend for anyone serious about taking control of their life’s direction. By leveraging these resources‚ readers can turn the book’s insights into tangible results‚ ensuring they stay on the path to a joyful and purposeful life. The workshops are a testament to the book’s commitment to empowering readers with the tools they need to succeed. They are an essential part of the “Design Your Life” experience‚ offering a pathway to a more intentional and meaningful life. The interactive workshops and courses are a must-attend for anyone serious about designing a well-lived‚ joyful life. They provide a comprehensive and practical approach to life design‚ ensuring participants have everything they need to create a life of purpose and joy. By engaging in these programs‚ readers can turn the book’s insights into tangible results‚ staying on the path to a joyful and purposeful life. The workshops are a valuable asset for anyone committed to personal growth and transformation. They offer a dynamic and engaging way to apply the book’s principles‚ ensuring participants achieve their life design goals. With expert guidance and interactive activities‚ these programs empower individuals to design a life that truly reflects their aspirations and values. The workshops are a powerful reminder that life design is a continuous process‚ and with the right tools‚ anyone can create a well-lived‚ joyful life. They are a must-attend for anyone serious about designing a life of purpose and fulfillment. By participating in these programs‚ readers can ensure they stay on track and achieve their life design aspirations. The workshops are a testament to the book’s dedication to helping readers succeed in designing a meaningful and joyful life. They are an indispensable part of the “Design Your Life” experience‚ offering a holistic approach to life design. The interactive workshops and courses are a valuable investment for anyone seeking to create a life of purpose and joy. They provide the structure‚ guidance‚ and inspiration needed to overcome obstacles and achieve life design goals. With these programs‚ readers can confidently embark on the journey of designing a life that aligns with their passions and values. The workshops are a powerful catalyst for personal growth and transformation‚ offering a practical and actionable approach to life design. They are a must-attend for anyone serious about taking control of their life’s direction. By leveraging these resources‚ readers can turn the book’s insights into tangible results‚ ensuring they stay on the path to a joyful and purposeful life. The workshops are a testament to the book’s commitment to empowering readers with the tools they need to succeed; They are an essential part of the “Design Your Life” experience‚ offering a pathway to a more intentional and meaningful life. The interactive workshops and courses are a must-attend for anyone serious about designing a well-lived‚ joyful life. They provide a comprehensive and practical approach to life design‚ ensuring participants have everything they need to create a life of purpose and joy. By engaging in these programs‚ readers can turn the book’s insights into tangible results‚ staying on the path to a joyful and purposeful life. The workshops are a valuable asset for anyone committed to personal growth and transformation. They offer a dynamic and engaging way to apply the book’s principles‚ ensuring participants achieve their life design goals. With expert guidance and interactive activities‚ these programs empower individuals to design a life that truly reflects their aspirations and values. The workshops are a powerful reminder that life design is a continuous process‚ and with the right tools‚ anyone can create a well-lived‚ joyful life. They are a must-attend for anyone

Encouragement to Take Action

“Design Your Life” by Bill Burnett and Dave Evans teaches using design thinking to create a fulfilling life. Embrace curiosity‚ reframe challenges‚ and redesign your path. The book is a call to action‚ urging readers to apply its principles for a joyful‚ purpose-driven life. The PDF is a valuable resource‚ making it accessible to all. A must-read for anyone seeking to redefine success and live intentionally.

printable pdf volleyball lineup sheet

A printable PDF volleyball lineup sheet is a crucial tool for coaches to organize team strategies, track player positions, and manage rotations efficiently. It provides a clear structure for documenting lineups, ensuring smooth transitions during both practice sessions and competitive matches.

What is a Printable PDF Volleyball Lineup Sheet?

A printable PDF volleyball lineup sheet is a strategic document designed to help coaches and teams organize their game strategies, player positions, and rotations. It serves as a visual representation of the team’s lineup, including player names, positions, and serving order, ensuring clarity and precision during matches. This tool is essential for both pre-game planning and in-game adjustments, allowing coaches to document their team’s configuration effectively. The sheet typically includes sections for team identification, player roster, starting positions, libero designation, serve order, and rotation tracking. By using a printable PDF format, coaches can easily customize and print multiple copies for each game or set, making it a versatile and practical resource for managing team lineups. It is widely used in competitive and recreational volleyball to streamline communication and ensure seamless execution of strategies.

Importance of a Lineup Sheet

A lineup sheet is an essential tool for volleyball coaches and teams, offering clarity and organization during games and practices. It provides a structured way to document player positions, rotations, and serving order, ensuring everyone on the team is aligned with the game strategy. By having a clear visual representation of the lineup, coaches can make quick and informed decisions during matches, improving communication and reducing confusion. The sheet also helps in tracking player performance and identifying areas for improvement. Additionally, it streamlines pre-game preparations, allowing teams to focus on execution rather than last-minute adjustments. For players, a lineup sheet provides transparency, helping them understand their roles and responsibilities. Overall, it enhances efficiency, strategic planning, and teamwork, making it a vital resource for competitive and recreational volleyball. Its importance lies in its ability to simplify complex strategies and ensure seamless execution, ultimately contributing to better performance on the court.

Key Elements of a Volleyball Lineup Sheet

A volleyball lineup sheet typically includes team identification, player roster, starting positions, libero designation, serve order, and rotation tracking. These elements ensure clarity and organization, helping coaches and players stay aligned during matches.

4.1 Team Identification

Team identification is a fundamental element of a printable PDF volleyball lineup sheet, providing essential details about the teams involved in the match. This section typically includes the team name, whether they are playing as the home or visiting team, and sometimes their league or tournament affiliation. Clear team identification helps avoid confusion during the game, ensuring that officials, coaches, and players are all on the same page. It also serves as a record for post-match documentation and reporting. Many templates include checkboxes or designated spaces for home or visitor status, making it easy to fill out before the game. Additionally, some sheets may include a section for the coach’s signature, adding an extra layer of official verification. Accurate team identification is crucial for maintaining organization and ensuring smooth communication throughout the match. It sets the foundation for the rest of the lineup sheet, allowing all other details to be properly attributed and understood.

4.2 Player Roster

The player roster section of a printable PDF volleyball lineup sheet is essential for organizing and tracking team members. This section typically includes spaces to list each player’s name, number, and position, providing a clear overview of the team’s composition. Coaches can use this section to identify starting players and substitutes, ensuring everyone knows their role before the match begins. Many templates also include columns for designating the libero, a key defensive position, and noting any specific responsibilities or rotation patterns. The player roster helps streamline communication among coaches, players, and officials, reducing confusion during substitutions or timeouts. By having all player information in one place, coaches can quickly reference it when making strategic decisions. Additionally, the roster serves as a permanent record of the lineup for future reference or post-game analysis. A well-organized player roster is vital for ensuring smooth team operations and maximizing performance on the court. It simplifies game preparation and execution, allowing coaches to focus on strategic adjustments rather than administrative tasks.

4.3 Starting Positions

The starting positions section of a printable PDF volleyball lineup sheet is designed to clearly outline where each player will begin the game. This section typically includes a visual representation of the court, with numbered positions corresponding to each player’s starting spot. Coaches can fill in the player numbers or names next to their respective positions, making it easy to visualize the initial setup. Common positions include outside hitter, middle blocker, opposite hitter, setter, and libero. By documenting starting positions, coaches can ensure that players understand their roles and responsibilities from the first serve. This section also helps in planning rotations and substitutions, as it provides a clear reference point for how the team will transition throughout the game. Many templates include space for multiple sets, allowing coaches to prepare for different scenarios or opponent strategies. Accurate documentation of starting positions is essential for maintaining organization and ensuring that the team executes its game plan effectively. It also aids officials in verifying the lineup and enforcing rotation rules during the match.

4.4 Libero Designation

The libero designation section on a printable PDF volleyball lineup sheet is a critical component, as it identifies the player who will serve in this unique, defensive-focused position. The libero is restricted to playing in the back row and is recognized by their distinct jersey color, which differentiates them from other players. In this section, coaches typically indicate the libero’s number or name, ensuring that officials and opponents are aware of their role. Many templates include a specific area or checkbox for the libero designation, making it easy to highlight this position. Properly designating the libero is essential for compliance with game rules and regulations, as it ensures that substitutions and rotations are conducted legally. Coaches often use this section to plan their defensive strategy, as the libero’s skills in receiving serves and digging attacks are vital to the team’s success. By clearly designating the libero, the lineup sheet helps maintain order and avoids confusion during the game. This section is a key part of the pre-game setup, ensuring that all players and officials are aligned on the team’s defensive structure. The libero’s role is crucial, and accurate designation on the lineup sheet ensures they can perform effectively.

4.5 Serve Order

The serve order section on a printable PDF volleyball lineup sheet is essential for organizing how players will rotate and serve during the game. This section typically lists the order in which players will serve, often numbered from 1 to 6, corresponding to their positions on the court. Coaches use this area to strategically plan the sequence of serves, ensuring that the rotation follows the correct order and that substitutions are made seamlessly. Many templates include checkboxes or designated spaces to indicate the serve order for each set, allowing for easy adjustments between sets. Accurate documentation of the serve order prevents confusion and ensures that all players understand their roles. It also helps officials track rotations and enforce rules effectively. By clearly outlining the serve order, coaches can optimize their team’s strategy and maintain a competitive edge; This section is a vital part of the lineup sheet, as it directly impacts the flow and execution of the game. Proper designation of the serve order ensures that the team’s offensive and defensive strategies align with their rotation plan.

4.6 Rotation Tracking

Rotation tracking is a critical component of a printable PDF volleyball lineup sheet, enabling coaches to monitor and manage player movements effectively. This section typically includes numbered positions (e.g., 1 through 6) arranged in a circular format, representing the court layout. Coaches can mark or highlight the starting positions and note how players rotate after each serve. Many templates feature visual aids like arrows or grids to illustrate the rotation sequence, making it easier to follow. This feature ensures that players and staff are aligned on the rotation plan, reducing confusion during the game. Additionally, rotation tracking helps maintain compliance with volleyball rules, which require players to rotate clockwise and remain in their positions until the serve is executed. By documenting each rotation, coaches can analyze patterns and make strategic adjustments. This section also helps in planning substitutions and ensuring that all players understand their movement sequence. Overall, rotation tracking enhances teamwork, tactical execution, and overall performance. It is a fundamental tool for any coach aiming to optimize their team’s strategy and maintain a competitive edge.

How to Use a Volleyball Lineup Sheet

A printable PDF volleyball lineup sheet is essential for organizing team strategies and player positions. Coaches fill in team details, player names, and starting positions before the game. During the match, it helps track rotations and ensures smooth transitions, allowing for quick adjustments.

5.1 Pre-Game Setup

The pre-game setup involves preparing the lineup sheet to ensure clarity and organization. Coaches begin by identifying the team and opponent details, followed by listing the player roster with names and numbers. Starting positions are assigned based on strategy, and the libero is designated. Serve order is determined and noted, along with the rotation plan. This step ensures that all elements are in place before the match begins, allowing for smooth execution during the game.

5.2 In-Game Adjustments

During the game, coaches utilize the lineup sheet to make tactical adjustments swiftly. This includes substituting players, altering rotations, or changing the serve order based on the flow of the match. The sheet allows for clear documentation of these changes, ensuring that all players and staff are aligned. Coaches can track substitutions and rotations in real-time, helping to maintain compliance with game rules and optimize team performance. Additionally, the lineup sheet serves as a communication tool, enabling coaches to signal player changes effectively. By having a structured format, adjustments can be made seamlessly, minimizing disruptions and maximizing strategic execution. This adaptability is crucial for maintaining competitive edge and responding to the opponent’s strategies dynamically.

Customizing Your Lineup Sheet

Coaches can tailor the lineup sheet to suit their specific needs by adding team logos, color-coding positions, or incorporating additional notes sections. This personalization enhances clarity and ensures the sheet aligns with the team’s unique strategies and preferences.

6.1 Templates

Using pre-designed templates is an excellent way to create a professional and functional volleyball lineup sheet. Templates are readily available online, offering various formats to suit different coaching styles and team requirements. Many templates are free to download and can be customized to include team names, player numbers, and specific game strategies. They often feature sections for pre-game lineups, serve orders, and rotation tracking, ensuring all essential details are captured. Some templates are designed for specific formats, such as sets or tournaments, while others are more general. Coaches can choose templates that align with their team’s needs, whether it’s for youth leagues, college matches, or professional games. Additionally, templates may include spaces for coach signatures and opponent details, making them comprehensive tools for game organization. By leveraging these templates, coaches can save time and focus on developing winning strategies rather than creating documents from scratch. This flexibility ensures that every team can have a lineup sheet tailored to their unique preferences and requirements.

6.2 Formatting Tips

When creating or customizing a printable PDF volleyball lineup sheet, proper formatting is essential for clarity and functionality. Start by using a clean, readable font and ensuring adequate spacing between sections to avoid clutter. clearly label each section, such as team identification, player roster, and serve order, to make the document easy to navigate. Consider using color coding or bold text to highlight important details like the libero designation or rotation order. Including a key or legend for symbols and abbreviations can also improve readability. Additionally, ensure that the layout is organized logically, with sections arranged in the order they will be used during the game. Pre-defining areas for notes or adjustments can help coaches make quick changes during matches. Finally, use digital tools to customize the design, ensuring the final PDF is professional and easy to print. Proper formatting ensures the lineup sheet is both practical and visually appealing, making it a valuable resource for coaches and players alike.

Benefits of Using a Lineup Sheet

A printable PDF volleyball lineup sheet enhances organization and clarity, ensuring players’ roles and strategies are well-defined. It saves time during games, maintains consistency across practices, and serves as a valuable resource for coaches and players to stay aligned and focused.

7.1 Strategic Planning

A printable PDF volleyball lineup sheet is a vital tool for strategic planning, allowing coaches to meticulously organize their team’s structure and game plan. By documenting player positions, rotations, and serve orders, coaches can analyze strengths and weaknesses, ensuring optimal team configuration. This sheet enables coaches to plan effectively for each set, making informed decisions about substitutions and rotations. It also helps in identifying key players for specific roles, such as the libero, and ensures compliance with game rules. With a clear lineup sheet, coaches can visualize the team’s strategy, communicate plans to players, and adapt quickly to opponents’ tactics. This organized approach enhances teamwork, maximizes player potential, and improves overall performance. The ability to customize and print these sheets makes them a flexible resource for coaches to refine their strategies and prepare for every game scenario.

7.2 Efficiency in Execution

A printable PDF volleyball lineup sheet enhances efficiency in execution by providing a clear and organized structure for managing player positions, rotations, and substitutions. Coaches can quickly identify and implement strategic adjustments, ensuring seamless transitions during matches. This tool streamlines communication, allowing players to understand their roles and responsibilities instantly. By having all necessary information in one place, teams can minimize delays and maintain focus on the game. The sheet also helps track serve orders and rotation patterns, reducing confusion and ensuring compliance with game rules. Its simplicity and clarity make it an indispensable resource for maintaining order and precision during high-pressure situations. With a well-organized lineup sheet, teams can execute their strategies more effectively, leading to improved performance and better outcomes. This level of efficiency is crucial for success in competitive volleyball, where every second counts.

Where to Find Printable Lineup Sheets

Printable volleyball lineup sheets can be easily found online through various resources. Official organizations like USAVolleyball and the NCAA offer downloadable templates specifically designed for coaches and teams. Additionally, websites such as Template.net and VolleyballRosterTemplate.com provide a wide range of customizable lineup sheets in PDF and Word formats. Many platforms allow users to download these sheets for free, making it convenient for teams to access professional-grade tools without additional costs. Coaches can also search for “free volleyball lineup sheet PDF” on search engines to find multiple options tailored to their needs. These sheets are often pre-formatted with sections for team identification, player rosters, serve orders, and rotation tracking, ensuring they meet all necessary requirements for efficient game management. By leveraging these resources, coaches can quickly obtain and print lineup sheets, saving time and focusing on strategizing for the game.

A printable PDF volleyball lineup sheet is an indispensable resource for coaches and teams, offering a structured approach to organizing player information and game strategies; By utilizing this tool, coaches can streamline pre-game setups, efficiently manage in-game adjustments, and ensure seamless communication among team members; The availability of customizable templates online makes it easier than ever to access professional-grade lineup sheets, catering to various formats and preferences. These sheets not only enhance strategic planning but also improve execution efficiency, allowing teams to focus on performance and achieving their goals. Whether for practice or competitive matches, a well-designed lineup sheet is a vital asset for any volleyball team aiming to stay organized and competitive. Its benefits extend beyond mere documentation, providing a foundation for effective teamwork and strategic decision-making. With the convenience of downloadable and printable options, coaches can readily adopt this essential tool to elevate their team’s performance.

britax clicktight advocate manual

Welcome to the Britax ClickTight Advocate manual, your guide to safe and proper car seat installation. This manual ensures optimal safety, ease of use, and adjustability for your child’s growth.

Overview of the Britax ClickTight Technology

Britax ClickTight Technology is a revolutionary system designed for effortless car seat installation. It eliminates the guesswork by using a self-tensioning mechanism, ensuring a secure fit every time. The system allows parents to easily tighten the seat belt or LATCH straps to achieve proper installation without requiring significant strength. This technology is integrated into the Britax Advocate ClickTight car seat, providing a safe and stress-free experience. It is particularly praised for its simplicity and effectiveness, making it a standout feature in the Advocate model. The ClickTight system is a testament to Britax’s commitment to combining safety, convenience, and innovation in their products.

Key Features of the Britax Advocate ClickTight Car Seat

The Britax Advocate ClickTight car seat is renowned for its advanced safety and convenience features. It includes the innovative ClickTight Installation System, which simplifies seat belt or LATCH installation. The seat boasts SafeCell Technology for superior impact absorption and a reinforced steel frame for added durability. Additional features include a 14-position harness, a no-rethread design, and multiple recline positions for optimal comfort. It supports rear-facing (5-40 lbs) and forward-facing (20-65 lbs) configurations, with a height limit of 49 inches. The Advocate ClickTight also emphasizes longevity, accommodating children from infancy through early childhood. Its premium materials and user-friendly design make it a top choice for parents seeking both safety and ease of use.

Importance of Reading the Manual for Safe Installation

Reading the Britax Advocate ClickTight manual is crucial for ensuring safe and correct installation. The manual provides detailed instructions for rear-facing and forward-facing configurations, proper harness tightening, and LATCH usage. Incorrect installation can compromise safety, so following the guidelines is essential. The manual also highlights car seat expiration dates and maintenance tips to ensure longevity. By understanding the features and limitations, parents can maximize the seat’s protective capabilities. Proper installation ensures the seat functions as intended, providing optimal protection for your child in the event of an accident. Always refer to the manual before installing or adjusting the car seat to guarantee safety and compliance with manufacturer recommendations.

Understanding the Britax Advocate ClickTight Car Seat

The Britax Advocate ClickTight is a premium convertible car seat designed for safety, comfort, and growth. It offers rear- and forward-facing options, adjustable features, and advanced safety technologies like SafeCell.

Weight and Height Limits for Rear-Facing and Forward-Facing

The Britax Advocate ClickTight car seat accommodates children in both rear-facing and forward-facing positions, with specific weight and height limits for each mode. Rear-facing, it is approved for children weighing between 5 and 40 pounds and measuring up to 49 inches tall. Forward-facing, the seat is suitable for children weighing from 20 to 65 pounds, also up to 49 inches tall. These limits ensure proper fit and safety throughout your child’s growth. Always refer to the manual for precise guidelines to ensure your child is within the recommended range for their seating position. Adhering to these limits is crucial for optimal protection and comfort.

Adjustability and Growth Potential of the Car Seat

The Britax Advocate ClickTight car seat is designed to grow with your child, offering exceptional adjustability to accommodate their changing needs. The seat features a 14-position harness that can be easily adjusted to ensure a proper fit as your child grows taller; Additionally, the headrest is height-adjustable, providing optimal support and safety for your child’s head and neck. The seat’s compact design allows for front-to-back space efficiency, making it ideal for smaller vehicles. With these features, the Advocate ClickTight ensures long-lasting use, from infancy through early childhood, without compromising on safety or comfort. This adaptability makes it a practical investment for families seeking a reliable car seat for years to come.

SafeCell Technology and Other Safety Features

The Britax Advocate ClickTight car seat is equipped with SafeCell Technology, a cutting-edge safety feature designed to compress and absorb crash forces, reducing the risk of injury. The seat also features a steel frame for added durability and stability. Its side impact protection shields your child from the forces of a collision, while the 14-position harness ensures a snug, secure fit as your child grows. The ClickTight Installation System provides a rock-solid installation, minimizing the risk of incorrect use. Together, these features create a car seat that prioritizes safety, offering parents peace of mind. This combination of innovative technologies makes the Advocate ClickTight a leader in child passenger safety.

Installation Guide for the Britax Advocate ClickTight

The Britax Advocate ClickTight installation guide provides clear, step-by-step instructions for rear-facing and forward-facing setups using a seat belt or LATCH. Tightening the harness and seat belt ensures a secure fit, while the ClickTight system simplifies installation for a rock-solid connection, offering parents confidence in their child’s safety.

Step-by-Step Rear-Facing Installation Using Seat Belt

For rear-facing installation using a seat belt, start by opening the ClickTight panel and locating the belt path. Thread the vehicle seat belt through the designated rear-facing belt path, ensuring it is flat and not twisted. Secure the belt by fully extending and retracting it to remove any slack. Tighten the belt by pressing down firmly on the seat while pulling the belt until it is snug against the car seat. Use the ClickTight dial to further tighten the installation until the seat moves less than one inch side to side or front to back; Do not use LATCH connectors for rear-facing installations. Always refer to the manual for specific vehicle compatibility and ensure proper tightening for optimal safety;

Step-by-Step Forward-Facing Installation Using Seat Belt

For forward-facing installation with a seat belt, begin by opening the ClickTight panel. Locate the forward-facing belt path and thread the vehicle seat belt through it, ensuring it is flat and untwisted. Secure the belt by fully extending and retracting it to remove slack. Tighten the belt by pressing down firmly on the seat while pulling the belt until it is snug. Use the ClickTight dial to further tighten the installation, ensuring the seat moves less than one inch side to side or front to back. Check that the harness is properly positioned and snug on the child. Always refer to the manual for specific vehicle compatibility and follow all safety guidelines for a secure installation.

Installation Using Lower Anchors (LATCH)

Begin by locating the LATCH anchors in your vehicle, typically found between the seat cushions. Attach the Britax Advocate ClickTight’s lower anchors to these points, ensuring they click securely into place. Next, tighten the LATCH straps evenly by pulling them away from the seat until they are snug and the car seat is firmly anchored. Use the ClickTight dial to further tighten the installation, ensuring no more than one inch of movement in any direction. Always verify the seat’s level indicator to ensure proper positioning. Double-check that the LATCH connectors are properly engaged and the straps are not twisted. Follow the manual’s guidelines for weight limits and vehicle compatibility to ensure a safe and secure installation.

Tightening the Harness and Seat Belt for Optimal Safety

After securing the Britax Advocate ClickTight car seat, ensure the harness and seat belt are tightened properly for optimal safety. For the harness, thread it through the correct slots and fasten it snugly around your child, making sure the chest clip is at armpit level. Pull the harness adjuster strap to tighten it evenly, ensuring no slack remains. For seat belt installations, guide the belt through the ClickTight path and tighten it using the ClickTight dial until it is secure. Always check that the seat belt or harness cannot move more than one inch in any direction when tugged firmly. This ensures your child is protected in the event of sudden stops or collisions. Regularly inspect and adjust the harness and seat belt as needed to maintain proper fit and safety.

Maintenance and Cleaning of the Britax Advocate ClickTight

Regularly clean the fabric with mild detergent, avoiding harsh chemicals. Inspect and replace worn parts promptly. Ensure all components are secure and free from damage for optimal safety and longevity.

Cleaning the Fabric and Harness

To maintain your Britax Advocate ClickTight car seat, gently remove the fabric cover and hand wash it using mild detergent and cold water. Avoid harsh chemicals or bleach, as they may damage the material. For tough stains, lightly scrub with a soft-bristled brush before rinsing thoroughly. Allow the fabric to air dry completely away from direct sunlight to prevent fading or shrinkage.

The harness can be cleaned with a damp cloth, ensuring no moisture seeps into the straps. Regularly inspect the harness for stains, fraying, or wear. If damaged, replace the harness immediately to ensure your child’s safety. Always refer to the manual for specific cleaning instructions to avoid voiding the warranty.

Proper maintenance ensures the car seat remains safe, comfortable, and functional for your child’s growing needs.

Replacing or Updating Parts as Needed

Regularly inspect the Britax Advocate ClickTight car seat for wear and tear. If any parts, such as the harness, straps, or fabric, show signs of damage or fraying, replace them immediately. Use only genuine Britax parts to ensure safety and compatibility. For replacements, visit Britax’s official website or authorized retailers. Follow the manual’s instructions for proper installation of new parts. If your model is discontinued, contact Britax customer support for assistance. Additionally, check for any recalls or software updates for your car seat. Proper maintenance ensures your child’s continued safety and comfort. Always prioritize replacing worn or damaged components to uphold the seat’s integrity and performance. Regular checks and timely replacements are essential for long-term reliability and safety.

Regular Inspection for Wear and Tear

Regularly inspect the Britax Advocate ClickTight car seat for signs of wear and tear. Check the harness, straps, and fabric for fraying, cracks, or fading. Ensure all buckles and connectors are functioning properly. Inspect the seat shell for any cracks or damage. Look for any signs of mold or mildew on the padding. Verify that the expiration date printed on the seat has not been reached. Clean the seat regularly to prevent dirt buildup. Refer to the manual for guidance on inspecting specific components. If any issues are found, contact Britax customer support for assistance. Regular inspections ensure the seat remains safe and functional for your child. Always prioritize your child’s safety by maintaining the car seat’s condition.

Troubleshooting Common Issues

Address common issues like harness slacking or installation difficulties by consulting the manual. If problems persist, contact Britax customer support for assistance or recall updates.

Resolving Harness Tightening Problems

If the harness seems loose, ensure the ClickTight dial is fully closed before tightening. Check for proper alignment and smooth straps. Refer to the manual for detailed guidance. Always verify the harness passes the pinch test for snugness. If issues persist, contact Britax support for further assistance or possible recalls. Regularly inspect the harness for wear or damage, replacing parts as needed. Proper harness tension ensures maximum safety, so never skip this step during installation or adjustments.

Fixing Installation Difficulties

Installation difficulties with the Britax Advocate ClickTight can often be resolved by ensuring proper alignment and tightness. Start by verifying the seat is level and positioned correctly in your vehicle. Check that the ClickTight dial is fully closed and the seat belt or LATCH connectors are properly secured. If the seat moves excessively, try repositioning it or adjusting the vehicle seat. Ensure the harness is snug and all straps are free from twists. For persistent issues, consult the manual or watch online tutorials for guidance. If problems remain unresolved, contact Britax customer support for assistance. Proper installation is crucial for safety, so take the time to double-check every step.

Addressing Recalls or Manufacturer Updates

Britax occasionally issues recalls or updates for the Advocate ClickTight to ensure ongoing safety and compliance. Always check the manual or Britax website for recall notices. If your seat is affected, contact Britax customer support for a free repair kit or instructions. Never ignore recalls, as they address critical safety concerns. Additionally, register your car seat with Britax to receive updates and notifications. Regularly visit the Britax website or sign up for their newsletter to stay informed about any manufacturer updates or safety improvements. Addressing recalls promptly ensures your car seat remains safe and reliable for your child.

Additional Resources and Support

Access the full Britax Advocate ClickTight manual online for detailed guidance. Visit Britax’s website for customer support, installation tutorials, and user guides to ensure proper car seat use.

Accessing the Full PDF Manual Online

The Britax Advocate ClickTight manual is readily available online in PDF format for easy access. Visit Britax’s official website or platforms like Internet Archive to download the full guide. This comprehensive document covers installation steps, safety features, and maintenance tips. It also includes detailed diagrams and troubleshooting sections to address common issues. The manual is designed to ensure proper use and safety, with clear instructions for rear-facing and forward-facing configurations. Regularly check for updates or recalls, as Britax may release revised versions. By referring to the official PDF, you can ensure your car seat is installed and used correctly, providing optimal protection for your child.

Britax Customer Service and Support Contact Information

For any questions or concerns about the Britax Advocate ClickTight car seat, Britax offers comprehensive customer support. You can contact their customer service team via phone at 1-888-427-4829 or through their official website’s contact form. Additionally, live chat support is available on their website during business hours. Britax’s support team is ready to assist with installation inquiries, troubleshooting, or information about recalls and updates; For international customers, visit the Britax website to find region-specific contact details. Britax also provides multilingual support to cater to a diverse range of users. Their customer service is available Monday through Friday, 8:30 AM to 6:00 PM EST, ensuring prompt assistance for all your car seat needs.

Online Tutorials and Video Guides for Installation

Britax offers a variety of online resources to help you master the installation of the Advocate ClickTight car seat. Visit the Britax website for step-by-step video guides that cover both rear-facing and forward-facing installations using a seat belt or LATCH system. These tutorials provide clear visual instructions to ensure a secure and correct installation. Additionally, YouTube channels like “Car Seats for the Littles” and Britax’s official channel feature detailed installation videos for the Advocate ClickTight. These resources are designed to simplify the process, address common challenges, and help you achieve a safe and proper fit. By following these guides, you can confidently install your car seat and ensure your child’s safety on the road.

Proper use of the Britax ClickTight Advocate ensures your child’s safety. Always follow manual guidelines, check expiration dates, and stay informed on recalls for optimal protection and peace of mind.

Final Tips for Ensuring Proper Use and Safety

Always read and follow the Britax ClickTight Advocate manual carefully to ensure correct installation and usage. Regularly inspect the seat for wear and tear, and check for any recalls. Tighten the harness and seat belt properly to secure your child firmly. Use the ClickTight system for hassle-free installation and optimal safety. Keep the car seat clean and well-maintained to prolong its lifespan. Never exceed the weight and height limits specified in the manual. Ensure your child rides rear-facing until at least two years old or the maximum weight limit. Stay informed about updates and guidelines from Britax to keep your child protected on every journey.

Encouraging Ongoing Education for Car Seat Safety

Staying informed about car seat safety is crucial for protecting your child. Regularly review the Britax ClickTight Advocate manual to ensure you’re using the seat correctly. Explore online resources, such as Britax’s website, for updated safety guidelines and installation tips. Watch video tutorials to reinforce proper techniques and address common challenges. Participate in car seat safety workshops or consultations with certified technicians to gain hands-on experience. Educate yourself on the latest recalls and updates to ensure compliance. By prioritizing ongoing education, you can maximize the safety and effectiveness of your Britax Advocate ClickTight car seat, giving your child the best possible protection on the road.

odot signal detector manual

The ODOT Signal Detector Manual provides a comprehensive guide for designing, installing, and maintaining traffic signal detectors in Oregon. It outlines standards, regulations, and best practices to ensure safety and efficiency in traffic management systems.

1.1 Overview of the ODOT Signal Detector Manual

The ODOT Signal Detector Manual is a comprehensive guide outlining standards and practices for traffic signal detectors in Oregon. It covers design, installation, and maintenance, ensuring compliance with MUTCD guidelines. The manual provides detailed procedures for detector placement, wiring, and operation, focusing on safety and efficiency in traffic management. It serves as a crucial resource for engineers and technicians, offering clear directives to optimize traffic signal systems statewide.

1.2 Purpose and Scope of the Manual

The ODOT Signal Detector Manual aims to establish uniform standards for traffic signal detectors, ensuring safe and efficient traffic flow. Its scope includes design criteria, installation guidelines, and maintenance protocols, tailored for Oregon’s transportation infrastructure. The manual addresses detector types, placement strategies, and compliance with federal regulations, such as MUTCD guidelines. It serves as a primary reference for engineers, technicians, and contractors involved in traffic signal projects, promoting consistency and adherence to best practices across the state.

Traffic Signal Warrants

This section outlines the criteria for traffic signal installations, focusing on traffic volume, safety, and pedestrian demand. It ensures compliance with MUTCD guidelines for effective traffic management.

2.1 Criteria for New Signal Installations

New traffic signal installations require meeting specific criteria, including traffic volume, accident history, and pedestrian demand. The ODOT manual outlines thresholds for average daily traffic volumes and peak-hour volumes to justify new signals. Additionally, the presence of significant pedestrian activity or unique traffic conditions, such as school crossings, is considered. The Transportation Planning and Analysis Unit (TPAU) provides procedures to evaluate these factors. The Pedestrian Hybrid Beacon (PHB) Evaluation Matrix and Figure 4F-1 or 4F-2 from the OMUTCD are referenced to determine the appropriateness of signal installations. These criteria ensure safety and efficiency in traffic flow management.

2.2 Average Daily Traffic Volumes

Average daily traffic volumes are a critical factor in determining the need for new traffic signals; The ODOT Signal Detector Manual specifies thresholds for mainline and side street volumes to justify signal installations. These volumes are typically measured over peak hours and compared against established warrants. The Transportation Planning and Analysis Unit (TPAU) provides procedures for assessing traffic data, ensuring accurate evaluations. By analyzing these volumes, engineers can identify intersections where traffic signals are necessary to improve safety and reduce congestion, aligning with ODOT’s goal of efficient traffic management. This data-driven approach ensures that signals are installed where they are most needed.

2.3 Future Need Determination

Future need determination involves assessing whether a traffic signal will be required at an intersection based on projected traffic growth and development. The ODOT Signal Detector Manual outlines procedures for evaluating future traffic conditions, incorporating data from traffic studies, land-use plans, and demographic projections. The Transportation Planning and Analysis Unit (TPAU) provides methodologies to forecast traffic volumes and determine if a signal will be necessary within a specific timeframe. This proactive approach ensures that infrastructure plans align with community growth, maintaining safety and efficiency. Public input and long-term development goals are also considered to prioritize future signal installations effectively.

Signal Design Process

The signal design process involves a systematic approach to planning, designing, and approving traffic signals, ensuring compliance with ODOT standards and MUTCD guidelines for safety and efficiency.

3.1 Traffic Signal Design Approval Process

The traffic signal design approval process ensures compliance with ODOT standards and MUTCD guidelines. It begins with an initial review of the design plan, followed by submission to the appropriate authorities for evaluation. Stakeholders, including engineers and traffic experts, verify the design’s safety, efficiency, and adherence to regulations.

Once approved, the design is implemented, with ongoing monitoring to ensure proper functionality. Any modifications require re-submission for approval. This structured process guarantees that traffic signals operate safely and effectively, minimizing conflicts and enhancing overall traffic flow.

The final inspection and operational testing are conducted to confirm compliance before the signal is fully activated.

3.2 Starting the Design

Starting the design involves gathering essential data, including traffic volumes, pedestrian activity, and future projections. Engineers analyze crash history and road geometry to identify safety concerns.

The site assessment ensures compliance with ODOT and MUTCD standards, focusing on visibility, signal placement, and detector zones. Initial sketches outline signal phasing, cabinet locations, and wiring plans.

This phase sets the foundation for a safe and efficient traffic flow, ensuring all elements align with regulatory requirements and project goals.

3.3 Signal Plan Requirements

The signal plan must include detailed traffic data, phasing sequences, and timing diagrams.

It should comply with ODOT and MUTCD standards, ensuring visibility and safety.

Drawings must show mast arms, signal heads, detectors, and wiring layouts.

Approvals from relevant authorities are required before implementation.

The plan should reflect site-specific conditions and optimize traffic flow.

Detector Plan

The Detector Plan outlines the installation and configuration of traffic signal detectors, ensuring accurate traffic monitoring and efficient signal operation. It includes radar, video, and inductive loop detectors, specifying placement, wiring, and connectivity standards to maintain reliable traffic flow and safety.

4.1 Radar/Video Detection Zones

Radar and video detection zones are critical components in traffic signal systems, ensuring accurate vehicle detection and reliable signal operation. These zones are typically illustrated on the signal plan sheet, showcasing the detector unit, conduit, and wiring. The setup is configured by the region signal timer, who defines the coverage areas to optimize traffic flow and safety. Radar/video detection zones are displayed on the cabinet print at the signal timer’s request, ensuring precise monitoring and control of traffic signals. This configuration is essential for maintaining efficient and safe traffic management systems.

4.2 Detector Placement and Coverage Areas

Detector placement is crucial for accurate traffic monitoring and efficient signal operation. Detectors should be positioned to maximize visibility and coverage, ensuring minimal interference from environmental factors. Coverage areas are defined based on the detector type and installation location, with careful consideration of vehicle paths and traffic patterns. Proper placement ensures reliable detection of vehicles, cyclists, and pedestrians, while minimizing false triggers. The region signal timer configures these zones to optimize traffic flow and safety. Detector placement and coverage areas are critical for maintaining the integrity and effectiveness of the traffic signal system.

4.3 Conduit Sizing and Wiring Requirements

Proper conduit sizing and wiring are essential for reliable detector operation. According to ODOT guidelines, conduit must be sized to accommodate all necessary wires, with a maximum fill of 25% to ensure durability, safety, and compliance. Wiring configurations should follow established standards to prevent damage and ensure signal integrity. Detectors, conduit, and wiring must be accurately represented on the signal plan sheet. Adherence to these requirements ensures optimal performance and longevity of the traffic signal system.

Signal Operation and Approval

The operational approval process ensures traffic signals function safely and efficiently. Signal timing and coordination are critical for smooth traffic flow, while conflict monitoring enhances safety and compliance.

5.1 Operational Approval Process

The operational approval process ensures traffic signals meet safety and efficiency standards. It involves preliminary reviews, field inspections, and final approvals by authorized personnel. Documentation must detail compliance with MUTCD guidelines, traffic flow analysis, and safety measures. The process includes verification of signal timing, phasing, and coordination to minimize conflicts and optimize traffic movement. Approval is granted only after all criteria are satisfied, ensuring public safety and operational effectiveness.

5.2 Signal Timing and Coordination

Signal timing and coordination are critical for optimizing traffic flow and reducing congestion. The process involves setting precise intervals for signal phases, ensuring smooth traffic progression along corridors. Coordination synchronizes adjacent signals to maintain consistent traffic movement. Factors like traffic volume, speed, and pedestrian crossings are analyzed to determine optimal timing plans. The Transportation Planning and Analysis Unit (TPAU) provides guidelines for timing adjustments. Advanced detection systems, such as radar and video detectors, help monitor real-time traffic conditions, enabling dynamic adjustments. Proper timing and coordination enhance safety, reduce delays, and improve overall traffic efficiency, aligning with MUTCD standards and regional traffic management goals.

5.3 Conflict Monitoring and Safety Measures

Conflict monitoring ensures traffic signals operate safely and efficiently by detecting and resolving conflicts between signal phases. Safety measures include regular inspections of signal components and timely resolution of malfunctions. The ODOT Signal Detector Manual emphasizes the use of conflict monitors to identify improper signal operations. These devices alert technicians to potential issues, such as conflicting signals or incorrect phasing, ensuring immediate corrective action. Additionally, fail-safe mechanisms and redundancy in signal controls are implemented to prevent accidents. Regular maintenance and real-time monitoring systems further enhance safety by addressing potential hazards before they escalate, aligning with MUTCD guidelines to minimize risks and improve traffic flow.

Installation and Maintenance

The ODOT Signal Detector Manual outlines installation procedures, including mast arm height adjustments and conduit sizing. Regular maintenance ensures optimal detector performance and traffic signal reliability.

6.1 Mast Arm Height and Clearance Requirements

The ODOT Signal Detector Manual specifies that mast arm height and clearance must adhere to strict standards for safety and visibility. Mast arms should be installed at a minimum height of 17 feet and a maximum of 19 feet above the roadway to ensure proper visibility and safety for all road users. These clearance requirements are designed to prevent obstruction and ensure traffic signals are easily visible. The manual also emphasizes compliance with MUTCD guidelines to maintain uniformity in traffic control devices. Proper installation and maintenance of mast arms are critical to ensure reliable operation of traffic signals and detectors.

6.2 Conduit and Wiring Installation Guidelines

The ODOT Signal Detector Manual provides detailed guidelines for conduit and wiring installations to ensure reliable signal operation. Conduit sizing must not exceed 25% fill capacity, as per the 2016 TEM update, to allow for future upgrades. Wiring configurations should follow standardized practices to minimize signal interference and ensure proper connectivity. Proper grounding and shielding are essential to maintain signal integrity and prevent electromagnetic interference. All installations must comply with MUTCD guidelines and local electrical codes. Regular inspections are required to ensure compliance and longevity of the system. Proper labeling and documentation of wiring are also mandated for ease of maintenance and troubleshooting.

6.3 Maintenance and Inspection Procedures

Regular maintenance and inspections are critical to ensure the longevity and reliability of traffic signal systems. The ODOT Signal Detector Manual recommends inspecting detectors, wiring, and conduit connections annually to identify potential issues. Cleaning radar and video detectors is essential to maintain accuracy, while wiring should be checked for damage or degradation. Conduit systems must be inspected for obstructions or water ingress. Signal timing and phasing should be verified during inspections to ensure proper operation. Any malfunctions or discrepancies must be documented and addressed promptly. Routine maintenance schedules and inspection checklists are provided in the manual to streamline the process and ensure compliance with safety standards.

Interconnect and Utilities Plan

The Interconnect and Utilities Plan outlines procedures for coordinating with utility companies, mapping existing infrastructure, and integrating signal systems with current utilities to ensure seamless connectivity and compliance with ODOT standards.

7.1 Interconnect Plan Requirements

The Interconnect Plan Requirements section details the necessary steps for integrating traffic signals with existing infrastructure. It includes guidelines for signal interconnect wiring, configuration, and communication protocols to ensure compatibility and coordination between signals. The plan must adhere to ODOT standards, outlining specific wiring diagrams, conduit sizing, and connectivity protocols. Additionally, it covers procedures for testing and verifying interconnect systems to ensure reliable operation; Compliance with these requirements is essential to maintain traffic flow efficiency and safety across interconnected signal systems.

7.2 Existing Utilities Plan

The Existing Utilities Plan section outlines the process for identifying and mapping all existing underground and overhead utilities near traffic signal installations. This includes power lines, communication cables, water mains, and sewer lines. The plan ensures that new signal installations do not conflict with existing infrastructure, minimizing disruptions and potential safety hazards. It requires coordination with utility providers to verify locations and ensure compliance with ODOT standards. Detailed diagrams and documentation are necessary to guide installation teams effectively. This step is crucial for maintaining public safety and system reliability during construction and operation.

7.3 Signal Interconnect Wiring and Configuration

Signal Interconnect Wiring and Configuration ensures proper communication between traffic signals and connected devices. This section details the wiring standards, connectors, and configuration protocols for interconnecting traffic signals, detectors, and controllers. It emphasizes the importance of proper wiring to prevent signal conflicts and ensure reliable operation. The manual provides guidelines for wiring diagrams, cable sizing, and termination procedures. Configuration parameters, such as timing settings and phase sequences, are also outlined to maintain consistency across interconnected systems. Compliance with ODOT standards is critical to ensure safety and efficiency in traffic signal networks.

Temporary and Removal Plans

This section outlines procedures for temporary signal installations and removal plans, ensuring safe and efficient traffic management during construction or maintenance activities while complying with ODOT standards.

8.1 Temporary Signal Installation

Temporary signal installations are essential for maintaining traffic flow during construction or maintenance. The ODOT Signal Detector Manual specifies that temporary signals must be installed according to approved plans, ensuring safety and visibility. Portable signals or battery-operated devices are commonly used, with retroreflective signs placed at intersections. Timing and phasing must align with existing traffic patterns to minimize disruptions. Radar or video detectors may be employed for real-time monitoring. Compliance with MUTCD guidelines is mandatory, and all installations must be inspected before activation. Temporary signals are removed once permanent systems are operational, following strict removal protocols to restore original traffic conditions.

8.2 Removal Plan Requirements

The removal of temporary signals must adhere to ODOT guidelines to ensure safety and restore original traffic conditions. All equipment, including detectors, conduits, and wiring, must be deactivated and removed promptly; Restoration of the site to pre-installation conditions is required, including repaving or repairing any excavated areas. Disposal of materials must follow environmental regulations. Coordination with local authorities is essential to minimize disruptions. Proper documentation of removal activities is mandatory for record-keeping. The removal plan must be approved by ODOT before execution, ensuring compliance with safety and operational standards throughout the process.

8.3 Temporary Signal Timing and Phasing

Temporary signal timing and phasing must align with existing traffic patterns to maintain safety and efficiency. Timing plans should be pre-approved by ODOT and coordinated with permanent signals. Phase sequences must prioritize pedestrian safety and minimize disruptions. Real-time monitoring is required to ensure proper operation and address conflicts. Adjustments should be documented and approved to maintain compliance. Temporary signals must adhere to MUTCD guidelines and local regulations. Proper timing ensures smooth traffic flow and reduces congestion during construction or maintenance activities. The phasing plan should be clearly outlined in the temporary signal plan and reviewed by ODOT before implementation.

Safety and Compliance

The ODOT Signal Detector Manual ensures adherence to MUTCD guidelines, emphasizing safety measures and regulatory compliance. Regular inspections and documentation are required to prevent accidents and ensure system reliability.

9.1 Safety Precautions and Standards

The ODOT Signal Detector Manual emphasizes strict adherence to safety protocols and industry standards. It outlines procedures for ensuring the safe installation and maintenance of traffic signal detectors, including proper use of personal protective equipment and adherence to MUTCD guidelines; Engineers must follow established conflict monitoring standards to prevent signal malfunctions. Regular inspections are required to identify and address potential hazards. Compliance with federal and state regulations is mandatory to ensure public safety and system reliability. The manual also provides detailed instructions for handling electrical components and avoiding risks associated with signal operation.

9.2 Compliance with MUTCD Guidelines

The ODOT Signal Detector Manual requires strict compliance with the Manual on Uniform Traffic Control Devices (MUTCD) guidelines, ensuring consistency and safety in traffic signal design. Adherence to MUTCD standards is mandatory for all signal installations, including detector placement and operation. The manual references specific MUTCD chapters, such as Chapter 4F, which outlines traffic signal operations and control. Engineers must follow these guidelines to ensure uniformity and compliance with federal and state regulations. Failure to comply may result in legal and safety issues, emphasizing the importance of staying updated with MUTCD revisions and requirements.

9.3 Conflict Monitoring and Resolution

The ODOT Signal Detector Manual emphasizes the importance of conflict monitoring to identify and resolve signal-related issues promptly. Conflict monitors are devices or systems used to detect improper or conflicting signal operations, ensuring safe and efficient traffic flow. The manual outlines procedures for monitoring signal conflicts, such as incorrect signal phases or timing mismatches. Resolution involves diagnosing the root cause and implementing corrective actions, which may include software updates, hardware repairs, or adjustments to signal timing. Regular inspections and real-time monitoring systems are recommended to proactively address potential conflicts. Proper documentation and reporting of conflicts are also required to maintain accountability and improve future signal designs.

References and Resources

The ODOT Traffic Signal Design Manual and MUTCD Chapter 4F provide essential guidelines. Additional resources include the Analysis Procedures Manual and ODOT’s drawing archive for approved traffic plans.

10.1 ODOT Traffic Signal Design Manual

The ODOT Traffic Signal Design Manual is a primary resource for traffic signal design and installation in Oregon. It provides detailed guidelines on signal warrants, design approval processes, and operational requirements. The manual is regularly updated to reflect current standards and practices. Engineers and technicians rely on this document for comprehensive information on traffic signal systems, including detector placement, timing coordination, and safety measures. It is available online and serves as a foundational reference for ensuring compliance with state and federal regulations. This manual is essential for anyone involved in traffic signal projects within Oregon.

10.2 MUTCD Chapter 4F Guidelines

MUTCD Chapter 4F provides federal guidelines for traffic signal control, complementing the ODOT Signal Detector Manual. This chapter outlines standards for traffic signal installation, operation, and maintenance, ensuring uniformity nationwide. It covers topics like signal phasing, timing, and coordination, as well as requirements for radar and video detection systems. Engineers must adhere to these guidelines to ensure compliance with federal regulations. The chapter also addresses safety measures and best practices for signal design, making it a critical resource for traffic engineers working on signal systems in Oregon and across the U.S. Proper implementation of these guidelines ensures efficient and safe traffic flow.

10.3 Additional Resources and Guides

Beyond the ODOT Signal Detector Manual, several supplementary resources are available to support traffic signal design and installation. The ODOT Traffic Signal Design Manual provides detailed design standards, while the MUTCD offers federal guidelines for traffic control devices. The Analysis Procedure Manual (APM) and Traffic Signal Timing Manual (TSTM) further assist in operational and timing aspects. Engineers can also access approved traffic plans and illumination guides through ODOT’s drawing archive. These resources ensure compliance with both state and federal regulations, offering comprehensive support for traffic signal projects. Additional guides, such as the Pedestrian Hybrid Evaluation Matrix, aid in specialized installations, ensuring safety and efficiency in traffic management systems;

the impact cycle pdf free download

The Impact Cycle, developed by Jim Knight, is a transformative tool for instructional coaching, offering a structured approach to improving teaching practices and student outcomes. Its practical framework guides coaches through stages of collaboration, inquiry, and implementation, making it essential for professional development. The availability of the Impact Cycle PDF for free download has made this valuable resource accessible to educators worldwide, providing actionable strategies and insights to enhance instructional effectiveness.

Overview of the Impact Cycle

The Impact Cycle, developed by Jim Knight, is a comprehensive framework designed to enhance instructional coaching and teaching practices. It provides a structured approach to professional development, focusing on collaboration, inquiry, and implementation. The cycle consists of three main stages: Identify, Learn, and Improve, guiding coaches and educators through the process of identifying areas for growth, learning effective strategies, and implementing changes to improve student outcomes. The framework emphasizes the importance of dialogue, reflection, and evidence-based practices. With the availability of the Impact Cycle PDF for free download, educators can access detailed resources, including checklists and teaching strategies, to support their professional development. This tool has become indispensable for instructional coaches aiming to foster meaningful improvements in education. Its practical and research-backed approach ensures that educators can apply its principles effectively in real-world settings.

Importance of the Impact Cycle in Education

The Impact Cycle plays a pivotal role in education by providing a structured approach to professional development and instructional improvement. It bridges the gap between theory and practice, enabling educators to implement evidence-based strategies effectively. By focusing on collaboration, inquiry, and implementation, the Impact Cycle empowers teachers and instructional coaches to identify areas for growth and develop targeted solutions. Its emphasis on dialogue and reflection fosters a culture of continuous improvement and shared learning. The availability of the Impact Cycle PDF for free download has made this transformative resource accessible to educators worldwide, ensuring that schools can adopt innovative practices without financial barriers. This accessibility has contributed to its widespread adoption, making it a cornerstone of modern educational development. Through its practical framework, the Impact Cycle continues to drive meaningful change in classrooms, benefiting both educators and students alike.

About the Author: Jim Knight

Jim Knight is a renowned expert in instructional coaching, known for his groundbreaking work in education. As the founder of the Instructional Coaching Group, he has authored influential books like The Impact Cycle, shaping modern coaching practices.

Jim Knight’s Contribution to Instructional Coaching

Jim Knight has revolutionized instructional coaching through his innovative approaches and practical tools. His development of the Impact Cycle has provided educators with a clear, evidence-based framework to enhance teaching strategies and student learning. By emphasizing collaboration and inquiry, Knight’s methods empower coaches to support teachers effectively. His work bridges theory and practice, offering actionable steps for professional growth. The availability of the Impact Cycle PDF for free download ensures widespread access to these transformative ideas, making Knight a pivotal figure in modern educational development. His contributions continue to inspire and guide educators worldwide, fostering a culture of continuous improvement in schools.

Key Concepts Introduced by Jim Knight

Jim Knight has introduced several foundational concepts that have shaped instructional coaching and educational practices. Central to his work is the Impact Cycle, a structured approach to improving teaching and learning through collaboration and inquiry. Knight emphasizes the importance of evidence-based practices, encouraging educators to rely on data and research to guide their decisions. He also highlights the distinction between facilitative and directive coaching, advocating for a balance that supports teacher autonomy while providing targeted guidance. Additionally, Knight’s work introduces the concept of the Instructional Playbook, a practical guide offering high-impact teaching strategies. His ideas are further supported by the availability of the Impact Cycle PDF for free download, ensuring accessibility for educators worldwide. These concepts collectively empower instructional coaches to foster meaningful and sustainable improvements in education.

Key Concepts of the Impact Cycle

The Impact Cycle provides a structured approach to instructional coaching, emphasizing collaboration, evidence-based practices, and continuous improvement. It fosters meaningful teacher growth and student success through targeted strategies.

Stages of the Impact Cycle

The Impact Cycle, developed by Jim Knight, is structured around five key stages: Identify, Learn, Plan, Teach, and Sustainability. Each stage is designed to guide instructional coaches and teachers through a collaborative process aimed at improving teaching practices and student outcomes. The Identify stage focuses on clarifying goals and identifying areas for growth. In the Learn stage, coaches and teachers explore evidence-based strategies to address these areas. The Plan stage involves designing actionable plans, while the Teach stage focuses on implementation. Finally, the Sustainability stage ensures that new practices are embedded into daily teaching routines. The Impact Cycle PDF, available for free download, provides detailed insights and practical tools for navigating these stages effectively. It is an essential resource for educators seeking to enhance instructional effectiveness.

Practical Applications of the Impact Cycle

The Impact Cycle offers numerous practical applications for educators and instructional coaches, providing a clear pathway to enhance teaching practices and student learning outcomes. Coaches can use the cycle to guide teachers through collaborative goal-setting, evidence-based strategy selection, and reflective practice. The Impact Cycle PDF, available for free download, includes actionable tools such as checklists and reflection guides to support implementation. For example, educators can apply the cycle to design professional development programs, improve classroom instruction, and foster a culture of continuous improvement. Additionally, the cycle’s structured approach makes it an effective framework for mentoring new teachers and supporting veteran educators in refining their skills. By integrating the Impact Cycle into daily practice, schools can create a sustainable system for instructional growth and student success. This resource is indispensable for any educator seeking to make a meaningful impact.

Instructional Coaching and the Impact Cycle

Instructional coaching, guided by the Impact Cycle, empowers educators to enhance teaching strategies. The free PDF offers practical tools like checklists and reflection guides, aiding coaches in fostering meaningful instructional improvements effectively.

Role of Instructional Coaches in the Impact Cycle

Instructional coaches play a pivotal role in the Impact Cycle by facilitating collaboration and professional growth among educators; They guide teachers through structured conversations, fostering a culture of inquiry and reflection. Coaches support educators in identifying challenges, exploring solutions, and implementing evidence-based strategies. By using resources like the free Impact Cycle PDF, coaches can access tools such as checklists and reflection guides to enhance their practice. Their role is not to direct but to empower teachers, helping them refine their instructional techniques and improve student outcomes. Effective coaches balance facilitative and directive approaches, ensuring teachers feel supported while taking ownership of their growth. Ultimately, instructional coaches are catalysts for sustainable improvement, aligning their efforts with the principles outlined in the Impact Cycle to create meaningful, lasting change in educational settings.

Facilitative vs. Directive Coaching Approaches

Facilitative and directive coaching approaches differ significantly in their methods and purposes. Facilitative coaching focuses on collaboration, empowering teachers to reflect, explore solutions, and take ownership of their professional growth. Coaches ask open-ended questions, fostering a dialogue that encourages teachers to identify and address challenges independently. In contrast, directive coaching involves providing explicit guidance, sharing expertise, and offering specific solutions. This approach is often used when teachers need clear instructions or immediate support. The Impact Cycle PDF emphasizes facilitative coaching, aligning with its emphasis on collaboration and teacher empowerment. While both approaches have their place, facilitative coaching is central to the Impact Cycle, as it promotes sustainable growth and long-term improvement in teaching practices. Coaches must adapt their approach based on the teacher’s needs, ensuring a balance between guidance and autonomy.

Downloading the Impact Cycle PDF for Free

The Impact Cycle PDF is widely available for free download, offering educators and coaches access to Jim Knight’s transformative framework for improving teaching practices and student outcomes effectively.

Where to Find the Impact Cycle PDF

The Impact Cycle PDF can be easily accessed through various online platforms and educational resources. Websites like Librivox and academic databases offer free downloads of the document, providing educators with Jim Knight’s comprehensive guide to instructional coaching. Additionally, many universities and digital libraries provide free access to the PDF, ensuring widespread availability. Users can also find the Impact Cycle PDF through specific search queries on platforms like Google Scholar and educational forums, where it is often shared as a valuable resource for professional development. This accessibility makes it convenient for coaches and teachers to explore the framework and implement its strategies in their practice. The PDF’s availability has been further enhanced by its inclusion in course materials and online toolkits, making it a readily accessible tool for improving teaching methods.

Free Resources for Downloading the Impact Cycle

The Impact Cycle PDF is widely available as a free resource through various educational platforms and websites. Educators can access it via platforms like Librivox and Google Scholar, where it is often shared as a downloadable document. Additionally, many instructional coaching websites and forums offer the PDF for free, providing educators with a comprehensive guide to improving teaching practices. The document includes detailed strategies, checklists, and frameworks that coaches can use to support teachers effectively. By downloading the Impact Cycle PDF, users gain access to Jim Knight’s evidence-based approaches, which have been proven to enhance instructional effectiveness. This free resource is a valuable tool for anyone looking to deepen their understanding of the Impact Cycle and its practical applications in education. Its availability ensures that educators worldwide can benefit from its insights without cost.

Tools and Guides Related to the Impact Cycle

The Impact Cycle is supported by various tools, including the Instructional Playbook and a Reflection Guide, offering practical strategies and checklists for instructional coaches. These resources are available as free downloads, providing educators with evidence-based approaches to enhance teaching practices effectively.

The Instructional Playbook: A Companion to the Impact Cycle

The Instructional Playbook serves as a comprehensive guide, complementing the Impact Cycle by providing detailed strategies for improving teaching methods. It includes one-page descriptions and checklists for each teaching strategy, making it an invaluable resource for educators. Available as a free PDF download, the Playbook offers practical tools to support instructional coaches in fostering meaningful improvements in the classroom. Its structured approach aligns seamlessly with the Impact Cycle, ensuring coaches have actionable steps to enhance teaching practices. This resource is particularly beneficial for those seeking to implement evidence-based methods effectively. By integrating the Playbook with the Impact Cycle, educators can create a powerful framework for professional growth and student success.

Reflection Guide to the Impact Cycle

The Reflection Guide to the Impact Cycle is a valuable resource designed to help instructional coaches and educators deepen their understanding of the Impact Cycle framework. Available as a free PDF download, this guide offers structured prompts and activities that facilitate self-reflection and professional growth. It encourages coaches to examine their practices, identify areas for improvement, and align their strategies with the principles of the Impact Cycle. By fostering a reflective mindset, the guide empowers educators to implement the Impact Cycle more effectively, leading to enhanced teaching practices and improved student outcomes. This resource is an essential companion for anyone seeking to maximize the potential of the Impact Cycle in their educational setting. Its practical approach ensures that coaches can continuously refine their skills and contribute to a more impactful instructional environment.

Practical Applications of the Impact Cycle

The Impact Cycle offers actionable strategies for instructional coaches, providing a clear framework to enhance teaching practices. Its practical tools, such as the Instructional Playbook, support educators in implementing evidence-based methods. The availability of the Impact Cycle PDF for free download ensures widespread accessibility, enabling coaches to apply its principles effectively in real-world educational settings. This resource is indispensable for fostering meaningful improvements in teaching and learning.

Case Studies: Implementing the Impact Cycle

The Impact Cycle has been successfully implemented in various educational settings, with case studies showcasing its effectiveness in improving teaching practices and student outcomes. For instance, schools that adopted the cycle reported enhanced collaboration between instructional coaches and teachers, leading to more targeted and impactful instructional strategies. The availability of the Impact Cycle PDF for free download has enabled educators to access these tools and apply them in real-world scenarios. One notable case study involved a district where coaches used the cycle to guide teachers in implementing evidence-based practices, resulting in measurable improvements in student performance. These success stories highlight the practical benefits of the Impact Cycle and its potential to drive meaningful change in education. The free PDF resource has been instrumental in making these strategies accessible to a broader audience, fostering widespread adoption and positive outcomes.

Success Stories from Instructional Coaches

Instructional coaches who have utilized the Impact Cycle report significant improvements in their ability to support teachers and enhance student learning. One coach shared how the cycle’s structured approach helped her lead a school-wide initiative, resulting in a 20% increase in student proficiency scores. Another coach highlighted the Impact Cycle PDF as a vital resource, enabling her to implement the cycle effectively and foster a culture of collaboration among staff. These success stories emphasize the practicality and effectiveness of the Impact Cycle in real-world educational settings. By downloading the free PDF, coaches gain access to actionable strategies, tools, and frameworks that empower them to drive meaningful change. The positive outcomes shared by these coaches underscore the transformative potential of the Impact Cycle in education.

The Impact Cycle offers a transformative approach to instructional coaching, empowering educators to drive meaningful change. With the Impact Cycle PDF freely available, teachers and coaches can easily access its powerful tools and strategies to enhance teaching and learning. By embracing this framework, educators can foster collaboration, improve practices, and achieve lasting student success.

Final Thoughts on the Impact Cycle

The Impact Cycle emerges as a pivotal framework for instructional coaching, offering educators a clear pathway to enhance teaching practices and student outcomes. Its structured approach, emphasizing collaboration and inquiry, makes it an invaluable resource for professional development. The availability of the Impact Cycle PDF for free download ensures that educators worldwide can easily access its practical tools and strategies. By integrating this model, instructional coaches can foster a culture of continuous improvement, helping teachers refine their methods and achieve measurable results. Beyond theory, the Impact Cycle provides actionable steps that educators can implement immediately, making it a cornerstone of modern educational innovation. Its enduring relevance lies in its ability to adapt to diverse learning environments, ensuring that every educator can benefit from its insights.

Encouragement to Explore the Impact Cycle Further

Educators are encouraged to delve deeper into the Impact Cycle by accessing its resources, such as the free PDF download, which offers a comprehensive guide to enhancing instructional practices. This framework, developed by Jim Knight, provides practical strategies for coaches and teachers to collaborate effectively, fostering meaningful improvements in teaching and learning. By exploring the Impact Cycle, educators can gain insights into transformative coaching methods and evidence-based practices. The availability of free resources, including the Instructional Playbook and Reflection Guide, further supports educators in their professional development journey. Embracing the Impact Cycle can lead to significant advancements in educational outcomes, making it a valuable tool for any educator seeking to make a lasting impact. Download the Impact Cycle PDF today and begin your journey toward instructional excellence.

kaufman cards pdf

Kaufman Cards, developed by Nancy Kaufman, are renowned tools for treating childhood apraxia of speech (CAS). They offer structured, effective strategies for speech therapists and parents, providing clear approximations and visual aids to support vocal development. Available in PDF and printable formats, these cards are widely praised for their organization and adaptability in various therapeutic settings.

Overview of Kaufman Cards

Kaufman Cards are a highly effective tool designed by Nancy Kaufman to help children with motor-speech difficulties, particularly those with Childhood Apraxia of Speech (CAS). These cards are structured to provide a clear progression of sounds and words, offering approximations to aid in vocal development. Available in PDF and printable formats, they are widely used by speech therapists and parents for home practice. The cards are organized by syllable complexity, starting from simple CVC words and progressing to more complex phrases and sentences. Each card includes visual aids and written prompts, making them adaptable for various therapeutic approaches. Their popularity stems from their ease of use, organization, and proven effectiveness in fostering communication skills in children with speech challenges.

History and Development

Kaufman Cards were developed by Nancy R. Kaufman, M.A., CCC-SLP, beginning in 1979, as part of her pioneering work in childhood apraxia of speech (CAS). Her approach, the Kaufman Speech to Language Protocol (K-SLP), laid the foundation for these cards, which were designed to help children with motor-speech challenges; Over the years, the cards have evolved to incorporate the latest research in motor learning, applied behavior analysis (ABA), and speech therapy techniques. Initially created as physical flashcards, they are now available in digital formats, including PDFs and Boom Cards, making them accessible for telepractice and home use. The Kaufman Cards have become a cornerstone in speech therapy, widely recognized for their effectiveness and adaptability in treating CAS and other speech disorders.

Treatment Kits and Materials

Kaufman Cards, created by Nancy Kaufman, are essential tools for addressing motor-speech difficulties. Available in PDF, they provide structured approximations, making them invaluable for effective speech therapy interventions.

Kaufman Speech to Language Protocol (K-SLP)

The Kaufman Speech to Language Protocol (K-SLP) is a groundbreaking approach developed by Nancy Kaufman to help children with motor-speech difficulties, particularly those diagnosed with Childhood Apraxia of Speech (CAS). This evidence-based method integrates the latest research in motor learning, applied behavior analysis (ABA), and speech-language pathology. The K-SLP emphasizes a systematic progression from simple to complex sounds, using visual and tactile cues to facilitate accurate articulation. The protocol is supported by the Kaufman Cards, which provide clear approximations and visual aids to guide therapy sessions. By focusing on functional communication, the K-SLP has become a cornerstone in speech therapy, offering both clinicians and parents a structured framework to promote vocal development and language skills in children.

Kaufman Treatment Kit 1

Kaufman Treatment Kit 1 is the first in a series of comprehensive tools designed to address severe speech-sound disorders, particularly in children with apraxia. Focused on foundational skills, this kit emphasizes initial sounds and syllable shapes, providing a structured approach to building vocal communication. It includes CVC (consonant-vowel-consonant) words and syllable-based exercises, along with visual aids and approximations to support articulation practice. The kit is organized by syllable complexity, starting with simple structures and progressing to more complex ones. Accompanying data sheets allow therapists and parents to track progress effectively. Kaufman Treatment Kit 1 is widely praised for its clarity and effectiveness in early intervention, making it a valuable resource for speech therapy and home practice.

Kaufman Treatment Kit 2

Kaufman Treatment Kit 2 is an advanced resource designed for children who have mastered the foundational skills introduced in Kit 1. It focuses on complex syllable shapes, multi-syllabic words, and phrases, helping to expand speech abilities beyond single words. The kit includes a variety of exercises tailored to improve articulation, fluency, and language development. With a emphasis on generalization, Kit 2 bridges the gap between structured practice and spontaneous communication. It also incorporates data sheets for tracking progress and ensuring accountability; This kit is particularly useful for children transitioning from basic sounds to more complex language structures, making it a valuable tool for speech therapists and parents working with children who have apraxia or other speech disorders.

Structure of Kaufman Cards

Kaufman Cards are meticulously designed to facilitate effective speech therapy. Each card features a clear, high-quality image on the front, accompanied by target words and their approximations on the back. The approximations are arranged in order of difficulty, starting with simpler sounds at the bottom and progressing to more complex ones. This hierarchical structure allows for gradual learning and reinforcement. The cards are organized by syllable complexity, making it easier for therapists to tailor sessions to individual needs. Additionally, the backs of the cards provide space for tracking progress, enabling therapists to mark when a sound is introduced and mastered. This structured approach ensures a systematic and efficient path to improving speech skills, particularly for children with apraxia or other motor-speech challenges.

Design and Organization

Kaufman Cards are designed with high-quality images and clear layouts, ensuring visual clarity for effective therapy sessions. Organized by syllable complexity, they offer a structured approach to sound progression, with approximations listed on the back for targeted practice.

Image Quality and Clarity

Kaufman Cards are renowned for their high-quality images, ensuring clarity and engagement for children; The visuals are vibrant, realistic, and carefully selected to aid in word recognition and sound association. Each card features a large, central image with minimal distractions, making it easy for children to focus. The clear design helps speech therapists use the cards effectively during sessions, while the images’ relevance supports meaningful communication practice. Parents and therapists alike appreciate the professional-grade visuals, which enhance the learning experience. The clarity of the images is particularly beneficial for children with visual or cognitive challenges, ensuring they can engage fully with the content.

Organization by Syllable Complexity

Organization by Syllable Complexity

Kaufman Cards are meticulously organized by syllable complexity, starting with simple CVC (Consonant-Vowel-Consonant) words and progressing to more complex structures. This hierarchical design supports a gradual learning process, aligning with motor learning principles. Each set of cards introduces sounds and syllable patterns in a logical sequence, helping children build speech skills systematically. The organization ensures that therapists and parents can tailor sessions to a child’s developmental level, focusing on achievable goals. This structured approach minimizes frustration and maximizes progress, making it an effective tool for addressing speech challenges in children with apraxia or other speech disorders.

Use of Approximations

Kaufman Cards incorporate a systematic use of approximations to help children gradually master speech sounds and word production. Each card lists multiple approximations, arranged from simplest to most complex, allowing for a step-by-step approach. This method ensures that children are not overwhelmed and can build confidence as they progress. The approximations are tailored to the child’s current skill level, with the easiest sound at the bottom of the list. For example, a card might start with a simpler sound and gradually introduce more complex articulations. This approach encourages consistent practice and reinforces correct speech patterns. By focusing on small, achievable steps, Kaufman Cards help children with apraxia or other speech challenges develop clear and functional communication skills over time.

Therapeutic Approaches

Kaufman Cards integrate the Kaufman Speech to Language Protocol (K-SLP), motor learning principles, and Applied Behavior Analysis (ABA) to provide a comprehensive approach for speech development and therapy.

Application in Childhood Apraxia of Speech (CAS)

Kaufman Cards are specifically designed to address Childhood Apraxia of Speech (CAS), offering a structured approach to improve vocal communication. They provide visual and written approximations for words, helping children with CAS articulate sounds progressively. The cards are organized by syllable complexity, allowing therapists to tailor sessions to individual needs. By focusing on motor learning principles, they facilitate consistent practice and mastery of speech sounds. The integration of these cards into the Kaufman Speech to Language Protocol (K-SLP) ensures a comprehensive and evidence-based treatment plan. Available in PDF and printable formats, they are easily accessible for both clinical and home use, making them a valuable tool for speech therapists and parents alike.

Motor Learning Principles

Kaufman Cards are rooted in motor learning principles, emphasizing repetition, practice, and feedback to build speech skills. They use a hierarchical approach, starting with simple sounds and progressing to complex syllables, ensuring mastery at each level. The cards incorporate immediate feedback, allowing children to correct errors and reinforce correct productions. By focusing on consistent practice and gradual skill development, they align with motor learning theories that emphasize repetition and reinforcement. This structured method helps children with speech difficulties, particularly CAS, to develop muscle memory and improve articulation. The cards’ design supports the application of motor learning principles in a clear, systematic way, making them an effective tool for speech therapy and home practice.

Integration with Applied Behavior Analysis (ABA)

Kaufman Cards seamlessly integrate with Applied Behavior Analysis (ABA) techniques, providing a structured approach to speech therapy. The cards support ABA principles by offering clear, consistent visual and auditory cues, which are essential for reinforcing desired speech behaviors. Speech therapists can use the cards to implement positive reinforcement, repetition, and systematic practice, aligning with ABA’s focus on measurable progress. The inclusion of data tracking sheets further supports ABA methodologies, allowing for precise monitoring of skill acquisition and mastery. This integration makes Kaufman Cards a valuable resource for ABA-based interventions, particularly for children with autism or other developmental disorders. By combining motor speech practice with behavioral strategies, they create a comprehensive tool for effective communication skill development.

Progress Tracking and Data Sheets

Kaufman Cards are accompanied by comprehensive progress tracking and data sheets, enabling speech therapists and parents to monitor a child’s speech development effectively. These sheets allow for precise documentation of when a sound or word is introduced, practiced, and mastered. The structured format helps in identifying progress patterns, ensuring targeted interventions. Data sheets align with the cards’ organization by syllable complexity, making it easier to track advancements through increasingly complex speech tasks. This systematic approach supports consistent practice and reinforces the Kaufman method’s emphasis on measurable outcomes. By maintaining detailed records, users can adapt therapy sessions to meet individual needs, ensuring a tailored and effective approach to speech improvement.

Usage and Implementation

Kaufman Cards are versatile tools used in structured therapy sessions, home practice, and telepractice; They guide speech therapists and parents through systematic, evidence-based approaches to improve speech skills effectively.

Step-by-Step Guide for Speech Therapists

Speech therapists using Kaufman Cards begin with assessing the child’s current speech abilities. They introduce the cards starting with simpler syllable structures, gradually increasing complexity. Each card includes target words and approximations, allowing therapists to model sounds and guide practice. Immediate feedback is provided to reinforce correct articulation. Progress is tracked using data sheets included with the kits, marking when sounds are mastered. Therapists incorporate motor learning principles, ensuring repetitive practice and positive reinforcement. Parents are often involved, with home practice materials like PDF versions of the cards, to maintain consistency. This structured approach ensures tailored, effective speech therapy for children with apraxia and other speech challenges.

Home Practice and Parental Involvement

Home practice with Kaufman Cards is essential for reinforcing speech therapy progress. Parents can use downloadable PDF versions of the cards to practice target words and sounds consistently. The structured format of the cards, including approximations, guides parents in modeling correct articulation. Regular practice helps children generalize new speech skills in natural environments. Parents are encouraged to track progress and communicate with therapists to align home practice with therapy goals. The availability of printable and digital formats makes it easy for families to incorporate practice into daily routines. This collaborative approach between therapists and parents fosters consistent reinforcement, accelerating the child’s speech development and communication confidence.

Adaptation for Different Age Groups

Kaufman Cards are versatile tools adaptable for various age groups, from toddlers to older children. The cards’ design, featuring clear images and gradual approximations, suits younger children’s developmental needs. For older children, the complexity increases with multi-syllabic words and phrases, challenging their articulation and language skills; The structured progression allows therapists to tailor activities to each child’s abilities, ensuring effective learning. Parents and educators can modify practice sessions to match the child’s attention span and interest. This adaptability makes Kaufman Cards a valuable resource for diverse age groups, supporting long-term speech and language development.

Digital and Printable Formats

Kaufman Cards are available in PDF and printable formats, offering flexibility for therapists and parents. Digital versions, including Boom Cards, support telepractice, while printables provide tactile learning aids.

Availability of Kaufman Cards in PDF

Kaufman Cards are widely available in PDF format, offering convenience and accessibility for speech therapists and parents. These digital files can be easily downloaded and printed, providing high-quality visual aids for speech therapy sessions. The PDF format ensures that the cards maintain their professional design and image clarity, which are essential for effective communication. Many resources online provide free or purchasable PDF versions of Kaufman Cards, catering to various speech and language needs. Additionally, the PDF format allows for integration with telepractice tools, such as Boom Cards, making remote therapy sessions more engaging and efficient. This accessibility ensures that children with speech difficulties can benefit from the Kaufman method regardless of their location or setup.

Boom Cards and Telepractice Tools

Boom Cards and telepractice tools have revolutionized the use of Kaufman Cards in remote therapy sessions. These digital platforms allow speech therapists to engage children with interactive exercises, maintaining the effectiveness of the Kaufman method. Boom Cards integrate seamlessly with Kaufman Cards, offering features like audio prompts and visual aids. They are accessible via tablets or computers, making therapy sessions flexible and convenient. Telepractice tools also enable real-time progress tracking, ensuring consistent communication between therapists and parents. This digital adaptation is particularly beneficial for children with apraxia of speech, providing a dynamic and engaging way to practice communication skills. The combination of Kaufman Cards and telepractice tools creates a comprehensive solution for modern speech therapy needs.

Printable Flashcards and Game Cards

Printable Kaufman Cards are a versatile resource for speech therapy, offering high-quality images and clear word approximations. These flashcards are designed to aid children with motor-speech difficulties, providing visual and auditory cues. Available in PDF format, they can be printed in full color or black and white, making them accessible for various settings. The cards are organized by syllable complexity, helping therapists and parents progress through sounds systematically. Game cards further enhance engagement, turning therapy into enjoyable activities. This adaptability makes Kaufman Cards an invaluable tool for both clinical and home use, ensuring consistent practice and measurable progress in speech development. Their portability and ease of use have made them a favorite among speech therapists worldwide.

bosch maxx 6 washing machine manual

Bosch Maxx 6 Washing Machine Manual: A Comprehensive Guide

Welcome to your comprehensive guide for the Bosch Maxx 6 washing machine! This manual will assist you in understanding its features. It will guide you on usage, maintenance, and troubleshooting. Use the manual to maximize the machine’s lifespan and efficiency.

The Bosch Maxx 6 washing machine is a reliable appliance designed for efficient laundry care. This guide offers an introduction to its features, operation, and maintenance. Understanding your Bosch Maxx 6 is crucial for optimal performance and longevity.
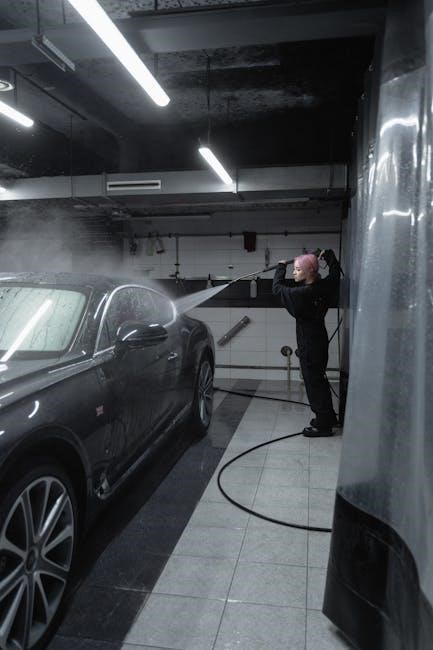
 This washing machine is known for its user-friendly interface and variety of wash programs, catering to different fabric types and cleaning needs. This manual provides you with all the necessary information to effectively use your washing machine, ensuring your clothes are cleaned perfectly every time.

From selecting the right wash cycle to troubleshooting common issues, this guide covers everything you need to know. The Bosch Maxx 6 is designed with advanced technology to provide energy-efficient cleaning. Familiarizing yourself with its features will help you save time and resources. It extends the life of your appliance and maintains the quality of your clothes.

This comprehensive guide ensures you get the most out of your Bosch Maxx 6 washing machine, providing reliable performance and exceptional cleaning results for years to come.

Finding the Right Manual for Your Model

Locating the correct manual for your specific Bosch Maxx 6 model is the first crucial step. This ensures you have the most accurate and relevant information for your appliance. Start by identifying the model number, typically found on a sticker located on the machine’s door, back, or side panel. Once you have the model number, visit the Bosch website. You can use the search function to find the corresponding manual.

Many online resources offer downloadable PDF manuals for various Bosch models. Ensure that the manual matches your specific model number to avoid incorrect information. Another approach is to check online appliance parts retailers. They often provide manuals for download as a service to their customers. If you have the original purchase documents, the manual might be included.

Using the wrong manual can lead to confusion and potentially damage your machine. Always double-check the model number and verify that the manual corresponds to your specific Bosch Maxx 6 washing machine before proceeding.

Understanding the Control Panel

The control panel of your Bosch Maxx 6 washing machine is designed for intuitive operation. Familiarizing yourself with each button, dial, and display element is essential for effective use. Typically, the panel features a central program selector dial, allowing you to choose from various wash cycles like cottons, synthetics, delicates, and wool. Adjacent to the dial are usually buttons for adjusting temperature, spin speed, and additional functions.

The display screen shows important information such as the remaining cycle time, selected options, and error codes if any issues arise. Some models also have buttons for functions like “EcoPerfect” for energy saving and “SpeedPerfect” for faster washing. Understanding these options lets you customize each wash to suit your needs.

Pay close attention to the symbols and labels on the control panel. They provide quick references to each function. Consulting your user manual will provide detailed explanations of each control, ensuring you can confidently operate your Bosch Maxx 6 washing machine and achieve optimal results.

Basic Operation: Starting a Wash Cycle

Initiating a wash cycle on your Bosch Maxx 6 washing machine involves a few straightforward steps. First, sort your laundry and load it into the drum, ensuring not to overload the machine. Next, add the appropriate amount of detergent to the dispenser drawer, along with any fabric softener or pre-wash additives as needed. Close the door securely.

Turn the program selector dial to choose the desired wash cycle based on your load’s fabric type and soil level. Adjust the temperature and spin speed using the corresponding buttons to match the requirements of your garments. If desired, select additional options such as “EcoPerfect” or “SpeedPerfect” to optimize energy consumption or reduce wash time.

Once all settings are selected, press the “Start/Pause” button to begin the wash cycle. The display screen will indicate the remaining time and the current stage of the cycle. Avoid opening the door during operation, unless pausing the cycle. Once completed, the machine will signal the end of the wash, allowing you to remove your clean laundry. Remember to consult the manual for detailed instructions.

Selecting the Appropriate Wash Program

Choosing the right wash program on your Bosch Maxx 6 is crucial for optimal cleaning and garment care. The machine offers a variety of programs designed for different fabric types and washing needs. Consult your user manual for a detailed explanation of each program’s specific features and recommended uses. Common programs include “Cottons,” ideal for everyday cotton items, and “Synthetics,” suitable for synthetic fabrics and blends.

For delicate items like silk or wool, use the “Delicates/Silk” or “Wool” program, respectively, to prevent damage. The “Easy Care” program is designed for wrinkle-resistant fabrics, while the “Mix” program can handle a mixed load of different fabric types. Additionally, there are specialized programs like “AllergyPlus,” designed to remove allergens, and “Quick/Mix,” for washing a small load quickly.

Consider the soil level of your laundry when selecting a program. Heavily soiled items may require a more intense program or pre-treatment. Always follow garment care label instructions and avoid washing items that are not machine-washable. Selecting the correct program ensures effective cleaning while protecting your clothes and the washing machine itself. The user manual is your best resource.

Troubleshooting Common Issues

Encountering issues with your Bosch Maxx 6 washing machine can be frustrating, but many problems have simple solutions. Before calling for professional repair, try troubleshooting common issues yourself. One frequent problem is the machine not starting. Ensure the power cord is plugged in securely, and the door is fully closed. The door lock mechanism must engage for the machine to operate.

Another common issue is the machine not draining water. Check the drain hose for kinks or blockages. Clean the drain pump filter, as it may be clogged with lint or small objects. If the machine vibrates excessively, make sure it is level and that all transit bolts have been removed. Uneven loading can also cause vibrations, so redistribute the laundry inside the drum.

If the machine is not filling with water, check the water supply hoses for kinks or blockages. Ensure that the water inlet valves are fully open. If you encounter error codes on the display panel, consult your user manual for specific troubleshooting steps. The manual provides solutions for common error codes, such as drainage issues or water inlet problems. Always refer to the user manual.

Error Codes: Identifying and Resolving Problems

When your Bosch Maxx 6 washing machine encounters a problem, it often displays an error code on the control panel. These codes are designed to help you identify the issue and take appropriate action. Consult your user manual for a comprehensive list of error codes and their meanings. Understanding these codes can save you time and money by allowing you to resolve minor issues without professional assistance.

One common error code is related to drainage problems. This could indicate a blocked drain pump filter or a kinked drain hose. Another frequent error involves water inlet issues, suggesting a problem with the water supply or inlet valve. Error codes may also appear due to motor problems, sensor malfunctions, or issues with the control board. Always turn off the machine and unplug it before attempting any troubleshooting steps.

The user manual will provide specific instructions for each error code, including steps to check and resolve the problem. Sometimes, simply restarting the machine can clear the error. However, if the error persists, follow the recommended troubleshooting steps. For complex issues, consult a qualified appliance repair technician. Proper identification and resolution of error codes are crucial.

F18 Error: Drain Issues and Solutions

The F18 error code on your Bosch Maxx 6 washing machine typically indicates a problem with draining water. This error suggests that the machine is taking too long to empty, or it’s not draining at all. Several factors can cause this issue, and it’s essential to diagnose the root cause for effective resolution. Begin by checking the drain hose for any kinks or blockages. A twisted or obstructed hose can severely restrict water flow.

Next, inspect the drain pump filter. This filter is designed to catch debris and prevent it from entering the drain pump. If the filter is clogged, it will impede drainage. To access the filter, usually located at the bottom front of the machine, consult your manual. Remove the filter, clean it thoroughly under running water, and then reinsert it securely. Also, check the drain pump itself for any obstructions.

If the hose and filter are clear, the issue might be with the drain pump motor. In some cases, the pump motor may fail, requiring replacement. If you’re comfortable with appliance repair, you might attempt this yourself. Otherwise, it’s advisable to contact a qualified technician. Regularly cleaning the filter and ensuring proper hose positioning can help prevent future F18 errors.

Maintenance and Cleaning

Regular maintenance and cleaning are crucial for prolonging the life and efficiency of your Bosch Maxx 6 washing machine. Neglecting these tasks can lead to reduced performance, unpleasant odors, and potential breakdowns. One essential aspect is cleaning the detergent drawer. Over time, detergent and fabric softener residues can accumulate, causing blockages and hindering proper dispensing. Remove the drawer completely, rinse it under warm water, and scrub away any buildup with a brush. Ensure all compartments are clear before reinserting the drawer.

Another key area to maintain is the rubber door seal. This seal can trap moisture and debris, creating a breeding ground for mold and mildew. After each wash, wipe down the seal with a dry cloth to remove any excess water. Periodically, clean it with a solution of water and vinegar to prevent mold growth. Additionally, it’s advisable to run a hot wash cycle with an empty drum and a cup of white vinegar every few months. This helps to sanitize the machine and eliminate odors.

Descaling the washing machine is also important, especially in hard water areas. Use a descaling product specifically designed for washing machines, following the manufacturer’s instructions. Regular maintenance ensures your Bosch Maxx 6 remains in optimal condition.

Cleaning the Exhaust Air Duct (Dryer Models)

If your Bosch Maxx 6 is a washer-dryer combo model, cleaning the exhaust air duct is a critical maintenance task. A clogged exhaust duct reduces drying efficiency and poses a fire hazard. Lint accumulates in the duct, restricting airflow and causing the dryer to overheat. Before starting, always disconnect the appliance from the power supply for safety.

Locate the exhaust duct, usually at the back of the dryer. Detach it carefully, noting how it’s connected for reassembly. Use a vacuum cleaner with a hose attachment to remove loose lint. For stubborn buildup, a specialized lint brush can be helpful. Gently scrub the inside of the duct to dislodge any remaining lint. Ensure the duct is completely clear before reattaching it.

Regularly cleaning the lint filter after each drying cycle is also essential. This prevents excessive lint from reaching the exhaust duct. Inspect the duct for any signs of damage, such as cracks or tears, and replace it if necessary. A clean exhaust air duct ensures efficient drying, saves energy, and minimizes the risk of fire. Consistent maintenance prolongs the life of your Bosch Maxx 6 dryer.

Safety Precautions

Operating a washing machine like the Bosch Maxx 6 requires adherence to crucial safety precautions to prevent accidents and ensure longevity. Always disconnect the machine from the power outlet before performing any maintenance or cleaning tasks. Never attempt to repair the appliance yourself if you lack the necessary expertise; instead, contact a qualified technician.

Keep children and pets away from the washing machine during operation. The door can pose a hazard, and curious hands might tamper with the controls. Avoid overloading the machine, as this can strain the motor and lead to malfunctions. Use the recommended amount of detergent to prevent excessive suds, which can damage the appliance and cause leaks.

Inspect the power cord regularly for any signs of damage, such as frayed wires or cracks. Replace the cord immediately if any issues are detected. Ensure the washing machine is placed on a level surface to prevent vibrations and instability during operation. Do not climb onto the washing machine or lean against the opened loading door. Following these precautions will help you operate your Bosch Maxx 6 safely and efficiently.

Avoiding Overloads and Improper Use

To ensure your Bosch Maxx 6 washing machine operates efficiently and maintains its lifespan, it is crucial to avoid overloads and improper use. Overloading the machine puts excessive strain on the motor, belts, and other components, leading to premature wear and potential breakdowns. Always adhere to the maximum load capacity specified in the user manual.

Improper use, such as using the wrong type or excessive amounts of detergent, can also cause problems. Too much detergent can lead to excessive suds, which can damage the machine and leave residue on your clothes. Always use the recommended amount of detergent for the load size and soil level.

Additionally, avoid washing items that are not suitable for machine washing, such as delicate fabrics that require hand washing. Ensure that all pockets are empty before loading clothes to prevent damage from foreign objects. Regularly inspect and clean the detergent dispenser to prevent clogs and ensure proper dispensing. By following these guidelines, you can prevent overloads and improper use, extending the life of your Bosch Maxx 6 washing machine and ensuring optimal performance.

Accessing Online Resources and Support

Bosch provides a wealth of online resources and support to assist you with your Maxx 6 washing machine. Their official website is a great starting point for finding answers to your questions. You can access detailed product information, frequently asked questions (FAQs), and troubleshooting guides. The Bosch website also offers the option to download manuals in PDF format, ensuring you always have access to the information you need.

In addition to the official website, numerous online forums and communities are dedicated to Bosch appliances. These forums can be valuable resources for finding solutions to common issues and connecting with other users who have experience with the Maxx 6 model. You can often find helpful tips, advice, and shared experiences that can assist you in resolving problems or optimizing the performance of your washing machine.

If you require direct assistance, Bosch’s customer support team is available via phone or email. Their knowledgeable representatives can provide personalized support and guidance to address your specific concerns. By utilizing these online resources and support channels, you can ensure you have the information and assistance needed to keep your Bosch Maxx 6 washing machine running smoothly.

Downloading Manuals and Finding Repair Information

Acquiring the correct manual for your Bosch Maxx 6 washing machine is crucial for proper operation and maintenance. Bosch’s official website serves as a primary source. Here, you can often download the specific manual tailored to your exact model number. This ensures you have accurate instructions and safety guidelines. Look for a section dedicated to “Service” or “Support” on the Bosch website to locate the manuals.

Furthermore, numerous third-party websites and online libraries host appliance manuals, including those for Bosch washing machines. Exercise caution when downloading from unofficial sources, ensuring the file is legitimate and virus-free. Look for reputable sites that specialize in appliance manuals. These sites often allow you to search by model number to find the correct document.

For repair information, explore online forums and communities dedicated to appliance repair. These platforms often contain discussions, diagrams, and troubleshooting tips related to common issues with Bosch washing machines. Additionally, websites that sell spare parts for Bosch appliances sometimes provide repair guides or diagrams to assist customers in diagnosing and fixing problems. Remember to consult qualified technicians for complex repairs.

honeywell cross reference guide pdf

Honeywell Cross Reference Guide PDF: An Overview

The Honeywell Cross-Reference Guide PDF serves as a convenient tool for identifying product substitutes. It includes Honeywell, OEM, and competitive manufacturer controls, offering recommended Honeywell cross-references to ensure proper replacements and compatibility.

Purpose of Honeywell Cross Reference Guides

The Honeywell Cross Reference Guides are designed to simplify the identification of suitable replacement parts and components. These guides enable users to quickly find Honeywell equivalents for various OEM and competitor products, reducing downtime and ensuring compatibility. By providing comprehensive cross-referencing, these guides help to avoid errors in product selection, thus maintaining system performance. Moreover, they assist in cost reduction by identifying potentially more efficient or readily available alternatives. The guides also support the transition to newer technologies and help in managing end-of-life products. Ultimately, they ensure optimal operation of HVAC systems and other applications by providing accurate cross-reference data.

Key Components Covered in Honeywell Cross Reference Guides

Honeywell cross-reference guides cover a range of key components, including thermostats, gas controls, relays, contactors, and transformers. These guides provide essential information for finding suitable replacements and ensuring system compatibility.

Commercial Thermostats

Honeywell’s cross-reference guides for commercial thermostats are essential for identifying suitable replacements. These guides often feature models like the webStat Controller T7350 and T7351F, along with Commercial VisionPRO 8000 and CommercialPRO 7000 series. The guides assist in finding equivalents for discontinued or obsolete models, ensuring seamless transitions and continued climate control within commercial buildings. Technicians can utilize these cross-references to maintain optimal system performance and minimize downtime. By using these guides, professionals can quickly identify the correct replacement, saving time and resources on installation and maintenance projects involving commercial thermostat systems. The data helps to ensure precise temperature regulation.

Gas Controls

The Honeywell cross-reference guides provide detailed information on gas controls, crucial for ensuring safe and efficient operation of heating systems. These guides offer cross-references for various gas valves, including universal gas valves and SmartValve technology, enabling technicians to find the appropriate replacements quickly. With comprehensive details on valve sizes and Cv ratings, these guides help in selecting the correct valve for specific applications. They also cover functionalities like electronic ignition and gas flow control. The cross-reference information is essential for avoiding costly mistakes and ensuring compatibility with existing systems. It also helps in reducing labor time by streamlining valve replacement processes.

Relays, Contactors and Transformers

Honeywell cross-reference guides also cover relays, contactors, and transformers, vital components in HVAC systems. These guides help in identifying suitable replacements for various applications, ensuring reliability and safety. Honeywell offers a comprehensive range of these components for both residential and commercial HVAC systems. The cross-reference information enables technicians to find the correct relay, contactor, or transformer based on specific voltage and current requirements. These guides also aid in selecting components for electric heat sequencers and other specialized applications. Proper selection ensures optimal performance and longevity of the HVAC system. The availability of cross-reference data minimizes downtime and simplifies maintenance procedures.

Specific Products Mentioned in Cross Reference Guides

Honeywell cross-reference guides specifically mention products like SmartValve technology and universal gas valves. These references aid in finding suitable replacements and understanding the specifications for each product.

SmartValve Technology

Honeywell SmartValve technology combines gas flow control and electronic ignition into a single, integrated unit. This design offers enhanced safety features and simplifies both wiring and overall appliance construction. The SmartValve system is frequently referenced within Honeywell’s cross-reference guides to provide technicians and installers with accurate replacement information. Its integration streamlines appliance design, reducing complexity and potential failure points.

The cross-reference guides offer detailed compatibility information, ensuring that replacements maintain the required safety and performance standards. These guides highlight the specific models and features, enabling users to select the appropriate SmartValve for their application. They also emphasize its role in improving comfort and temperature sensing.

Universal Gas Valves

Honeywell Universal Gas Valves are designed to reduce inventory and increase job completion rates by offering versatile replacement options. These valves are prominently featured in Honeywell’s cross-reference guides, assisting technicians in finding the right valve for diverse applications. The guides offer detailed specifications, including valve size and Cv rating, to ensure proper selection.

By stocking Honeywell Universal Gas Valves, professionals can minimize downtime and reduce the need for multiple specialized valves. The cross-reference information simplifies the identification process, helping to match specifications and ensuring optimal performance. These valves are engineered for broad compatibility, making them a cost-effective and efficient solution for various systems.

Accessing Honeywell Cross Reference Information

Honeywell cross-reference information is readily available through online resources such as customer.honeywell.com. For direct assistance, you can contact Honeywell at 1-800-328-5111 to access comprehensive support and data.

Online Resources (customer.honeywell.com)

The Honeywell website, specifically customer.honeywell.com, offers extensive cross-reference information. This online portal provides access to various resources, including cross-reference guides, product specifications, and compatibility data. Users can search for specific Honeywell products or competitive models to find suitable Honeywell replacements. The website also offers detailed documentation, such as installation instructions and technical manuals, to aid in the selection and implementation of the correct components. Additionally, the online platform often includes up-to-date information regarding product updates, end-of-life notices, and other important announcements. This digital resource simplifies the process of finding accurate and current cross-reference data.

Contacting Honeywell Directly (1-800-328-5111)

For users seeking personalized assistance or clarification on cross-reference information, contacting Honeywell directly via their customer support line at 1-800-328-5111 is a valuable option. This direct line provides access to knowledgeable representatives who can assist with identifying suitable product replacements, clarifying technical specifications, and addressing any specific inquiries related to Honeywell products and their cross-references. This service is particularly helpful when dealing with complex applications or when needing to verify compatibility between different components. The support team can provide guidance based on specific needs, ensuring the correct product selection for optimal performance.

Importance of Verification

It is crucial to verify all valve specifications for each cross-reference to guarantee the correct valve choice for the intended application. Doing so ensures proper functionality and prevents potential issues.

Valve Specifications

When utilizing Honeywell cross-reference guides, meticulous verification of valve specifications is paramount. Confirming parameters such as valve size and Cv rating is essential to ensure the selected replacement valve aligns precisely with the original’s requirements. Discrepancies in these specifications can lead to suboptimal performance, system inefficiencies, or even equipment damage.

Always compare the critical technical details, including pressure ratings, flow characteristics, and connection types, to guarantee compatibility. Consulting the manufacturer’s documentation and seeking expert advice can further mitigate risks associated with valve replacements. This thorough verification process safeguards against potential issues.

End of Life Product Information

Honeywell provides information regarding products that have reached their end-of-life phase. This includes a comprehensive list of Honeywell BMS sensor part numbers that are no longer in production. The end-of-life status may impact product availability and support. Customers are advised to consult the latest Honeywell documentation or contact Honeywell directly to obtain the most current information on end-of-life products.

Understanding which products are nearing or have reached end-of-life is critical for planning replacements, upgrades, and ensuring continued system functionality. Last Time Buy orders may be accommodated for select products, offering a final opportunity to acquire them.

ecology crossword puzzle answer key pdf

Ecology Crossword Puzzle: Article Plan

This article explores the realm of ecology crossword puzzles, providing solutions. It includes links to answer keys in PDF format. We will examine the benefits of using these puzzles, and reinforcing key concepts. We will also touch on biodiversity and ecosystems.

Ecology crossword puzzles are a captivating and educational tool, perfect for reinforcing knowledge of ecological concepts. They serve as an engaging way to test one’s understanding of ecosystems, biodiversity, conservation, and various other related terms. These puzzles aren’t just for students; they are also suitable for anyone interested in environmental science and nature.

The puzzles typically consist of clues related to ecological terms and concepts, with answers fitting into a grid of intersecting words. Solving these puzzles requires problem-solving skills and cognitive abilities, as one must decipher the clues and recall the correct ecological terms. This exercise helps in solidifying understanding and memory retention.

Ecology crossword puzzles come in various formats, including printable worksheets and interactive online versions. They can cover a wide range of topics, from basic ecological definitions to more complex concepts like food webs, biomes, and environmental management. Some puzzles even focus on specific ecosystems or conservation efforts.

Many resources offer ecology crossword puzzles in PDF format, making them easily accessible for educational purposes. These puzzles often include answer keys for easy checking and self-assessment. The puzzles are a valuable tool for teachers, students, and anyone looking to expand their knowledge of ecology in an enjoyable way.

Benefits of Using Crossword Puzzles in Ecology Education

Crossword puzzles offer numerous advantages as educational tools within the field of ecology. They transform learning into an interactive and enjoyable experience, encouraging active participation from students. This active engagement enhances memory retention and comprehension of key ecological concepts.

One significant benefit is vocabulary reinforcement. Ecology is rich in specialized terminology, and crosswords provide a fun method to familiarize students with these terms. By deciphering clues and fitting words into the grid, learners actively engage with the vocabulary, solidifying their understanding.

Furthermore, crossword puzzles promote problem-solving skills. Students must analyze clues, consider multiple possibilities, and strategically select the correct answers. This process sharpens their critical thinking abilities and enhances their capacity to approach ecological challenges.

Crosswords also serve as effective review tools. They offer a comprehensive overview of various ecological topics, prompting students to recall and connect different concepts. This holistic review aids in building a strong foundation of ecological knowledge.

In addition, crossword puzzles are adaptable to different learning styles and levels. Teachers can customize the puzzles to suit specific curriculum requirements and cater to diverse student needs. This adaptability makes them a versatile resource for ecology education at various levels. The availability of answer keys further supports self-assessment and independent learning.

Key Ecological Concepts Covered in Crosswords

Ecology crosswords frequently cover fundamental concepts such as ecosystems; They explore interactions between living organisms and their environment, including biotic (living) and abiotic (non-living) factors. These puzzles often delve into food webs and food chains, illustrating energy flow through ecosystems.

Another core theme is biodiversity and conservation. Crosswords may feature clues related to endangered species, habitat preservation, and the importance of maintaining ecological balance. They can also address environmental issues like pollution and climate change, promoting awareness of these pressing concerns.

Population ecology is another common topic, encompassing concepts like population growth, carrying capacity, and limiting factors. Crosswords may also touch on community ecology, exploring interspecies relationships such as competition, predation, and symbiosis (commensalism).

Furthermore, these puzzles often include terms related to biomes, such as forests, deserts, and aquatic ecosystems. Students might encounter clues about specific adaptations of organisms to different biomes.

Decomposers, producers, and consumers also appear frequently, reinforcing understanding of trophic levels. Ultimately, ecology crosswords provide a playful yet effective way to solidify comprehension of these core ecological principles. Answer keys support students in their learning journey, ensuring a thorough grasp of the subject matter.

Sources for Ecology Crossword Puzzles (PDF format)

Finding ecology crossword puzzles in PDF format is easier than you might think, thanks to various online educational resources. Many websites offer printable crossword puzzles tailored for different levels of ecology understanding. Educational websites frequently provide downloadable PDFs containing crossword grids, clues, and sometimes even answer keys;

Teachers’ resource websites are another excellent source. These platforms often feature ecology crossword puzzles created by educators, readily available for classroom use. These resources are designed to align with specific curriculum standards, ensuring relevance and accuracy.

Science education websites dedicated to biology and environmental science are invaluable sources. They frequently host collections of ecology-themed crossword puzzles, complete with PDF downloads. These puzzles cover diverse ecological concepts, from food webs to biomes.

Online puzzle generators allow you to create custom ecology crosswords. You can input your own clues and answers, tailoring the puzzle to specific topics. Many generators offer PDF export options, facilitating easy printing and distribution.

Lastly, searching online with keywords like “ecology crossword puzzle PDF” will yield numerous results. Be sure to preview the puzzles before downloading to ensure they align with your needs. Always verify the accuracy of the content, and double-check the included answer keys.

Ecology Crossword Puzzle: Answer Key and Solutions

The ecology crossword puzzle answer key provides vital solutions to the clues, enabling verification and learning. An answer key serves as a guide, confirming the accuracy of responses and facilitating comprehension of ecological concepts. It is an indispensable tool for both students and educators.

Each correct answer in the crossword puzzle corresponds to a specific ecological term or concept. The answer key elucidates these connections, reinforcing vocabulary and deepening understanding. For instance, if a clue refers to an organism that breaks down organic matter, the answer key would reveal “decomposer.”

Solutions are typically presented in a clear, organized manner, aligning with the crossword grid’s numbering system. This allows for easy cross-referencing between clues and answers. Some answer keys may also provide brief explanations of the terms, further enhancing learning.

Accessing the answer key is crucial for self-assessment and effective teaching. It allows individuals to identify areas where they may need additional study. Teachers can use the answer key to assess student understanding and provide targeted instruction.

In essence, the ecology crossword puzzle answer key unlocks a deeper understanding of ecological principles. It transforms a simple puzzle into a valuable learning experience, fostering both knowledge retention and critical thinking skills. Whether used for individual study or classroom instruction, it is an essential component of ecology education.

Customizing Ecology Crossword Puzzles for Specific Topics

Tailoring ecology crossword puzzles to specific topics elevates their educational value, making them more relevant and engaging. Customization allows educators to focus on particular areas of ecology, such as biomes, food webs, or conservation, ensuring targeted learning experiences.

To customize a puzzle, begin by selecting a theme or ecological concept. Then, identify key terms and definitions related to that topic. These terms will form the basis of your crossword puzzle, with clues designed to test understanding of their meanings.

Consider the learning objectives for your students when crafting the clues. Are you aiming to reinforce vocabulary, assess comprehension of complex processes, or encourage critical thinking about environmental issues? The clues should reflect these objectives, challenging students to apply their knowledge.

Numerous online tools and software programs facilitate crossword puzzle creation. These resources often provide customizable templates and allow you to input your own clues and answers. You can also adjust the puzzle’s difficulty level to suit your students’ needs.

Remember to include an answer key for easy grading and self-assessment. The answer key should clearly indicate the correct answers for each clue. By customizing ecology crossword puzzles, educators can create dynamic learning tools that enhance student engagement and promote a deeper understanding of ecological principles.

Using Crossword Puzzles for Vocabulary Reinforcement

Crossword puzzles serve as an engaging and effective tool for reinforcing vocabulary in ecology. By requiring students to recall and apply ecological terms, crosswords solidify their understanding of key concepts. This method moves beyond rote memorization, encouraging active recall and critical thinking.

When designing ecology crosswords for vocabulary reinforcement, focus on terms that are fundamental to the subject. Include definitions, synonyms, or contextual clues that prompt students to think about the meaning of each word. For instance, a clue could be “Organisms that break down organic matter,” with the answer being “Decomposers.”

Vary the difficulty of the clues to cater to different learning levels. Some clues can be straightforward definitions, while others can require students to apply their knowledge in a more complex way. This differentiation ensures that all students are challenged and engaged.

Integrate visuals, such as diagrams or images, to provide additional context for the vocabulary terms. Visual clues can help students make connections between the words and their real-world applications.

After students complete the crossword, encourage them to discuss their answers and explain the meanings of the terms. This collaborative activity reinforces their understanding and helps them learn from each other.

By incorporating crossword puzzles into ecology lessons, educators can create a fun and interactive way to reinforce vocabulary and enhance student learning.

Crossword Puzzles as a Review Tool

Crossword puzzles are invaluable review tools for ecology, offering a fun, engaging alternative to traditional study methods. They prompt students to actively recall learned information, reinforcing their understanding of complex ecological concepts. By testing knowledge in a different format, crosswords highlight areas needing further attention.

When using crosswords for review, tailor the clues to cover key topics from the unit or course. Include questions that assess understanding of definitions, processes, and relationships within ecosystems. For example, clues could focus on food webs, biomes, or symbiotic relationships.

Vary the type of clues to challenge students in different ways. Use definitions, analogies, or fill-in-the-blank statements to test their knowledge from multiple angles. Consider incorporating clues that require students to apply their understanding to real-world scenarios.

To enhance the review process, encourage students to work in pairs or small groups. Collaborative problem-solving promotes discussion and deeper understanding of the material. Students can learn from each other as they work together to decipher the clues.

Provide students with access to resources, such as textbooks or notes, to help them complete the crossword. This allows them to actively engage with the material and reinforce their learning.

Crosswords provide immediate feedback, allowing students to identify areas where they need to focus their studies. The act of completing the puzzle reinforces their understanding and builds confidence.

Examples of Ecology Crossword Clues

Crafting effective crossword clues is crucial for engaging students and reinforcing their understanding of ecological concepts. Clues should be clear, concise, and appropriately challenging, prompting students to recall and apply their knowledge; The clues will reinforce the vocabulary that they need to learn.

Here are some examples of ecology crossword clues:

  1. Across: The process by which plants convert light energy into chemical energy (12 letters). Answer: Photosynthesis
  2. Down: An organism that consumes both plants and animals (8 letters). Answer: Omnivore
  3. Across: A community of interacting organisms and their physical environment (9 letters). Answer: Ecosystem
  4. Down: The role of an organism in its ecosystem (5 letters). Answer: Niche
  5. Across: The variety of life in a particular habitat or ecosystem (11 letters). Answer: Biodiversity
  6. Down: A close and long-term interaction between two different species (10 letters). Answer: Symbiosis
  7. Across: An animal that hunts and eats other animals (8 letters). Answer: Predator

When writing clues, consider using definitions, analogies, or fill-in-the-blank statements. For example:

  • Definition: “The study of the interactions between organisms and their environment.”
  • Analogy: “A lion is to a zebra as a predator is to its ____.”
  • Fill-in-the-blank: “____ is the process of breaking down organic matter.”

Vary the difficulty of the clues to cater to different learning levels. Include some easier clues to build confidence and more challenging clues to stretch students’ thinking.