Monthly Archives: December 2025

troy bilt 2700 psi pressure washer manual

Troy-Bilt 2700 PSI Pressure Washer Manual: A Comprehensive Guide

This guide details the Troy-Bilt 2700 PSI pressure washer, offering insights into its operation, maintenance, and troubleshooting, alongside manual access options.

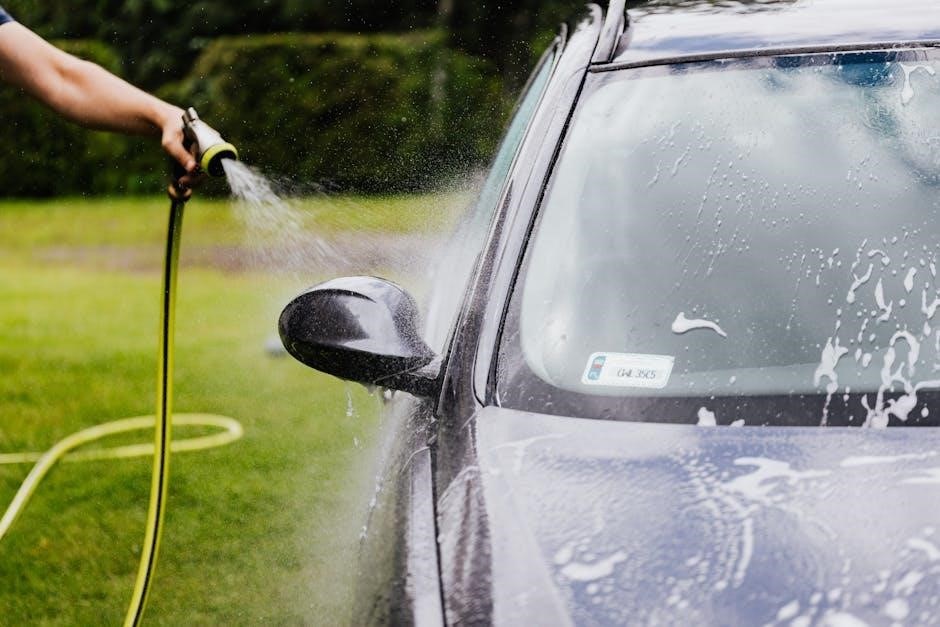
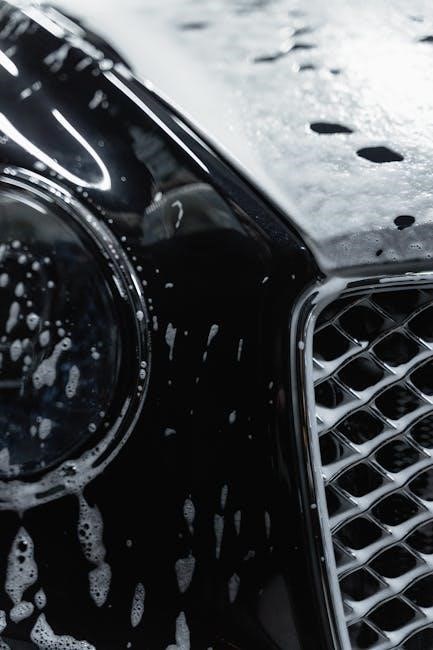
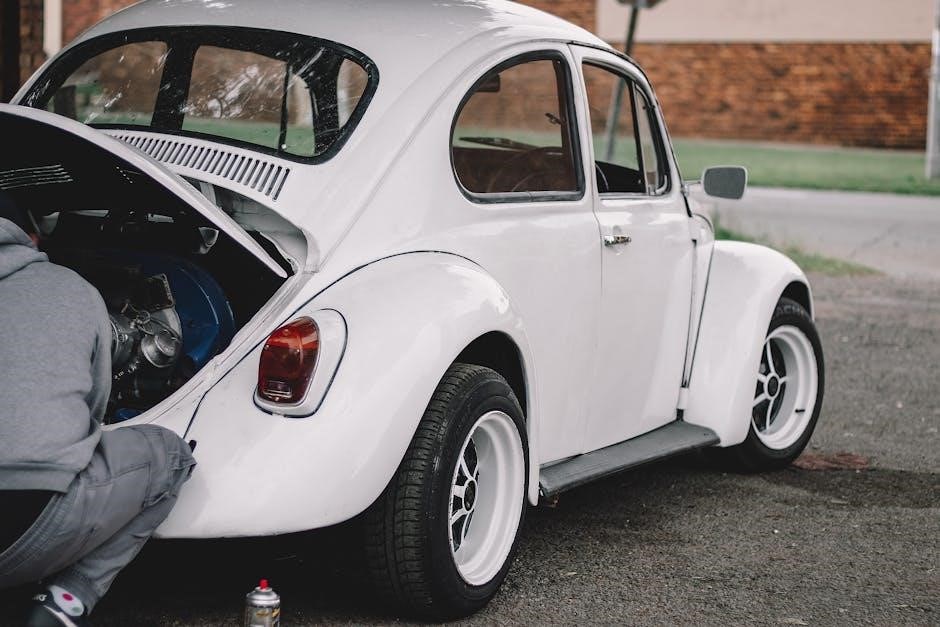
The Troy-Bilt 2700 PSI Pressure Washer is a powerful cleaning tool designed for a variety of outdoor tasks, from washing vehicles and siding to preparing surfaces for staining or painting. This model, often associated with the 020207 owner’s manual, delivers substantial cleaning power thanks to its robust engine – frequently a GCV160 – and efficient pump.

Understanding its features and proper operation is crucial for maximizing its lifespan and ensuring optimal performance. This manual serves as a vital resource, providing step-by-step instructions for assembly, operation, and maintenance. Common concerns, like a hard pull cord or engine shutdown after running dry, are addressed within its pages, helping users diagnose and resolve issues effectively. Accessing the manual, whether in PDF, JP2, or via torrent downloads from resources like The Manual Library, is essential for all owners.

Understanding the Manual’s Importance

The Troy-Bilt 2700 PSI Pressure Washer manual isn’t merely a collection of instructions; it’s a critical guide to safe and effective operation. It details essential safety precautions, preventing potential injury during use. Proper assembly, as outlined within, ensures optimal performance and avoids damage to the unit.

Furthermore, the manual provides invaluable troubleshooting advice. Issues like a hard pull cord, often stemming from internal resistance, or engine shutdown due to overheating (typically from running without water) are clearly explained, along with potential solutions. Downloading a copy – in PDF, JP2, or even via torrent from sites like The Manual Library – grants readily available access to this vital information, extending the life of your pressure washer and maximizing its cleaning power.

Safety Precautions and Warnings

Always read the manual before operation; heed all warnings to prevent injury, especially regarding high-pressure spray and potential engine-related hazards.

General Safety Rules

Before operating the Troy-Bilt 2700 PSI pressure washer, thoroughly familiarize yourself with all safety guidelines outlined in the owner’s manual. Always wear safety glasses or goggles to protect your eyes from debris. Securely wear appropriate footwear, and avoid operating the machine barefoot or in sandals. Never point the wand at yourself or others.

Ensure a stable and level working surface. Keep children and pets away from the operating area. Do not modify the pressure washer in any way, as this could compromise safety features. Inspect hoses for damage before each use, and replace them if necessary. Avoid using flammable liquids or solvents in the pressure washer. Always disconnect the power source before performing any maintenance or repairs. Be mindful of the high-pressure spray and its potential to cause injury.

Specific Warnings for the 2700 PSI Model

The Troy-Bilt 2700 PSI model generates high-pressure spray, demanding extra caution. Be aware that running the unit without water can cause severe overheating and internal damage to the pump, potentially voiding the warranty. A hard pull cord may indicate engine issues; do not force it, and consult a qualified technician.

Regularly inspect the engine for oil leaks and ensure proper ventilation during operation. Never operate the pressure washer in enclosed spaces. Pay close attention to nozzle selection, as incorrect nozzle usage can damage surfaces. Avoid prolonged use at maximum pressure, as this can strain the engine and pump. Always follow the recommended maintenance schedule to prevent issues and ensure safe operation.

Assembly and Setup

Proper assembly involves unboxing components, connecting the water supply and hoses, and performing an initial engine setup for optimal performance.

Unboxing and Component Identification

Upon receiving your Troy-Bilt 2700 PSI pressure washer, carefully inspect the box for any shipping damage. Once opened, verify all listed components are present. These typically include the pressure washer unit itself, the high-pressure hose, a trigger gun, various nozzles (soap, 0°, 15°, 25°), a detergent tank, and this owner’s manual.

Refer to the manual’s parts diagram to accurately identify each component. Note the specific connections for the hose and trigger gun. Pay close attention to any included quick-connect fittings. Ensure all protective packaging is removed before proceeding. A ruler can be helpful to understand component sizes, as noted in some online resources. Missing parts should be reported to the retailer immediately for replacement.

Connecting Water Supply and Hoses

Before starting, ensure a reliable water supply is available, capable of delivering at least 2.0 gallons per minute at 20 PSI. Connect the water inlet hose to both the pressure washer’s water inlet and a standard garden hose. Securely tighten all connections to prevent leaks.

Next, attach the high-pressure hose to the trigger gun and then to the pressure washer’s high-pressure outlet. Again, ensure a snug fit. Before operation, fully open the water supply valve. Briefly depress the trigger on the gun to purge air from the hose – this is crucial for optimal performance. Inspect all hose connections for leaks before initiating the engine.

Starting the Engine – Initial Setup

Prior to the first start, check the engine oil level, ensuring it’s within the recommended range – typically using the dipstick. Add oil if necessary, using the specified type (refer to the manual for details). Verify the fuel tank contains fresh gasoline. To start, turn the fuel valve to the ‘ON’ position and set the choke to ‘START’ if the engine is cold.

Gently pull the starter cord until resistance is felt, then pull firmly and smoothly. Once the engine starts, gradually adjust the choke to the ‘RUN’ position. Allow the engine to warm up for a few minutes before applying full pressure. Always ensure the area is well-ventilated during operation.

Operating Instructions

Proper operation involves powering the unit on/off, adjusting pressure settings, and selecting appropriate nozzles for various cleaning tasks effectively and safely.

Powering On and Off

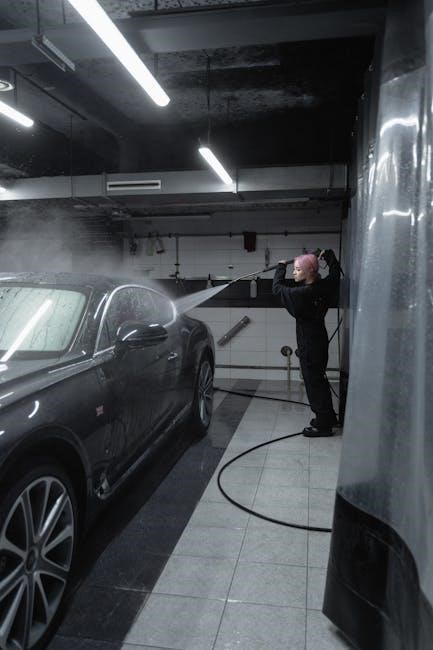
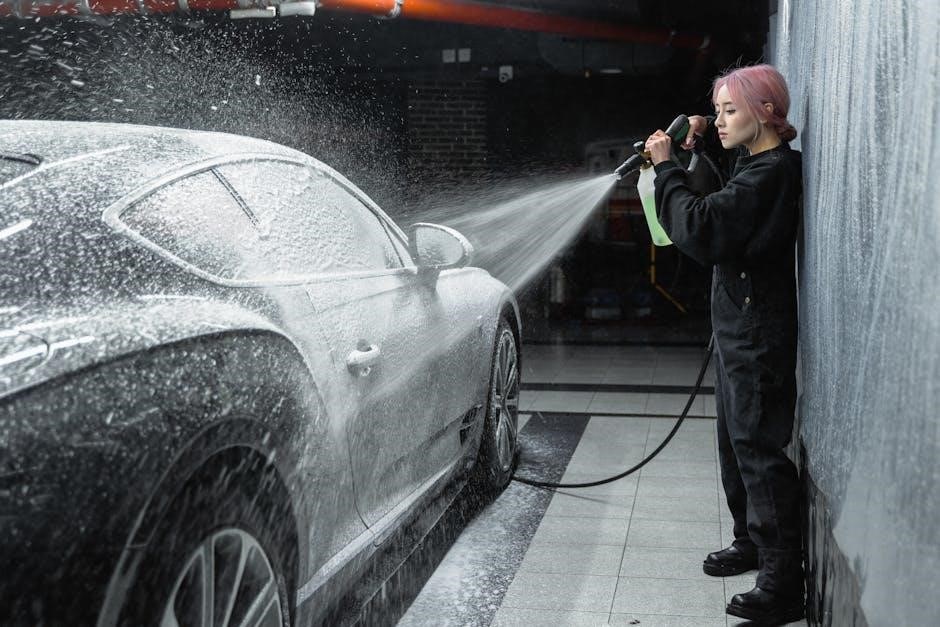
Starting the Troy-Bilt 2700 PSI pressure washer requires ensuring the water supply is connected and the unit is properly assembled. First, verify the power switch is in the “OFF” position. Then, turn on the water supply fully. After that, squeeze the trigger on the spray gun to release any trapped air, and wait until a steady stream of water flows.

To start the engine, turn the ignition key to the “ON” position and gently pull the starter cord until the engine ignites. Once running, gradually increase the throttle. To shut down, turn the ignition key to “OFF” and release the trigger on the spray gun. Always disconnect the water supply and drain the hoses after each use to prevent freezing and damage.

Adjusting Pressure Settings

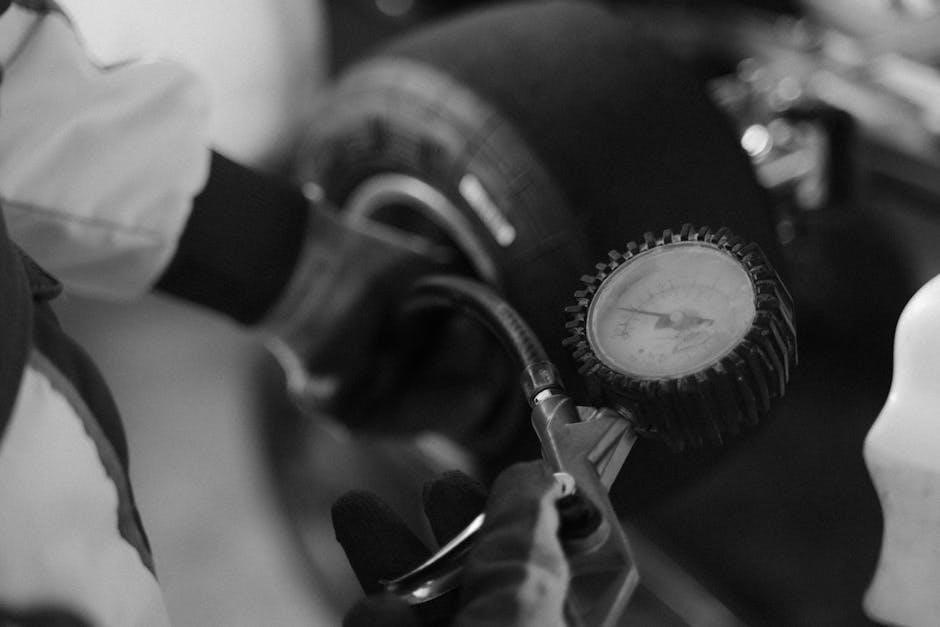
The Troy-Bilt 2700 PSI pressure washer allows for adjustable pressure, crucial for various cleaning tasks. Pressure adjustment is typically achieved using an unloader valve, often controlled by a knob or dial. Turning the knob clockwise generally increases pressure, while counterclockwise decreases it.

Begin with the lowest pressure setting and gradually increase it until you achieve the desired cleaning power. Always test the pressure on an inconspicuous area first to avoid damage. Different nozzles also affect pressure; narrower nozzles create higher pressure. Understanding these adjustments ensures effective cleaning without causing harm to surfaces. Refer to the manual for specific details on your model’s unloader valve.

Nozzle Selection and Usage

The Troy-Bilt 2700 PSI pressure washer comes with multiple nozzles, each designed for specific cleaning applications. A 0-degree nozzle delivers a concentrated, powerful stream for stubborn dirt, but use it cautiously to avoid damage. A 15-degree nozzle is suitable for general cleaning tasks like driveways. 25-degree nozzles are ideal for more delicate surfaces like painted wood;

A 40-degree nozzle provides a wider spray pattern for rinsing. The soap nozzle (often black) is for applying detergent. Always ensure the nozzle is securely attached before operation. Incorrect nozzle usage can lead to ineffective cleaning or surface damage. Consult your manual for detailed nozzle guides.

Maintenance and Troubleshooting

Regular upkeep and problem-solving are crucial for your Troy-Bilt 2700 PSI washer; common issues include a hard pull cord and engine shutdown.

Routine Maintenance Schedule

Maintaining your Troy-Bilt 2700 PSI pressure washer ensures longevity and optimal performance. After each use, disconnect the water supply and power cord, then drain all water from the pump and hoses to prevent freezing and corrosion. Monthly, inspect hoses for cracks or leaks, and clean nozzles to remove debris.

Every 50 hours of operation, change the engine oil using the recommended grade (refer to the engine specifications). Annually, inspect the spark plug and replace if necessary, and check the air filter, cleaning or replacing it as needed. Before storing for extended periods, winterize the unit by adding pump protector to prevent internal damage from freezing. Consistent adherence to this schedule will minimize potential issues and maximize the lifespan of your pressure washer.

Addressing Common Issues: Hard Pull Cord

A hard pull cord on your Troy-Bilt 2700 PSI pressure washer often indicates a few potential problems. First, check the engine oil level; low oil can create significant resistance. Second, inspect the spark plug – a fouled or damaged plug hinders combustion. Third, ensure the air filter is clean, as a clogged filter restricts airflow.

If these checks don’t resolve the issue, the compression release valve might be faulty, requiring professional attention. Avoid forcing the cord, as this can damage the starter mechanism. Regular maintenance, including oil changes and air filter cleaning, proactively prevents this issue. Consult the manual for detailed diagrams and troubleshooting steps specific to your model.

Engine Shutdown After Running Without Water – Causes and Solutions

Running a Troy-Bilt 2700 PSI pressure washer without water is a critical error, often leading to overheating and automatic shutdown. The pump relies on water for lubrication and cooling; its absence causes rapid temperature increases, triggering a thermal sensor to protect the engine. Prolonged operation in this state can inflict severe internal damage to the pump itself;

To prevent this, always ensure a consistent water supply. If shutdown occurs, allow the unit to cool completely before restarting. Inspect for damage; overheating may necessitate pump replacement. Refer to your manual for specific thermal sensor reset procedures, if applicable, and prioritize preventative maintenance to avoid recurrence.

Winterizing Your Pressure Washer

Proper winterization is crucial to protect your Troy-Bilt 2700 PSI pressure washer from freezing temperatures. Begin by disconnecting the water supply and hoses, then drain all remaining water from the pump and hoses. Utilize a pump saver kit, adding antifreeze to the pump to prevent internal component damage. Empty the oil and replace it with fresh oil, ensuring complete engine lubrication before storage.

Clean the exterior thoroughly, removing any debris. Store the unit in a dry, protected location, ideally indoors. Consider covering it to prevent dust accumulation. Following these steps will ensure your pressure washer is ready for use when spring arrives, extending its lifespan significantly.

Detailed Component Breakdown

This section provides a thorough examination of the Troy-Bilt 2700 PSI’s key components, including engine (GCV160) and pump specifications, plus nozzle details.

Engine Specifications (GCV160)

The Troy-Bilt 2700 PSI pressure washer utilizes the Honda GCV160 engine, a reliable and widely-used powerplant known for its durability and performance. This engine is a single-cylinder, four-stroke, overhead valve (OHV) design. It boasts a displacement of 160cc, providing ample power for various cleaning tasks.

Key specifications include a 0.47-gallon fuel capacity and a net power output of approximately 5.5 horsepower. The GCV160 engine features a recoil starter for easy ignition and operates on unleaded gasoline with a minimum octane rating of 87. It’s designed for efficient combustion and reduced emissions, contributing to a more environmentally friendly operation. Regular oil changes, using the recommended SAE 30 oil, are crucial for maintaining optimal engine performance and longevity.

Furthermore, the engine incorporates a cyclonic air filter system for enhanced filtration and extended service intervals.

Pump Specifications

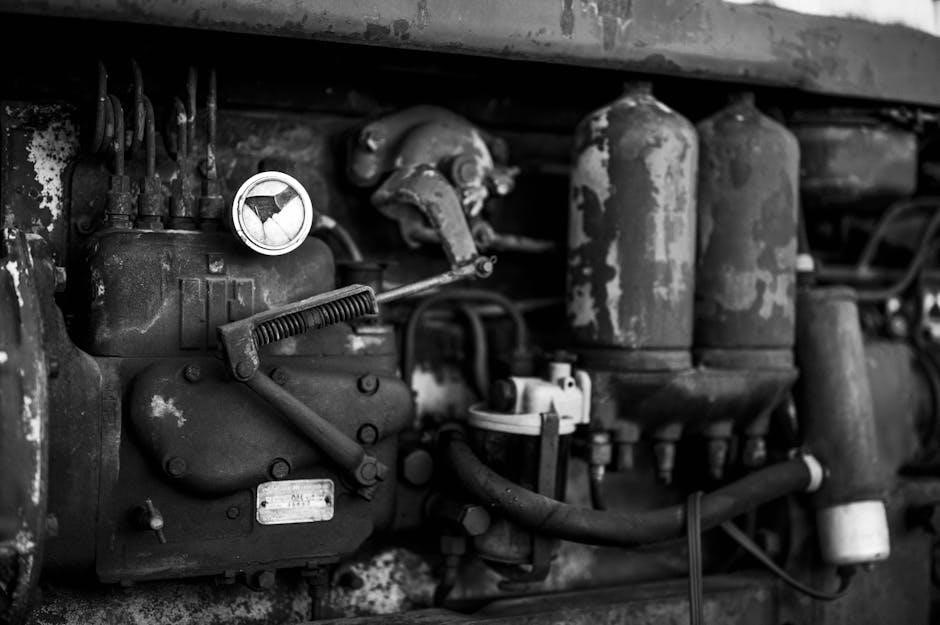
The Troy-Bilt 2700 PSI pressure washer features a robust axial cam pump designed for efficient water delivery and consistent pressure. This pump is capable of generating a maximum pressure of 2700 pounds per square inch (PSI) and a flow rate of 2.3 gallons per minute (GPM). These specifications combine to deliver substantial cleaning power for a wide range of applications.

Constructed with durable materials, the pump incorporates ceramic pistons to withstand high pressure and resist wear. It’s designed for longevity and reliable performance, even under demanding conditions. The pump also includes a thermal relief valve to prevent overheating and protect internal components when the trigger is released.

Proper maintenance, including regular inspection and cleaning of the water inlet filter, is essential for optimal pump function.

Nozzle Types and Applications

The Troy-Bilt 2700 PSI pressure washer typically includes a selection of quick-connect nozzles, each designed for specific cleaning tasks. A 0-degree nozzle delivers a concentrated, powerful stream ideal for removing stubborn dirt and grime from hard surfaces, but use caution as it can damage softer materials.

A 15-degree nozzle provides a narrower spray pattern for more focused cleaning, suitable for driveways and patios. The 25-degree nozzle offers a wider spray for general cleaning tasks like washing cars and siding. A 40-degree nozzle is best for delicate surfaces, and a soap nozzle creates a low-pressure spray for applying detergents.

Always select the appropriate nozzle for the surface being cleaned to avoid damage and ensure effective results.

Finding and Downloading the Manual

Accessing the Troy-Bilt 2700 PSI manual is possible through the official website, third-party libraries like The Manual Library, or via PDF/torrent downloads.

Official Troy-Bilt Website Resources

The official Troy-Bilt website serves as the primary hub for accessing your 2700 PSI pressure washer manual and related documentation. Navigating to their support section allows users to search for manuals using the model number – 020207 is frequently associated with this model.

Typically, you can find downloadable PDF versions of the owner’s manual, parts lists, and safety guidelines. Registration of your product may be required to unlock certain resources or receive updates. The website also often features frequently asked questions (FAQs) and troubleshooting guides that can address common issues.

Furthermore, Troy-Bilt provides contact information for customer support, enabling direct assistance if you encounter difficulties locating the manual or require further clarification. Regularly checking the official website ensures you have the most current version of the documentation available.

Third-Party Manual Libraries (The Manual Library)

The Manual Library presents a valuable alternative source for locating the Troy-Bilt 2700 PSI pressure washer manual. This online repository compiles user manuals from various manufacturers, including Troy-Bilt, offering a convenient platform for searching and downloading documentation.

Users can find multiple versions of the manual, potentially including different formats like PDF, JP2, and even torrent files. The site often hosts manuals uploaded by other users, expanding the availability of resources. It’s important to verify the manual’s accuracy and relevance to your specific model number (020207).

While a helpful resource, exercise caution when downloading files from third-party sites and ensure your antivirus software is up-to-date. The Manual Library provides a community-driven approach to manual access, supplementing the official Troy-Bilt website.

PDF, JP2, and Torrent Download Options

When seeking the Troy-Bilt 2700 PSI pressure washer manual, several download formats are commonly encountered: PDF, JP2, and torrent files. PDF (Portable Document Format) is the most user-friendly, preserving the manual’s original layout and ensuring compatibility across devices. JP2 (JPEG 2000) offers compressed image-based versions, potentially smaller in file size but sacrificing text searchability.

Torrent files represent a peer-to-peer file-sharing method, offering potentially faster download speeds but carrying inherent risks. Downloading torrents may expose your device to malware and could violate copyright laws depending on the source. Exercise extreme caution and utilize reputable antivirus software.

Prioritize official sources or trusted manual libraries for PDF downloads. Always scan downloaded files before opening them, regardless of the format, to safeguard your system’s security.

rc 1 loop station manual

RC Loop Station Manual: An Overview

This manual details RC loop stations, covering basics, components, setup, operation, maintenance, and resources like RCFans and RC-Network for enthusiasts.

What is an RC Loop Station?

An RC Loop Station represents a captivating sub-genre within the broader realm of radio control (RC) vehicles. Essentially, it’s a specifically designed track configuration – a continuous loop – intended for remote-controlled cars, offering a unique and engaging driving experience. Unlike traditional, open-ended RC courses, loop stations prioritize sustained, high-speed runs and the mastery of controlled drifts and jumps.

These stations cater to diverse RC interests, from casual hobbyists to competitive racers. The internet buzzes with communities like RCFans and RC-Network, showcasing various loop station builds and modifications. They range from simple, homemade tracks to elaborate, professionally constructed setups. The core appeal lies in the challenge of maintaining momentum and navigating the loop flawlessly, demanding precision and skill from the operator.

RC, short for Radio Control, encompasses a wide array of remotely operated vehicles, and loop stations are a thrilling extension of this hobby.

Understanding Radio Control (RC) Basics

Radio Control (RC) fundamentally relies on wireless communication between a transmitter – held by the operator – and a receiver within the RC vehicle. This system translates the operator’s commands (steering, throttle) into electronic signals that control the vehicle’s motor and steering mechanisms. RC isn’t limited to cars; it extends to aircraft, boats, and even drones, all sharing this core principle.

Key components include the radio transmitter, receiver, Electronic Speed Controller (ESC), motor, and battery. Online resources like RCFans and RC-Network highlight the importance of understanding these elements. The ESC regulates power to the motor, dictating speed, while the battery provides the necessary energy. Different frequencies are used for transmission, minimizing interference.

RC is a broad hobby, and mastering these basics is crucial for enjoying and maintaining your loop station.

Components of an RC Loop Station

Essential parts include the chassis, motor with ESC, radio transmitter/receiver, and a robust battery system – powering thrilling RC action and performance.

The Chassis and Body

The chassis forms the foundational structure of your RC loop station, providing rigidity and mounting points for all other components. Materials commonly used include plastic, carbon fiber, and aluminum, each offering varying degrees of strength, weight, and flexibility.

The body shell, often made of polycarbonate (Lexan), protects internal parts from debris and impacts while contributing to the vehicle’s aerodynamics and visual appeal. Bodies come in diverse styles, mirroring real-world vehicles like trucks or buggies.

Choosing the right chassis and body depends on your intended use and driving surface. For rough terrain, a durable chassis and robust body are crucial. For speed runs, a lightweight chassis and aerodynamic body are preferred; Consider factors like wheelbase, track width, and ground clearance for optimal performance.

Motor and ESC (Electronic Speed Controller)

The motor provides the power to drive your RC loop station’s wheels. Brushed motors are simpler and more affordable, while brushless motors offer greater efficiency, power, and longevity. Motor selection depends on your desired speed and torque.

An Electronic Speed Controller (ESC) regulates the power delivered to the motor, controlling its speed and direction based on signals from the receiver. ESCs are rated by amperage, which must match or exceed the motor’s requirements.

Proper ESC calibration is essential for smooth operation and optimal performance. Modern ESCs often feature programmable settings for features like braking force and throttle curves. Selecting a quality motor and ESC pairing is crucial for reliable and enjoyable operation.

Radio Transmitter and Receiver

The radio transmitter is your control interface, sending commands to the RC loop station. Transmitters typically operate on the 2.4GHz frequency band, offering reliable performance and minimal interference. They feature joysticks and triggers for steering and throttle control.

The receiver, installed within the loop station, decodes the signals from the transmitter and relays them to the ESC and steering servo. Compatibility between the transmitter and receiver is vital; they must use the same protocol.

“Binding” the transmitter and receiver establishes a unique connection, preventing interference from other RC vehicles. Ensure a strong signal and proper antenna placement for optimal range and control.

Battery and Power System

The battery is the heart of your RC loop station’s power, determining runtime and performance. Lithium Polymer (LiPo) batteries are commonly used due to their high energy density and discharge rates. Battery capacity is measured in mAh (milliampere-hours), indicating how long the station can run.

Voltage (V) is crucial; match the battery voltage to the ESC and motor specifications. Using an incorrect voltage can damage components. A dedicated LiPo charger is essential for safe and efficient charging.

Proper battery care extends its lifespan; avoid overcharging, deep discharging, and physical damage. Always store LiPo batteries in a fireproof bag when not in use.

Setting Up Your RC Loop Station

Proper setup involves assembling the chassis, installing the motor and ESC, connecting the battery, and crucially, binding the transmitter and receiver for control.

Assembling the Chassis

Begin by carefully unpacking all chassis components, referencing the parts list to ensure everything is present. Lay out the components in an organized manner. The chassis typically consists of a base plate, side rails, and mounting points for other components.

Follow the manufacturer’s instructions meticulously, often involving screws, nuts, and potentially adhesives. Pay close attention to the orientation of each part; incorrect assembly can lead to handling issues. Ensure all screws are tightened securely, but avoid over-tightening, which could strip threads or damage the chassis material.

Double-check the alignment of the axles and suspension components. A properly assembled chassis provides a stable foundation for the entire RC loop station, impacting performance and durability. Take your time and prioritize accuracy during this crucial step.

Installing the Motor and ESC

Carefully mount the motor to the chassis using the provided screws, ensuring it’s securely fastened and aligned with the drivetrain. Connect the motor wires to the Electronic Speed Controller (ESC), observing the correct polarity – typically matching wire colors.

The ESC should be positioned to allow for adequate airflow to prevent overheating. Secure the ESC to the chassis using double-sided tape or mounting screws. Connect the ESC’s power wires to the battery connector, again paying attention to polarity.

Finally, connect the ESC’s signal wire to the receiver. Double-check all connections before proceeding, ensuring they are firm and properly insulated. A correctly installed motor and ESC deliver smooth, controlled power to your RC loop station.

Connecting the Battery

Before connecting the battery, ensure the transmitter is switched off to prevent accidental activation. Identify the battery connector type and match it to the ESC’s input connector. Most RC loop stations utilize a standard connector, but adapters may be needed.

Carefully align the polarity – red wire typically indicates positive (+), and black indicates negative (-). Incorrect polarity can permanently damage the ESC and battery. Securely connect the battery, ensuring a snug fit.

Consider using a battery strap or Velcro to prevent the connector from detaching during operation. Always inspect the battery for any signs of damage before use. Proper battery connection is crucial for safe and reliable performance.

Binding the Transmitter and Receiver

Binding establishes a unique connection between your transmitter and receiver, preventing interference from other RC systems. Consult your specific transmitter and receiver manuals for detailed binding instructions, as procedures vary. Typically, this involves powering off both units, then initiating binding mode on the transmitter.

Next, power on the receiver; it should enter binding mode automatically. A successful bind is usually indicated by a solid LED light on the receiver. If binding fails, repeat the process, ensuring both units are close together and free from interference.

A secure bind is essential for reliable control of your RC loop station. Verify the connection before each use.

Operating Your RC Loop Station

Master basic controls for driving, steering, and throttle adjustments. Explore advanced techniques like drifting and jumping for enhanced RC loop station fun!

Basic Driving Controls

Understanding the transmitter is key. The right stick typically controls throttle – pushing forward accelerates, pulling back brakes or reverses. Steering is usually managed with the left stick; left steers left, right steers right.

Begin with gentle throttle inputs to get a feel for the loop station’s acceleration. Practice steering in open spaces, making wide turns initially. Coordinate throttle and steering for controlled movement. Avoid sudden, jerky movements, especially at higher speeds.

Familiarize yourself with the transmitter’s trim adjustments; These fine-tune steering and throttle, correcting for slight deviations. Consistent practice builds muscle memory and improves control, allowing for more precise maneuvers and enjoyable operation of your RC loop station.

Steering and Throttle Adjustment

Fine-tuning is crucial for optimal performance. Utilize the trim controls on your transmitter to correct for unwanted steering drift or throttle bias. If the loop station veers to one side, adjust the steering trim until it tracks straight. Similarly, if it creeps forward or backward when neutral, adjust the throttle trim.

Many transmitters offer adjustable endpoints. These limit the maximum steering angle and throttle output, preventing oversteering or excessive speed. Experiment with these settings to find a comfortable and controllable range.

Dual-rate functionality allows for varying steering sensitivity. Lower rates provide more precise control at higher speeds, while higher rates offer quicker response for maneuvering. Mastering these adjustments enhances handling and responsiveness.

Advanced Techniques: Drifting & Jumping

Once comfortable with basic control, explore drifting and jumping. Drifting requires precise throttle control and counter-steering; initiate a powerslide by applying throttle while turning sharply. Practice on smooth surfaces to develop the necessary finesse.

Jumping demands careful speed management and throttle modulation mid-air. Approach ramps at a consistent speed, and use the throttle to adjust your trajectory. Landing smoothly requires reducing throttle just before impact and absorbing the shock with the suspension.

Experiment with different ramp angles and speeds to master jump techniques. Remember safety first – always jump in a clear, open area!

Maintenance and Troubleshooting

Regular cleaning, lubrication, and battery care are crucial. Address common issues like binding servos or erratic motor behavior promptly for optimal performance.

Cleaning and Lubrication

Maintaining cleanliness is paramount for your RC loop station’s longevity and performance. After each use, carefully inspect the chassis for dirt, debris, and any signs of wear. Use a soft brush and compressed air to remove loose particles from all components, especially around the motor, gears, and suspension points.

Lubrication is equally important. Apply a small amount of silicone-based lubricant to gears, bearings, and moving parts to reduce friction and ensure smooth operation. Avoid using oil-based lubricants, as they can attract dirt. Pay close attention to the steering linkages and wheel axles. Regularly check and tighten any loose screws or fasteners, as vibrations during operation can cause them to loosen over time. A clean and well-lubricated RC loop station will provide hours of reliable fun!

Battery Care and Charging

Proper battery care is crucial for maximizing performance and lifespan. Always use a LiPo-compatible charger specifically designed for your battery type. Never leave batteries unattended while charging, and always charge them on a fireproof surface. Monitor the charging process closely and disconnect the battery immediately if it becomes hot or swollen.

Storage is also vital. When not in use, store batteries in a cool, dry place at a storage voltage (typically around 3.8V per cell). Avoid extreme temperatures and direct sunlight. Regularly check batteries for any signs of damage, such as punctures or swelling. Discharging batteries completely can damage them, so avoid letting them sit fully discharged for extended periods. Following these guidelines will ensure safe and reliable battery operation.

Common Issues and Solutions

Experiencing issues? Here’s a quick guide. If your RC loop station isn’t responding, first check the battery connection and ensure it’s fully charged. Binding issues between the transmitter and receiver can often be resolved by repeating the binding procedure outlined in the setup section.

For motor problems, inspect the ESC for overheating or damage. A faulty ESC may require replacement. Steering issues could stem from loose linkages or a malfunctioning servo; tighten connections and test the servo’s range of motion. If drifting or jumping feels unstable, adjust the suspension settings or consider upgrading tires for better grip. Online forums like RCFans and RC-Network offer extensive troubleshooting advice from experienced users.

Resources and Communities

Connect with fellow enthusiasts! Explore online forums like RCFans and RC-Network, and visit local model shops for parts and expert advice.

Online Forums (RCFans, RC-Network)

Engage with a vibrant community of RC enthusiasts through dedicated online forums. RCFans, a popular platform, provides a wealth of global RC information, including discussions on loop station builds, modifications, and troubleshooting. You’ll find video content showcasing impressive loop performances, like the X-Maxx 8S tackling challenging terrains.

RC-Network.de offers a comprehensive platform for RC model building, featuring classifieds, a magazine, and a wiki. It’s a great resource for discovering new products, techniques, and connecting with other builders. These forums often host discussions on specific components, such as JConcepts Axial parts or Kyosho models, providing valuable insights for your loop station project.

Many forums, like the Chinese RC model forum, cater to specific interests and languages, broadening your access to knowledge and support. XenForo powers many of these communities, ensuring a user-friendly experience.

Model Shops and Suppliers

Sourcing components is crucial for your RC loop station build. Local model shops offer personalized advice and immediate access to essential parts like motors, ESCs, and chassis components. Online suppliers expand your options, providing a wider selection and competitive pricing.

Consider suppliers specializing in specific brands, such as those carrying JConcepts parts for Axial vehicles or HUDY tires for off-road racing. DH-Colorworks, known for high-quality paints and finishes, can enhance your loop station’s aesthetics.

Websites like RC-Network.de also feature classifieds where you can find used or new parts from other enthusiasts. Remember to check for compatibility and quality when purchasing from any supplier. Exploring various options ensures you obtain the best components for a successful and enjoyable loop station experience.

indesit washing machine manual 7kg

Indesit 7kg Washing Machine Manual: A Comprehensive Guide (Updated 12/16/2025)

Today’s date is 12/16/2025 15:40:35. This guide assists users with their Indesit 7kg washing machine, offering efficiency, reliability, and functionality for a dynamic lifestyle.

Welcome! This manual serves as your comprehensive guide to operating and maintaining your new Indesit 7kg washing machine. Indesit appliances are designed for individuals embracing a dynamic lifestyle, prioritizing efficiency, reliability, and practical functionality. We understand the importance of a dependable washing machine in today’s busy world, and this model is engineered to deliver consistent performance.

This 7kg capacity machine offers ample space for your laundry needs, accommodating various fabric types and wash loads. Indesit’s commitment extends beyond just cleaning; it’s about preserving the quality of your garments while simplifying your routine. From understanding the control panel to mastering specialized wash cycles, this manual will empower you to maximize your machine’s potential.

Whether you’re a first-time washing machine owner or simply seeking a refresher, this guide provides clear, step-by-step instructions. We’ll cover everything from initial setup and safety precautions to troubleshooting common issues, ensuring a seamless and satisfying laundry experience. Explore innovative features designed for your home and family!

Understanding the Key Features

Your Indesit 7kg washing machine boasts several key features designed for optimal performance and convenience. The 7kg drum capacity provides generous space for family-sized loads, reducing the frequency of washes. A notable feature is the adjustable spin speed, allowing you to tailor the cycle to different fabric types – a 1200rpm spin is standard, balancing effective water extraction with garment care.

The machine incorporates multiple wash cycles, catering to everything from delicate items to heavily soiled clothes. Features like a delay start function offer flexibility, enabling you to schedule washes around your lifestyle. Safety is paramount, with a child lock function preventing accidental program alterations.

Indesit prioritizes food preservation and freshness in their appliances, and this extends to laundry care. The machine’s design focuses on efficient water and energy consumption, contributing to a more sustainable household. Explore the innovative functions designed to simplify your laundry routine and enhance the care of your clothes, benefiting both your home and family.

Safety Precautions

Important Safety Instructions: Before operating your Indesit 7kg washing machine, carefully review these precautions to ensure safe and reliable use. Always ensure the machine is properly grounded to prevent electric shock. Never attempt to repair the appliance yourself; contact authorized Indesit support for assistance.

Keep children and pets away from the washing machine during operation. Activate the child lock feature when the machine is not in use to prevent accidental program changes or access. Do not overload the machine, as this can cause damage and affect performance. Avoid washing flammable materials.

Inspect the power cord regularly for damage and replace it if necessary. Disconnect the machine from the power supply before cleaning or performing maintenance. Never immerse the machine in water. Indesit appliances are designed with safety in mind, but responsible usage is crucial for preventing accidents and maintaining optimal functionality for your home and family.

Initial Setup and Installation

Preparing for Installation: Upon receiving your Indesit 7kg washing machine, carefully inspect it for any shipping damage. Remove all packaging materials, including transit bolts located on the rear of the appliance – these must be removed before operation to prevent damage during the wash cycle. Ensure the installation surface is level and stable to minimize vibration and noise.

Position the machine in a well-ventilated area, allowing sufficient space around it for proper airflow and access for maintenance. Check that the electrical outlet is compatible with the machine’s power requirements. Before connecting the water supply and drainage hoses, verify that the water pressure is within the specified range.

Refer to the included installation guide for detailed diagrams and instructions. Proper setup is crucial for optimal performance and longevity of your Indesit appliance, ensuring years of reliable service for your household needs.

Connecting Water Supply and Drainage

Water Inlet Connection: Carefully connect the supplied water inlet hose to both the washing machine and a suitable water tap. Ensure the connection is tight to prevent leaks. Use the provided washers to create a watertight seal. The Indesit 7kg model requires a standard cold water supply; hot water connections are not typically utilized.

Drainage Hose Installation: Attach the drainage hose securely to the designated outlet on the washing machine and position the other end into a standpipe or securely over the edge of a sink. The drainage hose should not be kinked or submerged in water, as this can cause siphoning and disrupt the drainage process.

Double-check all connections for leaks after initial setup. Proper water supply and drainage are essential for the efficient operation of your washing machine, preventing potential water damage and ensuring optimal cleaning performance.

Loading Laundry Correctly

Distribute Items Evenly: To ensure optimal washing performance with your Indesit 7kg machine, distribute laundry items evenly inside the drum. Avoid overloading, as this can hinder proper cleaning and potentially damage the machine. A 7kg capacity refers to dry weight; consider the bulkiness of items.

Separate Laundry Types: Always separate laundry by color, fabric type, and soil level. Wash delicate items separately, using a laundry bag for added protection. Remove any small objects, like coins or keys, from pockets to prevent damage to the drum and other components.

Avoid Tangling: Loosely place items into the drum, avoiding tightly packed bundles that can become tangled during the wash cycle. Proper loading promotes effective cleaning and minimizes wear and tear on your clothes and the washing machine itself.

Control Panel Overview

Programme Selector Dial: The central dial allows you to choose from a variety of wash programmes, tailored to different fabric types and soil levels. Options typically include cottons, synthetics, delicates, wool, and quick wash cycles. Refer to the ‘Programme Selection Guide’ for detailed descriptions.

Temperature Control: Adjust the wash temperature using the dedicated buttons or dial. Lower temperatures are suitable for delicate fabrics, while higher temperatures are effective for heavily soiled items. Always check garment care labels before selecting a temperature.

Spin Speed Adjustment: Control the spin speed to determine the amount of water remaining in your laundry. Higher spin speeds extract more water, reducing drying time, but may cause more creasing. Options range from no spin to maximum speed (typically 1200rpm).

Additional Functions: The control panel may include buttons for functions like delay start, child lock, and pre-wash. These features enhance convenience and safety.

Programme Selection Guide

Cottons: Ideal for everyday cotton items like t-shirts, underwear, and bed linen. Use a higher temperature for heavily soiled items and a lower temperature for lightly soiled ones. This programme offers a thorough clean.

Synthetics: Designed for synthetic fabrics like polyester and nylon. Select a lower temperature to prevent damage. This programme provides a gentle yet effective wash.

Delicates: Use this programme for delicate fabrics like silk and lace. A cold wash and gentle spin are recommended to protect the fibres. Hand-wash items can also be safely cleaned here.

Wool: Specifically designed for woollen garments. Use a cold wash and a wool-specific detergent to prevent shrinkage and maintain the fabric’s quality. A gentle cycle is crucial.

Quick Wash: Perfect for lightly soiled items that need a quick refresh. This programme uses less water and energy, saving you time and resources. It’s ideal for small loads.

Understanding Wash Cycles

Wash: This phase initiates the cleaning process, utilizing water, detergent, and mechanical action to loosen and remove dirt from your laundry. The duration varies based on the selected programme and soil level.

Rinse: Following the wash, the rinse cycle removes residual detergent and loosened dirt. Multiple rinses may occur to ensure thorough cleaning. Efficient rinsing prevents skin irritation and fabric damage.

Spin: The spin cycle extracts water from the laundry using centrifugal force. Spin speed, measured in RPM (revolutions per minute), impacts the remaining moisture content. Higher speeds mean drier clothes.

Drain: This phase removes the used water from the drum, preparing the machine for the next cycle. Proper drainage is essential for optimal performance and preventing blockages.

Pause/Stop: Allows you to temporarily halt the wash cycle or completely stop it. Useful for adding forgotten items or adjusting settings mid-cycle. Remember to resume or restart appropriately.

Detergent Dispenser Guide

The Indesit 7kg washing machine features a multi-compartment dispenser, typically located on the top left of the machine. Understanding each compartment is crucial for optimal washing results.

Compartment I (Pre-wash): Use this for detergent when selecting a pre-wash cycle, ideal for heavily soiled items. It initiates cleaning before the main wash.

Compartment II (Main Wash): This is where you add detergent for the primary wash cycle. Use powder, liquid, or gel detergent as recommended by the garment care label.

Compartment III (Fabric Softener): Reserved exclusively for fabric softener. Do not add detergent here. Fabric softener adds fragrance and reduces static cling, leaving clothes feeling softer.

Important Notes: Always follow the detergent manufacturer’s instructions regarding dosage. Overuse can lead to residue buildup. Ensure the dispenser is clean to prevent clogging. Avoid using too much detergent, as it can affect rinsing efficiency.

Using the Detergent and Fabric Softener

Proper detergent and fabric softener usage is vital for clean, fresh laundry with your Indesit 7kg washing machine. Always refer to garment care labels for specific instructions.

Detergent: Use a high-efficiency (HE) detergent for optimal performance and to prevent excessive suds. The amount needed depends on load size, water hardness, and soil level. Start with the recommended dosage on the detergent packaging and adjust as needed. Powder, liquid, and gel detergents are all compatible.

Fabric Softener: Add fabric softener to the designated compartment (usually marked with a flower symbol). Never pour fabric softener directly onto clothes, as it can cause staining. Use the recommended amount; overuse can reduce absorbency of towels.

Dosage Tips: For lightly soiled loads, use less detergent. For heavily soiled loads, consider a pre-wash cycle with detergent in compartment I. Regularly clean the detergent dispenser to prevent buildup and ensure proper dispensing.

Adjusting Wash Temperature

Your Indesit 7kg washing machine offers adjustable wash temperatures to cater to various fabric types and soil levels. Selecting the correct temperature is crucial for effective cleaning and preventing damage to your clothes.

Temperature Options: Typically, you’ll find options ranging from cold (30°C/86°F) to hot (90°C/194°F). Cold water is ideal for delicate fabrics, bright colors, and lightly soiled items, conserving energy. Warm water (40°C/104°F) is suitable for everyday laundry and moderately soiled clothes.

Hot Water: Hot water (60°C/140°F and above) is best for whites, heavily soiled items, and disinfecting laundry. However, be cautious as high temperatures can cause shrinkage or fading. Always check garment care labels before selecting a high temperature.

Energy Saving: Utilizing lower temperatures whenever possible contributes to energy savings and reduces environmental impact. The control panel allows easy temperature selection before starting a wash cycle. Remember to adjust based on fabric type and desired cleaning level.

Spin Speed Options and Their Impact

Your Indesit 7kg washing machine provides a range of spin speeds, measured in revolutions per minute (RPM), impacting the moisture content remaining in your laundry. Higher spin speeds extract more water, reducing drying time, but can also increase wrinkling.

Spin Speed Levels: Common options include No Spin, Low (400-800 RPM), Medium (800-1200 RPM), and High (1200-1600 RPM). ‘No Spin’ leaves clothes very wet, ideal for delicate items you intend to air dry. Lower speeds are gentle on fabrics, minimizing wrinkles and suitable for synthetics.

Medium & High Speeds: Medium speeds are versatile for most everyday laundry. High speeds are best for durable fabrics like cotton, maximizing water extraction. However, excessive spin can damage delicate items.

Considerations: The Indesit BIWMIL71252 model features a 1200 RPM spin. While some machines offer 1400 RPM, 1200 RPM effectively removes moisture without excessive strain. Always check garment care labels and adjust spin speed accordingly to protect your clothes.

Delay Start Function Explained

The Delay Start function on your Indesit 7kg washing machine allows you to conveniently schedule wash cycles to begin at a later time. This feature is ideal for taking advantage of off-peak electricity tariffs or ensuring laundry is finished when you’re home.

How it Works: After selecting your desired wash programme, temperature, and spin speed, activate the Delay Start function. You can then set a delay timer, typically ranging from 1 to 24 hours, using the control panel buttons. The machine will automatically start the cycle at the programmed time.

Benefits: Delay Start offers flexibility and energy savings; It’s particularly useful for pre-washing clothes overnight or scheduling a cycle to finish before your arrival. Ensure the water supply remains connected during the delay period.

Important Note: Avoid using Delay Start with laundry containing perishable items. Always double-check your settings before activating the function to prevent unexpected wash cycles.

Child Lock Feature – How to Activate

The Child Lock feature on your Indesit 7kg washing machine is a crucial safety mechanism designed to prevent accidental operation by children. This function disables the control panel buttons, ensuring the selected wash cycle isn’t altered or interrupted during operation.

Activation Process: To activate Child Lock, typically you need to press and hold two specific buttons simultaneously on the control panel – often the ‘Spin’ and ‘Temperature’ buttons – for a few seconds. A corresponding indicator light on the display panel will illuminate, confirming the lock is engaged.

Deactivation Process: To deactivate Child Lock, repeat the same button combination. The indicator light will turn off, restoring normal control panel functionality. This prevents unintended changes to the washing process.

Safety Reminder: Always deactivate Child Lock before attempting to change settings or stop a wash cycle. This feature prioritizes safety and prevents accidental operation, especially in households with young children.

Troubleshooting Common Issues

Encountering issues with your Indesit 7kg washing machine can be frustrating. Here’s a guide to resolving common problems. If the machine doesn’t start, check the power supply and ensure the door is securely closed. A blocked drain hose is a frequent cause of water not draining; inspect and clear any obstructions.

Leaking Water: Check the inlet and drain hoses for cracks or loose connections. Ensure the detergent dispenser isn’t overloaded, causing excessive suds. Excessive Vibration: Verify the machine is level and that the load is balanced. Redistribute items within the drum if necessary.

Error Codes: Refer to the ‘Error Codes and Their Meanings’ section for specific diagnostics. If the machine displays an error, note the code before attempting any repairs. For persistent issues, consult the ‘Contacting Indesit Support’ section for professional assistance. Always disconnect the power before inspecting internal components.

Error Codes and Their Meanings

Your Indesit 7kg washing machine utilizes error codes to signal specific malfunctions, aiding in quick diagnosis. F01: Indicates a water inlet issue – check the tap is open and the hose isn’t kinked. F02: Signals a drainage problem; inspect the drain hose for blockages. F03: Points to a temperature sensor fault, requiring professional attention.

F04: Suggests excessive foam, likely due to using too much detergent. Reduce the amount used in future washes. F05: Indicates a water pressure problem – low or high pressure can trigger this code. F06: Signals a door locking issue; ensure the door is firmly closed.

F07: Relates to the motor’s operation; this often requires a technician’s expertise. F08: Indicates an imbalance in the load. Redistribute items within the drum. F11: Signals a heating element failure. Always consult a qualified technician for repairs involving electrical components. Disconnect the power before any inspection.

Cleaning and Maintenance

Regular cleaning and maintenance are crucial for prolonging the life and efficiency of your Indesit 7kg washing machine. Exterior Cleaning: Wipe down the machine’s exterior with a damp cloth and mild detergent. Avoid abrasive cleaners that could damage the finish. Control Panel: Clean the control panel gently with a soft, dry cloth;

Drum Cleaning: Periodically run an empty wash cycle with a washing machine cleaner to remove residue and prevent odors. High temperatures (60°C or higher) are recommended. Door Seal: Inspect the door seal regularly for mold or debris. Clean with a damp cloth and ensure it’s properly sealed.

Filter Cleaning: The filter traps lint and small objects. Clean it every few washes to maintain optimal drainage. Refer to the ‘Filter Cleaning – Step-by-Step’ section for detailed instructions. Proper maintenance ensures peak performance and prevents potential issues, keeping your Indesit machine running smoothly for years.

Drum Cleaning Procedures

Maintaining a clean drum is vital for hygiene and performance. To initiate a drum clean, ensure the washing machine is empty; Add a dedicated washing machine cleaner – liquid or tablet form is suitable – directly into the drum. Select a high-temperature cycle: A 60°C or 90°C cycle is recommended for effective cleaning.

Run the cycle: Start the wash cycle without any laundry. This allows the cleaner to circulate and dissolve residue buildup. After the cycle completes, it’s advisable to run a short rinse cycle to remove any remaining cleaner traces.

Regularity: Perform this drum cleaning procedure at least once a month, or more frequently if you regularly wash at low temperatures. This prevents mold, mildew, and unpleasant odors from developing within the drum, ensuring fresh and clean laundry results. Consistent drum cleaning extends the lifespan of your Indesit 7kg washing machine.

Filter Cleaning – Step-by-Step

Regular filter cleaning is crucial for optimal performance. Locate the filter: Typically found at the front, bottom-right of your Indesit 7kg machine, behind a small access panel. Have a shallow container and towels ready to catch any water spillage.

Open the panel: Gently open the access panel. Some models require a slight turn to unlock. Slowly unscrew the filter cap – be prepared for water to flow out. Remove any debris – lint, coins, hair, etc. – from the filter housing.

Rinse and Reinstall: Thoroughly rinse the filter under running water to remove all remaining debris. Carefully reinsert the filter cap, ensuring it’s securely tightened. Close the access panel. Frequency: Clean the filter every 2-3 months, or more often if you notice slow drainage.

Exterior Cleaning and Care

Maintaining the exterior of your Indesit 7kg washing machine keeps it looking its best and prevents damage. Regular wiping: Use a damp, soft cloth to wipe down the machine’s exterior surfaces weekly. Avoid abrasive cleaners, as they can scratch the finish.

Control panel care: Gently wipe the control panel with a slightly damp cloth. Avoid getting water inside the buttons or display. For stubborn stains, use a mild detergent diluted in water, ensuring you wipe away any residue with a clean, damp cloth.

Stainless steel surfaces: If your model has stainless steel components, use a stainless steel cleaner to maintain their shine. Avoid harsh chemicals: Never use solvents, bleach, or flammable liquids on any part of the machine. Ensure the machine is switched off and unplugged before cleaning.

Technical Specifications (7kg Model)

Here are the key technical specifications for your Indesit 7kg washing machine. Dimensions (H x W x D): Approximately 85cm x 60cm x 59.5cm – variations may occur depending on the specific model. Capacity: 7kg – suitable for average household laundry loads.

Maximum Spin Speed: Typically 1200 RPM, though some models may offer adjustable spin speeds. Energy Efficiency Class: Check the energy label affixed to the machine for the specific rating (e.g., A+++, A++, A+). Water Consumption: Varies depending on the program selected, but generally falls between 40-60 liters per cycle.

Voltage: 220-240V. Frequency: 50Hz. Power Consumption: Refer to the rating label. Program Number: Offers a range of programs to suit different fabric types and washing needs. Drum Material: Typically stainless steel for durability. These specifications ensure optimal performance and efficiency.

Warranty Information

Your Indesit 7kg washing machine is covered by a manufacturer’s warranty, providing peace of mind and protection against defects. Standard Warranty Period: Typically, a 12-month warranty covers parts and labor from the date of original purchase. Please retain your proof of purchase (receipt or invoice) as evidence of the purchase date.

Extended Warranty Options: Opportunities may exist to purchase an extended warranty for additional coverage beyond the standard period. Contact your retailer or Indesit directly for details. What is Covered: The warranty covers manufacturing defects in materials and workmanship under normal household use.

What is Not Covered: Damage caused by misuse, improper installation, unauthorized repairs, or normal wear and tear is excluded. To make a warranty claim, contact Indesit customer support – details are provided in the ‘Contacting Indesit Support’ section. Registering your appliance online may streamline the claim process.

Contacting Indesit Support

Need assistance with your Indesit 7kg washing machine? Indesit provides several avenues for customer support to address your queries and concerns. Online Support: Visit the official Indesit website for a comprehensive FAQ section, troubleshooting guides, and downloadable manuals. You can often find solutions to common issues online.

Phone Support: For direct assistance, contact the Indesit customer support hotline. Numbers vary by region; check the Indesit website for the correct contact number for your location. Email Support: Submit your inquiry via the online contact form on the Indesit website, or email directly to the provided customer service address.

Social Media: Indesit maintains a presence on various social media platforms. While not a primary support channel, you can sometimes receive assistance or find helpful information through their social media pages. Before Contacting Support: Have your model number and serial number readily available to expedite the support process.

oil pressure engine off owners manual vw

Understanding the “Oil Pressure Engine Off” Warning in VW Vehicles

Volkswagen owners’ manuals often detail the “Oil Pressure Engine Off!” warning, advising immediate shutdown to prevent severe engine damage; consult your specific VW’s guide.

The “Oil Pressure Engine Off!” warning light in your Volkswagen is a critical indicator demanding immediate attention. As highlighted in many VW owner’s manuals, this isn’t a suggestion, but a directive to cease operation. Ignoring it risks catastrophic engine failure. The light illuminates when the engine isn’t receiving adequate oil pressure, potentially stemming from various issues. Your manual will specify the light’s appearance – often a red oil can symbol – and emphasize the necessity of consulting a qualified mechanic. Understanding this warning, and referencing your VW’s specific manual, is paramount for preventative maintenance and avoiding costly repairs.

What Does “Oil Pressure Engine Off” Mean?

The “Oil Pressure Engine Off!” message, detailed in your VW’s owner’s manual, signifies a critical lubrication failure. It means the engine isn’t receiving sufficient oil to protect vital components from wear and tear. This isn’t simply low oil level; it indicates a problem with the oil pressure itself. Continuing to drive with this warning illuminated can cause severe, irreversible engine damage. The manual stresses immediate shutdown and professional diagnosis. Essentially, the engine is signaling it cannot safely continue operation without risking catastrophic internal failure due to inadequate lubrication.

Common Causes of the Warning

VW owner’s manuals highlight low oil, a faulty sensor, a worn pump, or a clogged pickup as potential causes for the “Oil Pressure Engine Off!” warning.

Low Oil Level – The Primary Suspect

Volkswagen owner’s manuals consistently emphasize checking the oil level as the first step when the “Oil Pressure Engine Off!” warning illuminates. A significant drop in oil, due to leaks or consumption, directly impacts oil pressure. Regularly referencing your manual for the correct oil type and checking the dipstick ensures adequate lubrication. Ignoring low oil can lead to catastrophic engine failure, as the system struggles to maintain pressure. The manual will detail the proper procedure for accurate oil level assessment, including vehicle positioning and dipstick reading techniques.

Faulty Oil Pressure Sensor

A malfunctioning oil pressure sensor can trigger a false “Oil Pressure Engine Off!” warning, even with sufficient oil. Your Volkswagen’s owner’s manual doesn’t typically detail sensor diagnostics, but it will highlight the warning light’s significance. A failing sensor may provide inaccurate readings to the vehicle’s computer. Professional diagnosis using a scan tool is crucial to confirm sensor functionality. While the manual stresses immediate shutdown for genuine low-pressure events, a faulty sensor requires repair, not necessarily engine stoppage, preventing unnecessary anxiety and potential inconvenience.

Worn Oil Pump

A deteriorating oil pump struggles to maintain adequate oil pressure throughout the Volkswagen engine, potentially causing the “Oil Pressure Engine Off!” warning. The owner’s manual emphasizes the critical nature of oil pressure for engine longevity. As the pump wears, its ability to circulate oil diminishes, especially during cold starts or acceleration. Ignoring this warning, as the manual cautions against, can lead to catastrophic engine failure. Diagnosis requires professional assessment of oil pressure output. Replacement of a worn pump is essential to restore proper lubrication and prevent further damage, safeguarding your VW.

Clogged Oil Pickup Tube

A clogged oil pickup tube restricts oil flow to the pump, triggering the “Oil Pressure Engine Off!” warning in your Volkswagen. The owner’s manual stresses the importance of a free-flowing oil system. Sludge buildup, often from infrequent oil changes, is a primary culprit. This blockage reduces the volume of oil reaching critical engine components. Addressing this issue requires removing the oil pan to inspect and clean the pickup tube. Ignoring the warning, as the manual advises against, can cause severe engine damage due to oil starvation. Regular maintenance, as outlined in your VW’s guide, is crucial.

Internal Engine Damage – A Serious Concern

The “Oil Pressure Engine Off!” warning, detailed in your Volkswagen’s owner’s manual, signifies a potentially catastrophic situation. Prolonged operation with low oil pressure leads to severe internal engine damage. Worn bearings, camshaft damage, and even piston failure can occur rapidly. The manual emphasizes immediate shutdown to mitigate these risks. Continued driving accelerates wear and can result in complete engine seizure. Addressing the root cause – as the VW guide instructs – is paramount. Ignoring the warning isn’t simply risky; it’s a path to costly repairs or engine replacement.

VW Engine Types and Oil System Vulnerabilities

Volkswagen owner’s manuals highlight varying oil system sensitivities across engine types; understanding your specific VW’s design is crucial for addressing the “Oil Pressure Engine Off!” warning.

VW Type 1 (Air-Cooled) Engine Oil Considerations

Volkswagen Type 1 (Beetle, Bus, etc.) engines, being air-cooled, demand specific oil considerations detailed in the owner’s manual. Unlike water-cooled engines, oil plays a vital role in cooling, necessitating higher oil levels and frequent checks. The “Oil Pressure Engine Off!” warning, while less common, signifies critical lubrication failure.

Manuals emphasize using the correct viscosity oil for ambient temperatures, as cold oil thickens, hindering circulation. Low oil levels are a primary suspect, but also inspect the oil pump screen for blockage. Ignoring this warning can lead to catastrophic engine damage due to overheating and component seizure, as the oil system is integral to thermal management.

EA888 Engine Family (Gen 3) – Common Issues

The VW EA888 Gen 3 engine, found in many models, presents specific challenges. The owner’s manual addresses the “Oil Pressure Engine Off!” warning, often linked to PCV valve failures causing increased crankcase pressure. This pressure can compromise oil circulation and sensor readings.

Oil sludge buildup, exacerbated by infrequent oil changes, is another common culprit. The manual stresses correct oil specification; using incorrect oil can accelerate sludge formation. A failing oil pressure sensor can also trigger a false alarm, but should not be assumed without further diagnostics; Always consult the manual for recommended maintenance intervals.

2.0L TSI Engine (MK6 Jetta) – PCV Valve Connection

In the MK6 Jetta’s 2.0L TSI engine, a faulty PCV valve frequently triggers the “Oil Pressure Engine Off!” warning. The owner’s manual doesn’t explicitly detail this connection, but online forums and repair guides highlight it. A clogged or malfunctioning PCV valve increases crankcase pressure, potentially affecting oil pressure readings and lubrication.

Oil often accumulates around the MAP sensor due to this pressure, as reported by Jetta owners. Inspecting the PCV valve and its associated hoses is crucial. The manual emphasizes regular maintenance, but doesn’t specifically address PCV valve inspection frequency; proactive checks are recommended.

Checking Oil Pressure and Level

Volkswagen owner’s manuals detail oil level checks using the dipstick; low levels are a primary cause of the “Oil Pressure Engine Off!” warning, requiring immediate attention.

Locating the Oil Dipstick in Your VW

Volkswagen owner’s manuals provide specific diagrams illustrating the oil dipstick’s location, varying by model – typically within the engine bay, near the engine block. Generally, look for a brightly colored handle, often yellow or orange, clearly marked for oil level checks. The manual emphasizes consulting the vehicle-specific guide for precise placement.

Incorrectly identifying the dipstick can lead to misdiagnosis when addressing an “Oil Pressure Engine Off!” warning. Always refer to your VW’s manual to ensure you’re checking the correct fluid level. Proper identification is crucial for accurate maintenance and preventing potential engine damage.

Proper Oil Level Checking Procedure

Your Volkswagen owner’s manual details the correct procedure: park on level ground, turn off the engine, and wait several minutes for oil to settle. Remove the dipstick, wipe it clean, reinsert fully, and remove again. The oil level should fall between the “min” and “max” marks.

Low oil, triggering an “Oil Pressure Engine Off!” warning, demands immediate attention. The manual stresses avoiding overfilling, as this can also cause issues. Regularly checking, as outlined in your VW’s manual, is vital for preventative maintenance and engine health.

Using an Oil Pressure Gauge (Advanced)

While the “Oil Pressure Engine Off!” warning illuminates on your VW’s dashboard, a mechanical oil pressure gauge provides a more precise reading. Installation requires tapping into the engine’s oil system – consult a qualified mechanic if unfamiliar.

Your owner’s manual won’t detail gauge installation, but it will specify the correct oil pressure range for your engine. Consistent low readings, even without the warning light, indicate a potential problem. This advanced diagnostic step complements the manual’s guidance and aids in pinpointing the root cause.

Troubleshooting Steps – DIY Approach

Begin by referencing your VW’s owner’s manual for warning light specifics; then, verify oil level, inspect the oil pressure sensor, and check PCV valve connections.

Checking the Oil Level First

Volkswagen’s owner’s manual emphasizes checking the oil level as the initial step when the “Oil Pressure Engine Off!” warning illuminates. Locate the oil dipstick – its position varies by model, but the manual provides a clear diagram. Ensure the engine is off and cool for an accurate reading. Pull the dipstick, wipe it clean, reinsert it fully, and then remove it again to observe the oil level.

The dipstick has markings indicating minimum and maximum levels. Oil should reside between these marks. Low oil is the most common cause, and topping up may resolve the issue. However, consistently low oil suggests a leak requiring further investigation, as detailed in your VW’s manual.

Inspecting the Oil Pressure Sensor

Your Volkswagen’s owner’s manual doesn’t typically detail sensor inspection, but a faulty oil pressure sensor can trigger a false “Oil Pressure Engine Off!” warning. Locate the sensor – its position varies by engine type; a repair manual is helpful. Visually inspect the sensor and its wiring for damage, corrosion, or loose connections.

Disconnect the electrical connector and check for oil contamination. While a multimeter test can confirm functionality, this requires technical expertise. Replacing the sensor is relatively inexpensive and can resolve the issue if it’s the culprit, but always consult a VW-specific repair guide.

Examining the PCV Valve and Hoses

The owner’s manual won’t directly link a PCV valve issue to the “Oil Pressure Engine Off!” warning, but a clogged PCV system can create excessive crankcase pressure; This impacts oil flow and potentially triggers the sensor. Inspect the PCV valve and its connecting hoses for cracks, leaks, or blockages, particularly in 2;0L TSI engines (MK6 Jetta);

A faulty PCV valve can cause oil to be drawn into the intake manifold, contaminating the MAP sensor (as reported by some Jetta owners) and indirectly affecting oil pressure readings. Replacement is straightforward and inexpensive.

Owners Manual Resources

Volkswagen owner’s manuals contain vital information regarding the “Oil Pressure Engine Off!” warning, alongside radio code retrieval procedures for your specific VW model.

Locating the Oil Pressure Warning Section

Volkswagen owner’s manuals dedicate a section to instrument cluster warnings, and the “Oil Pressure Engine Off!” message will be prominently featured within this area. Typically, this section is found in the “Instruments and Controls” or “Warning and Indicator Lights” chapter.

Look for a symbol resembling an oil can; this visually represents the oil pressure warning. The manual will explain the meaning of the light, recommended actions (like immediately stopping the engine), and potential causes. Some manuals may also include troubleshooting steps or direct you to a qualified VW mechanic for further diagnosis. Referencing your specific model year’s manual is crucial, as layouts and details can vary.

Radio Code Retrieval (Related Owner’s Manual Info)

While seemingly unrelated to the “Oil Pressure Engine Off!” warning, Volkswagen owner’s manuals often contain information regarding radio security codes. If your radio displays “SAFE” after a power interruption (like disconnecting the battery during troubleshooting), you’ll need this code.

The manual may list the code directly, or provide instructions on how to retrieve it. This often involves a serial number lookup process, potentially requiring contacting a VW dealership with your vehicle’s VIN. Keep your owner’s manual readily accessible, as it serves as a valuable resource for various vehicle functions beyond critical warning lights.

Advanced Diagnostics & Repairs

Autel IM508/IM608 tools aid in complex VW diagnostics, while understanding cooling system impacts on oil temperature is crucial for accurate assessment.

Using Diagnostic Tools (Autel IM508/IM608)

Autel’s IM508 and IM608 scan tools offer advanced diagnostic capabilities for Volkswagen vehicles experiencing the “Oil Pressure Engine Off!” warning. The V5.10 update, released in August 2021, significantly enhanced VW/Audi IMMO functionality, including MQB key programming. These tools can access engine control module (ECM) data, revealing live oil pressure readings, sensor values, and potential fault codes related to the oil system.

Beyond basic code retrieval, these scanners can perform actuation tests on the oil pump and pressure sensor, helping pinpoint component failures. They also provide guided diagnostics, streamlining the troubleshooting process. Utilizing these tools alongside the owner’s manual information provides a comprehensive approach to diagnosing the root cause of the warning.

Cooling System Impact on Oil Temperature

A malfunctioning Volkswagen cooling system directly impacts oil temperature and, consequently, oil pressure. Overheating thickens the oil, reducing its flow rate and potentially triggering the “Oil Pressure Engine Off!” warning. Conversely, a failing thermostat can lead to excessively low oil temperatures, also affecting pressure readings.

Referencing your owner’s manual for proper coolant levels and specifications (like G12 variations – blue, red, pink, purple, orange) is crucial. A compromised cooling system, as discussed in dedicated threads, can cause engine damage, exacerbating oil pressure issues. Maintaining a healthy cooling system is preventative maintenance linked to oil system health.

Emissions System Deletion and Potential Oil Pressure Effects

Deleting emissions components in your Volkswagen, while sometimes considered, can indirectly affect oil pressure. Alterations to the engine’s operation, particularly those impacting crankcase pressure, may influence oil flow and sensor readings, potentially triggering the “Oil Pressure Engine Off!” warning.

Modifications should be carefully considered, as they aren’t covered by VW’s owner’s manual warranty. Discussions online detail potential issues; proper research is vital. Changes to the PCV system, often linked to oil in the MAP sensor, are particularly relevant. Always prioritize maintaining a healthy oil system.

Preventative Maintenance

VW’s owner’s manual stresses regular oil changes with the correct specification (like G12 coolant) to maintain oil pressure and avoid the “Engine Off!” warning.

Regular Oil Changes – The Cornerstone

Volkswagen’s owner’s manual consistently emphasizes the critical role of regular oil changes in preventing the dreaded “Oil Pressure Engine Off!” warning. Fresh oil maintains proper lubrication, reducing wear on vital engine components like the oil pump. Following the VW-recommended oil change intervals, detailed within your vehicle’s specific manual, is paramount.

Using the correct oil specification, as outlined in the manual, is equally important; incorrect oil viscosity can compromise pressure. Neglecting oil changes allows sludge buildup, potentially clogging the oil pickup tube and triggering the warning. Proactive maintenance, guided by your VW’s manual, is the best defense.

Using the Correct Oil Specification

Your Volkswagen’s owner’s manual is the definitive guide to the correct oil specification for your engine. Using the wrong viscosity or oil type can significantly impact oil pressure, potentially triggering the “Oil Pressure Engine Off!” warning. VW engines are designed to operate optimally with specific oil formulations, often meeting standards like VW 502 00 or 504 00.

The manual details these requirements; deviating from them can lead to inadequate lubrication, increased wear, and ultimately, engine damage. Always cross-reference the oil label with your VW’s manual to ensure compatibility and maintain optimal oil pressure, preventing the alarming warning light.

Checking Coolant Condition (G12 Variations)

While seemingly unrelated, coolant condition impacts oil temperature regulation, potentially influencing oil pressure. Your Volkswagen’s owner’s manual details VW’s coolant specifications, historically involving G12 variations (blue, red, pink, purple, orange). Incorrect coolant mixtures or degraded coolant reduce cooling efficiency, leading to higher oil temperatures.

Overheated oil thins, potentially lowering oil pressure and triggering the “Oil Pressure Engine Off!” warning. Regularly inspect coolant color and concentration as outlined in your manual. Mixing incompatible G12 types can cause corrosion and reduced cooling, exacerbating oil temperature issues and increasing engine stress.

When to Seek Professional Help

Volkswagen’s owner’s manual stresses immediate professional attention if the “Oil Pressure Engine Off!” warning persists, preventing potential catastrophic engine damage from continued operation.

Ignoring the Warning – Potential Engine Damage

Volkswagen’s owner’s manual emphatically warns against dismissing the “Oil Pressure Engine Off!” indicator; continued driving can inflict severe, costly damage. Insufficient lubrication leads to accelerated wear on critical engine components like bearings, camshafts, and pistons. This friction generates excessive heat, potentially causing seizing or complete engine failure. Ignoring the warning risks a repair bill far exceeding preventative maintenance costs. The manual stresses immediate shutdown and professional diagnosis to mitigate these risks, safeguarding your VW’s longevity and performance. Delaying action invites catastrophic consequences, rendering the engine irreparable.

Symptoms Requiring Immediate Attention

The Volkswagen owner’s manual highlights several accompanying symptoms demanding immediate attention alongside the “Oil Pressure Engine Off!” warning. These include unusual engine noises – knocking or rattling – signifying metal-on-metal contact due to inadequate lubrication. Diminished engine power or stalling also indicate a critical issue. Smoke emanating from the engine compartment, particularly if it smells of burning oil, is a severe warning sign. If the oil pressure gauge (if equipped) reads zero, or fluctuates wildly, stop driving immediately. Ignoring these signs, as the manual cautions, will exacerbate engine damage;

Finding a Qualified VW Mechanic

Your Volkswagen owner’s manual emphasizes the importance of professional diagnosis for the “Oil Pressure Engine Off!” warning. Seek a mechanic specializing in VW vehicles; they possess the diagnostic tools – like Autel IM508/IM608 – and expertise to accurately pinpoint the cause. General mechanics may lack the specific knowledge of VW’s oil systems, including EA888 engine vulnerabilities. Online VW forums can provide recommendations for reputable shops in your area. Verify the mechanic’s certifications and read customer reviews before entrusting them with your vehicle’s repair.

Resetting the Warning Light (If Applicable)

Some VW models allow a DRL turn-off procedure – key off, signal left, activate high beams – which may coincidentally reset the “Oil Pressure Engine Off!” light.

DRL Turn Off Procedure (Potential Reset Method)

Volkswagen owners have discovered a curious quirk: the Daytime Running Light (DRL) disable procedure sometimes resets the “Oil Pressure Engine Off!” warning. This isn’t a guaranteed fix, and shouldn’t be relied upon as such, but it’s a simple attempt. With the ignition off, fully depress the signal stalk to the left, and simultaneously pull the high beam stalk. Hold both positions until the instrument cluster indicates the DRLs are disabled.

This method, documented by VW Golf owners, isn’t officially linked to oil pressure reset, but anecdotal evidence suggests it can clear the warning in some cases. Always consult your owner’s manual for specific instructions and remember a persistent warning demands professional attention.

Understanding When a Reset is Not Possible

Attempting to reset the “Oil Pressure Engine Off!” warning without addressing the underlying issue is dangerous. If the warning illuminates due to genuinely low oil pressure – caused by a failing pump, clogged pickup, or internal engine damage – a reset will only temporarily mask a critical problem. Your VW’s owner’s manual emphasizes immediate shutdown in such cases.

Furthermore, if the warning is accompanied by other symptoms like engine knocking or unusual noises, a reset is absolutely contraindicated. Relying on temporary fixes can lead to catastrophic engine failure; professional diagnosis and repair are essential when a genuine oil pressure fault exists.

Long-Term Engine Health

VW owner’s manuals stress consistent maintenance to prevent “Oil Pressure Engine Off!” recurrences; diligent monitoring and prompt attention safeguard long-term engine reliability.

Importance of Regular Maintenance

Volkswagen’s owner’s manuals consistently emphasize the critical role of regular maintenance in preventing the dreaded “Oil Pressure Engine Off!” warning. Proactive oil changes, using the correct specification as detailed in your VW’s guide, are paramount. Ignoring scheduled services significantly increases the risk of low oil pressure and subsequent engine damage. Consistent coolant checks, noting the G12 variations, also contribute to optimal engine temperature regulation, indirectly impacting oil viscosity and pressure. Addressing issues promptly, as outlined in the manual, avoids escalating problems and preserves long-term engine health, preventing costly repairs and ensuring reliable performance.

Monitoring for Recurring Issues

Even after resolving an “Oil Pressure Engine Off!” event, diligent monitoring is crucial, referencing your VW’s owner’s manual for guidance. Pay close attention to any reappearance of the warning light, even intermittently. Regularly check oil levels and condition, noting any unusual consumption or discoloration. Be alert for changes in engine noise or performance. If the issue recurs, despite maintenance, a deeper diagnostic investigation is necessary. Ignoring recurring warnings can indicate underlying problems, potentially leading to catastrophic engine failure; professional assessment is vital for long-term reliability.

black & decker handy steamer manual

Black & Decker Handy Steamer Manual: A Comprehensive Guide (Updated 12/03/2025)

This comprehensive guide details setup, operation, maintenance, and troubleshooting for Black & Decker Handy Steamers, including HS90 and HS1000 models.

Welcome to the world of convenient and healthy cooking with your Black & Decker Handy Steamer! This appliance is designed to simplify meal preparation, offering a versatile solution for steaming vegetables, grains, and more. As of today, December 3rd, 2025, this manual serves as a comprehensive resource for maximizing your steamer’s potential.

Whether you own the popular HS90 model or the advanced HS1000, this guide provides detailed instructions, helpful tips, and troubleshooting advice. We’ll cover everything from initial setup and operation to essential maintenance and safety precautions. The Black & Decker Handy Steamer promotes a healthier lifestyle by preserving vital nutrients often lost during traditional cooking methods. Explore its features and unlock a world of flavorful, nutritious meals!

What is a Handy Steamer and its Benefits?

A Black & Decker Handy Steamer is a versatile kitchen appliance designed for effortless and healthy cooking. Unlike boiling or frying, steaming preserves essential vitamins and minerals in food, resulting in more nutritious meals. This appliance efficiently steams vegetables, rice, grains, and even seafood, offering a convenient alternative to conventional cooking methods.

The benefits are numerous: quicker cooking times, minimal effort, and reduced cleanup. Its user-friendly design, exemplified in models like the HS90 and HS1000, makes it accessible for cooks of all skill levels. Furthermore, steaming requires no added fats or oils, promoting a healthier diet and eco-friendly operation. Enjoy flavorful, perfectly cooked dishes with minimal fuss!

Popular Black & Decker Handy Steamer Models

Black & Decker offers several Handy Steamer models, catering to diverse cooking needs. Two prominent examples are the HS90 and HS1000. The HS90, often referred to as the Handy Steamer Plus, is a compact rice cooker offering a convenient solution for preparing rice and steaming smaller portions. It’s known for its simplicity and ease of use.

The HS1000 model generally provides a larger capacity and potentially additional features, suitable for families or those who frequently steam larger quantities of food. Both models prioritize efficient steaming, preserving nutrients and flavors. Accessing specific manuals for each model is crucial for optimal performance and safety, ensuring a tailored cooking experience.

HS90 Model Overview

The Black & Decker Handy Steamer Plus HS90 is a compact and user-friendly rice cooker designed for efficient steaming. It’s particularly well-suited for preparing rice and smaller portions of steamed vegetables or grains. This model emphasizes simplicity, making it ideal for individuals or smaller households. Its straightforward operation requires minimal effort, offering a convenient cooking solution.

The HS90’s specifications focus on providing a reliable and efficient steaming experience. Users can find detailed instructions and troubleshooting tips within the dedicated HS90 manual, ensuring optimal performance and longevity. It’s a practical appliance for those seeking a basic, yet effective, steaming option.

HS1000 Model Overview

The Black & Decker Handy Steamer HS1000 represents a versatile kitchen appliance designed for steaming a variety of foods, from vegetables and grains to complete meals. This model builds upon the simplicity of the HS90, offering enhanced functionality and potentially a larger capacity. Accessing the HS1000 manual provides comprehensive guidance on utilizing its features effectively.

Users can expect detailed instructions covering setup, operation, and maintenance specific to the HS1000. Troubleshooting tips are also included to address common issues. The HS1000 aims to promote healthy cooking with minimal effort, offering an eco-friendly and efficient steaming solution for diverse culinary needs.

Setting Up Your Handy Steamer

Proper setup is crucial for optimal performance. This section covers unboxing, component identification, initial cleaning, and correctly filling the water reservoir for use.

Unboxing and Component Identification

Upon receiving your Black & Decker Handy Steamer, carefully unpack the box and verify all components are present. Typically, you should find the steamer base, steaming basket(s), a rice measuring cup, and this comprehensive user manual. Inspect each part for any shipping damage before proceeding.

Familiarize yourself with the steamer’s key features: the water reservoir, control panel (if applicable), and steam vent. The steaming basket is designed to hold food while allowing steam to circulate. Some models may include additional accessories like egg racks or specialized steaming trays. Refer to the included diagrams in your manual to correctly identify each component and understand its function. Proper identification ensures safe and effective operation of your new appliance.

Initial Cleaning and Preparation

Before your first use, thoroughly clean all removable parts of your Black & Decker Handy Steamer with warm, soapy water. This removes any manufacturing residue and ensures hygienic food preparation. Pay close attention to the steaming basket and rice measuring cup. Rinse all components completely and dry them with a soft cloth.

Wipe down the steamer base with a damp cloth, avoiding direct contact with electrical components. Do not immerse the base in water. A preliminary steaming cycle with water only can further cleanse the internal components. This initial preparation step is crucial for optimal performance and longevity of your steamer, guaranteeing fresh and flavorful results from the very beginning.

Filling the Water Reservoir

To fill the water reservoir, carefully remove it from the steamer base. Use fresh, cold water, and fill to the desired level, never exceeding the maximum fill line indicated inside the reservoir. The appropriate water level depends on the quantity of food you are steaming; consult the included recipe guide for specific recommendations.

Avoid overfilling, as this can cause water to spill during operation. Once filled, securely reattach the reservoir to the steamer base, ensuring it clicks into place. Using distilled or filtered water can help minimize mineral buildup and prolong the life of your Black & Decker Handy Steamer.

Operating Instructions

Follow these instructions for safe and effective steaming. Power on, select settings, and utilize step-by-step guides for vegetables, rice, and grains.

Powering On and Selecting Settings

Before first use, ensure the steamer is placed on a stable, level surface. Connect the power cord to a grounded electrical outlet. To power on, typically a single button initiates the steaming process. Many Black & Decker Handy Steamers feature simple, user-friendly controls.

Settings often include options for rice, vegetables, or a general steam setting. Refer to your specific model’s manual (HS90 or HS1000) for detailed instructions on setting selection. Some models may have adjustable timers or temperature controls. Always ensure the water reservoir is adequately filled before initiating the steaming cycle; The indicator light will illuminate when the steamer is actively heating and steaming.

Proper setting selection is crucial for optimal cooking results and to prevent undercooked or overcooked food. Experiment with different settings to achieve your desired level of tenderness and flavor.

Steaming Vegetables: A Step-by-Step Guide

Begin by washing and preparing your chosen vegetables – chopping them into uniform sizes ensures even cooking. Add approximately one to two cups of water to the reservoir, depending on the steaming duration. Place the vegetables into the steaming basket, ensuring they aren’t overcrowded to allow for proper steam circulation.

Securely position the steaming basket within the Black & Decker Handy Steamer. Select the “Vegetable” setting (if available) or a general steam setting. Power on the steamer and allow it to heat up. Steaming times vary based on the vegetable type; consult a steaming chart for guidance.

Check for doneness using a fork – vegetables should be tender-crisp. Carefully remove the basket, avoiding steam burns, and serve immediately.

Steaming Rice and Grains

To steam rice and grains effectively, begin by rinsing them thoroughly under cold water until the water runs clear. This removes excess starch, preventing stickiness. Consult your Black & Decker Handy Steamer manual for the correct water-to-grain ratio, typically 1:1 or 1.5:1.

Place the rinsed rice or grain into the steaming basket. Securely position the basket within the steamer. Select the appropriate setting – a dedicated “Rice” setting is ideal, otherwise use a general steam setting. Power on the steamer and allow it to heat up.

Once complete, let the rice stand, covered, for 10 minutes before fluffing with a fork. This ensures even moisture distribution and a perfect texture.

Maintenance and Care

Regular cleaning and descaling, as outlined in your manual, ensures optimal performance and longevity of your Black & Decker Handy Steamer.

Cleaning the Steamer After Each Use

To maintain your Black & Decker Handy Steamer’s performance and hygiene, thorough cleaning after each use is crucial. Always unplug the steamer and allow it to cool completely before beginning. Remove any remaining food particles from the steaming basket and water reservoir. The basket and any removable parts are typically dishwasher-safe; however, consult your specific model’s manual for confirmation.

For the reservoir, wipe it down with a damp cloth and mild detergent. Avoid abrasive cleaners, as they can damage the surface. Pay attention to any areas where mineral deposits may accumulate. Regularly wiping down the exterior with a damp cloth will also keep your steamer looking its best. Proper cleaning prevents buildup and ensures consistent steaming results.

Descaling the Steamer

Over time, mineral deposits from water can build up inside your Black & Decker Handy Steamer, reducing its efficiency. Descaling removes these deposits, ensuring optimal performance. Fill the water reservoir with a mixture of equal parts white vinegar and water. Run the steamer through a full steaming cycle without food inside.

After the cycle completes, discard the vinegar solution and rinse the reservoir thoroughly with clean water, repeating several times to remove any residual vinegar taste or smell. Run another steaming cycle with just fresh water to finalize the cleaning process. Descale your steamer every 1-3 months, depending on water hardness, to prolong its lifespan.

Proper Storage Techniques

To ensure the longevity of your Black & Decker Handy Steamer, proper storage is crucial. Always unplug the steamer and allow it to cool completely before storing. Ensure the water reservoir is empty to prevent mold or mildew growth. Clean the steamer thoroughly after each use, following the cleaning instructions in this manual.

Store the steamer in a cool, dry place, away from direct sunlight and extreme temperatures. Avoid storing it in a damp environment. If possible, store the steamer in its original packaging to protect it from dust and damage. Keep the power cord neatly coiled and secured to prevent tripping hazards.

Troubleshooting Common Issues

This section provides solutions for typical problems like heating failures, leaks, and ineffective steaming, ensuring your Black & Decker Handy Steamer functions optimally.

Steamer Not Heating Up

If your Black & Decker Handy Steamer isn’t heating, first ensure it’s properly plugged into a functioning electrical outlet. Verify the power cord isn’t damaged; inspect for any visible cuts or fraying. Confirm the steamer is assembled correctly, as some models have safety mechanisms preventing operation if components aren’t aligned.

Check the water reservoir; the steamer won’t heat if the water level is insufficient. Also, examine the heating plate for any buildup or obstructions that might hinder heat transfer. If the issue persists, consult the manual’s troubleshooting section for specific error codes or reset instructions. A faulty thermostat could also be the culprit, potentially requiring professional repair or replacement.

Water Leaking from the Steamer

If you notice water leaking from your Black & Decker Handy Steamer, immediately unplug the unit to prevent electrical hazards. Overfilling the water reservoir is a common cause; ensure you’re adhering to the maximum fill line indicated in the manual. Inspect the sealing rings and gaskets for damage or improper placement – these components are crucial for maintaining a watertight seal.

Check for cracks or damage to the reservoir itself. A buildup of mineral deposits can also compromise the seal, so regular descaling (as outlined in the maintenance section) is vital. If the leak persists after addressing these points, consult the manual for specific troubleshooting steps or contact Black & Decker customer support for assistance.

Food Not Steaming Properly

If your food isn’t steaming adequately with your Black & Decker Handy Steamer, first verify sufficient water is in the reservoir. Insufficient water prevents proper steam generation; Ensure the steamer basket is correctly positioned and not overcrowded, allowing steam to circulate freely around the food. Check that the lid is securely closed; a loose lid allows steam to escape, reducing efficiency.

Larger food pieces may require longer steaming times. Refer to the manual’s steaming chart for recommended durations. If using frozen foods, ensure they are not clumped together. A buildup of mineral scale can also hinder performance, so regular descaling is recommended. If issues persist, consult the manual or contact customer support.

Safety Precautions

Always prioritize safety when using your Black & Decker Handy Steamer; avoid burns, scalds, and electrical hazards by following all guidelines carefully.

Important Safety Warnings

Before operating your Black & Decker Handy Steamer, carefully read all instructions to minimize risks. Never immerse the steamer base in water or other liquids to prevent electric shock. Always ensure the appliance is properly grounded.

Hot steam and surfaces pose burn hazards; use caution when opening the lid and handling steamed food. Keep the steamer out of reach of children. Do not operate the appliance with a damaged cord or plug.

Unplug the steamer when not in use and before cleaning. Never attempt to repair the steamer yourself; contact qualified service personnel for assistance. Use only approved accessories and attachments. Avoid operating the steamer near flammable materials. Proper ventilation is crucial during operation.

Avoiding Burns and Scalds

Steam from your Black & Decker Handy Steamer is extremely hot and can cause severe burns. Always open the lid away from your face and hands, allowing steam to escape gradually. Use oven mitts or tongs when handling hot containers or food.

Be cautious of hot surfaces, including the steamer body and the inner cooking pot. Allow the steamer to cool completely before cleaning or storing. Never touch the steam vent while the appliance is in operation.

Keep children and pets away from the steamer during and immediately after use. If accidental contact with steam or hot surfaces occurs, immediately flush the affected area with cool water and seek medical attention if necessary.

Electrical Safety Guidelines

To ensure safe operation of your Black & Decker Handy Steamer, always plug the appliance into a grounded electrical outlet. Never operate the steamer with a damaged cord or plug; replace immediately. Avoid using extension cords if possible, and if necessary, ensure it’s rated for the appliance’s wattage.

Do not immerse the steamer base, cord, or plug in water or other liquids. Unplug the steamer from the outlet when not in use and before cleaning. Never attempt to disassemble or repair the appliance yourself; contact qualified service personnel for assistance.

Inspect the power cord regularly for any signs of damage. Avoid operating the steamer near flammable materials. Ensure the voltage of your outlet matches the appliance’s specifications.