Tila bead bracelets are a popular DIY jewelry trend, offering endless creativity with their flat, square shape and dual-hole design. Perfect for beginners and skilled crafters alike, these bracelets combine modern style with versatility, allowing for personalized designs that suit any taste or occasion.
What Are Tila Beads?
Tila beads are small, flat, square-shaped beads with two holes, making them ideal for intricate bead-weaving designs. Originating from Miyuki, a renowned Japanese bead manufacturer, Tila beads are known for their versatility and dual-hole feature, which allows for creative stitching patterns. They come in a wide variety of colors and finishes, ranging from solid hues to metallic and iridescent options. Tila beads are available in full and half sizes, offering crafters the flexibility to experiment with different designs. Their flat shape and smooth edges make them comfortable to wear and easy to work with, especially for bracelets and other jewelry pieces. These beads are a favorite among DIY enthusiasts and professional jewelers alike, perfect for creating modern and stylish accessories.
Why Tila Beads Are Popular for Bracelets
Tila beads have gained immense popularity in bracelet-making due to their unique design and versatility. Their flat, square shape and dual-hole feature allow for intricate stitching patterns, making them ideal for bead-weaving techniques like the herringbone and brick stitches. The wide range of colors and finishes available enables crafters to create personalized designs that match any style or theme. Tila beads are also lightweight and comfortable to wear, making them perfect for everyday jewelry. Additionally, their durability ensures that the bracelets retain their shape and appearance over time. The ease of use and the creative freedom they offer make Tila beads a favorite choice for both beginners and experienced jewelry makers, resulting in stunning and professional-looking bracelets;
Materials Needed for a Tila Bead Bracelet
Tila beads, elastic string, beading needle, scissors, and clear nail polish are essential. Optional items include seed beads, clasps, and bead mats for a polished finish.
Essential Beading Supplies
- Elastic String: Choose a durable elastic cord suitable for bracelets, available in various colors to match your design.
- Beading Needle: A thin, flexible needle is necessary for threading beads onto the string.
- Scissors: Sharp scissors are needed to cut the elastic string accurately.
- Clear Nail Polish: Used to secure knots and prevent the elastic from fraying.
- Tila Beads: Miyuki Tila beads are the star of the project, available in various colors and finishes.
- Bead Mat: Optional but helpful for keeping beads organized and preventing them from rolling away.
These supplies ensure a smooth and enjoyable beading experience, allowing you to create a stunning Tila bead bracelet with ease.
Recommended Bead Types and Colors
For a stunning Tila bead bracelet, Miyuki Tila beads are the most popular choice due to their flat, square shape and dual holes. They come in a wide variety of colors, from metallic finishes to matte and glitter options. Pairing Tila beads with seed beads, such as Czech Preciosa or Matubo Miniduo, adds texture and depth to your design. Coastal hues like soft blues and sandy neutrals create a beachy vibe, while bold colors like red and turquoise make for a statement piece. Neutral tones like white, gray, or metallic silver are versatile for everyday wear. Experiment with contrasting colors or monochromatic schemes to reflect your personal style.
Basic Techniques for Tila Bead Weaving
Mastering the herringbone and brick stitches is essential. Ensure even tension and align beads properly for a smooth finish. These techniques provide a sturdy foundation for intricate designs.

Understanding the Herringbone Stitch
The herringbone stitch is a foundational technique in bead weaving, creating a reversible, zigzag pattern. It involves threading beads in a specific sequence, with each bead resting in the “valley” between two beads in the previous row. To start, thread a needle and tie a knot at the end of the elastic string. Pick up two Tila beads, then pass the needle through the second bead from the first pair. Continue this process, adding beads and maintaining even tension. The reverse of the stitch mirrors the forward motion, ensuring symmetry. Keep the beads aligned and the tension consistent for a professional finish. Practice on scrap material to master the rhythm before creating a full bracelet.
Mastering the Brick Stitch
The brick stitch is a versatile and popular bead-weaving technique that creates a sturdy, fabric-like texture. It involves stacking beads in a “brick” formation, with each bead resting in a loop created by the previous bead. To begin, thread a needle and create a foundation row by securing a bead. For each subsequent row, thread a bead, then pass the needle through the loop of the bead below. Continue this process, maintaining even tension to keep the bracelet flat. The brick stitch works well with Tila beads, as it highlights their flat shape and allows for vibrant color patterns. Practice on scrap material to refine your technique, ensuring beads align neatly and the fabric lies smooth. This stitch is ideal for those seeking a durable and visually appealing design.
Step-by-Step Tila Bead Bracelet Tutorial
Learn to craft a stunning Tila bead bracelet with this easy-to-follow guide. Start by preparing materials, then master essential beading techniques to create a beautiful, personalized accessory.
Preparing the Elastic String
Begin by cutting a length of elastic string, approximately 6-8 inches, depending on the desired bracelet size. Ensure the string is smooth and free of tangles. Anchor one end of the elastic using a bead stopper or a small clip to prevent beads from sliding off. This step is crucial for maintaining control while threading the beads. Lightly stretch the elastic to gauge its flexibility and ensure it will fit comfortably around the wrist. For accuracy, measure the string against your wrist or a predetermined length. Use high-quality elastic to avoid breakage and ensure durability. Proper preparation of the elastic string sets the foundation for a successful Tila bead bracelet project.
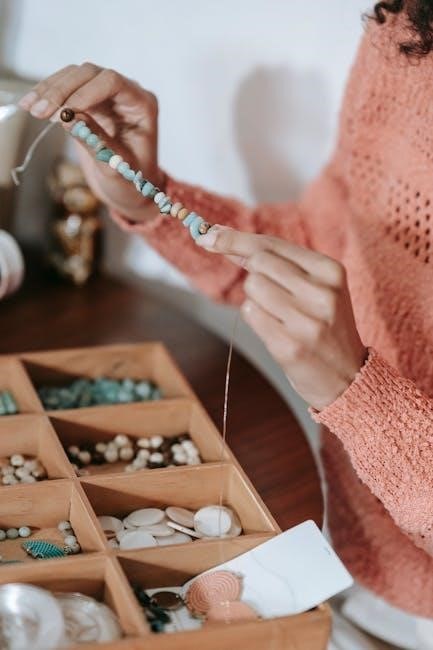
Threading the Tila Beads

To thread the Tila beads, start by picking up one bead and gently sliding it onto the elastic string. Use a bead pick or needle if the bead hole is small. Ensure the bead sits correctly on the string, with its hole aligned vertically. Repeat this process, adding beads one by one, until you reach the desired number for your bracelet. For even spacing, you can use seed beads between Tila beads if needed. Handle the elastic carefully to avoid stretching it excessively, as this could affect the bracelet’s fit. Keep the beads aligned and facing the same direction for a uniform appearance. Threading the beads is a foundational step that requires patience and attention to detail to achieve a professional finish.
Creating the First Row
Begin by holding the elastic string taut and positioning the first Tila bead at the center. This will serve as the starting point for your bracelet. Use your non-dominant hand to steady the bead while your dominant hand weaves the needle through the bead’s hole. Gently pull the thread to secure the bead in place. Ensure the bead sits flat and aligned properly. For the herringbone stitch, pass the needle through the adjacent bead in the same direction. Continue this process, adding beads row by row, maintaining consistent tension to avoid gaps. Keep the beads aligned and evenly spaced for a polished look. This foundational row sets the stage for the rest of your design, so precision is key.
Adding the Second Row
Once the first row is complete, begin the second row by threading the needle and positioning the next Tila bead directly above the first bead in the initial row. Ensure the bead aligns properly and sits snugly against the elastic string. For a herringbone or brick stitch pattern, weave the needle through the adjacent bead in the first row to secure it. Continue this process, adding beads one by one, maintaining consistent tension to prevent gaps. Use a bead pick if needed to adjust misaligned beads. As you progress, the second row should mirror the first, creating a symmetrical base for your bracelet. Keep the beads evenly spaced and the design tight for a professional finish.
Securing the Beads
To ensure your Tila bead bracelet is durable, carefully secure the beads once the desired length is achieved. Begin by tying a surgeon’s knot at the end of the elastic string, leaving a small tail. Moisten the knot slightly to tighten it, then trim the excess string with sharp scissors. For added security, apply a small dot of clear nail polish or bead glue to the knot. If adding a clasp, attach it to one end of the bracelet using a strong adhesive or crimp. Finally, gently pull the string to tighten the beads, ensuring they sit snugly. Inspect the bracelet for any loose beads or gaps before wearing.
Finishing Touches
Tighten the bracelet slightly, ensuring beads are evenly spaced for a polished look, and complete your Tila bead project with a neat, professional finish today.
Tightening the Bracelet
Gently pull the elastic string to remove any slack between the beads, ensuring the bracelet fits snugly but not too tightly. Check the alignment by sliding the beads slightly. Avoid over-tightening, as this can cause the elastic to break or the beads to misalign. For an even fit, tighten the bracelet while it’s on a flat surface or clipped to a clipboard. Once tightened, test the bracelet on your wrist to ensure comfort and proper sizing. Make small adjustments as needed to achieve the perfect fit. Proper tightening ensures the bracelet remains durable and maintains its shape over time, giving it a professional finish.
Adding a Clasp or Closure
To add a clasp or closure to your Tila bead bracelet, begin by selecting a suitable type, such as a toggle, lobster claw, or magnetic clasp. Attach the clasp using a jump ring or head pin; Use pliers to open the jump ring and slide it onto the end of the elastic string, then close it securely. Ensure the clasp is tightly fastened to prevent it from coming loose. Choose a clasp that complements the bracelet’s design and size. Test the clasp by opening and closing it to ensure proper functionality. A well-secured clasp enhances the bracelet’s durability and provides a polished finish, ensuring it stays securely on the wrist.
Design Variations and Ideas
Explore endless creativity with Tila beads by experimenting with vibrant colors, geometric patterns, and gradients. Mix metallic and matte finishes for a modern look or add personalized charms for a unique touch.
Using Different Colors and Patterns
Experimenting with colors and patterns is a fantastic way to personalize your Tila bead bracelet. Start by selecting a color scheme, such as monochromatic tones for a sleek look or complementary colors for a bold statement. Striped patterns, gradients, and geometric designs add visual interest. Consider using a focal bead or charm as the centerpiece and build your design around it. For a cohesive look, stick to a limited palette or theme, like nature-inspired earth tones or vibrant tropical hues. You can also alternate bead orientations to create dynamic textures. Don’t be afraid to mix metallic and matte finishes for added depth. With Tila beads, the possibilities for unique and eye-catching designs are endless!
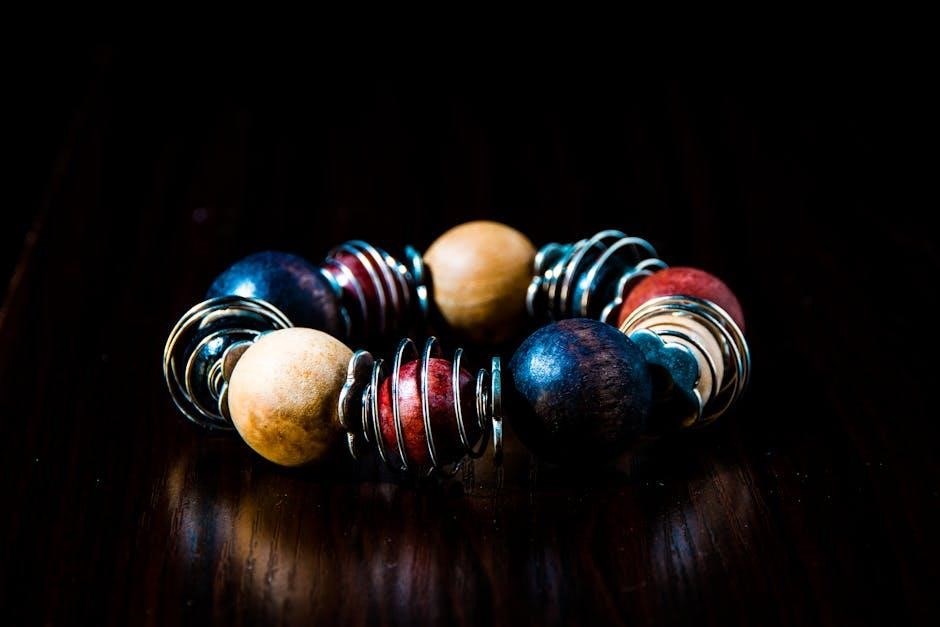
Incorporating Other Bead Types
Incorporating other bead types into your Tila bead bracelet adds texture, dimension, and personality. Seed beads are a popular choice for filling gaps or creating intricate details. Gemstone or crystal beads can add luxury and sparkle, while charm beads bring whimsy and theme-based designs. To balance the look, alternate Tila beads with smaller seed beads or use a statement bead as a focal point. Experiment with metallic accents or spacer beads to separate Tila beads and prevent overcrowding. When mixing bead types, consider their size and shape to ensure a cohesive design. This technique allows for endless creativity, enabling you to craft a bracelet that reflects your unique style and preferences.
Advanced Techniques
Explore advanced stitching patterns and integrate various bead types for intricate designs. Discover specialized techniques to elevate your Tila bead bracelet craftsmanship to the next level.
Creating a Half Tila Design
For a unique twist, try the Half Tila design, where beads are arranged in a staggered pattern. Start by threading a Tila bead onto elastic string and centering it. Pick up a seed bead, then a Tila bead, and pass the needle through the first Tila bead to form a loop. Repeat this process, ensuring each bead sits at an angle to the previous one. This technique creates a dynamic, three-dimensional effect. Maintain even tension to keep the bracelet flat. The Half Tila design offers versatility, allowing you to experiment with color gradients or contrasting beads for a personalized look. Perfect for intermediate beaders, this method adds sophistication to any bracelet design.
Combining Tila Beads with Seed Beads
Enhance your Tila bead bracelet by incorporating seed beads for added texture and detail. Start by threading a seed bead onto the elastic string, followed by a Tila bead. Use the herringbone or brick stitch to weave them together. Seed beads can act as spacers, creating a balanced look between larger Tila beads. For a decorative touch, alternate between single Tila beads and clusters of seed beads. This combination adds depth and visual interest to your design. Experiment with contrasting colors to make the Tila beads stand out. To secure the pattern, ensure tight stitches and maintain consistent tension. This technique is ideal for creating intricate, multi-dimensional bracelets that showcase both bead types beautifully.
Troubleshooting Common Mistakes
Common mistakes in Tila bead bracelets include using the wrong elastic size, improper bead alignment, insufficient spacing, incorrect length, poor end securing, low-quality beads, wrong tools, not following instructions, and rushing.
Fixing Misaligned Beads
Misaligned beads can ruin the symmetry of a Tila bracelet. To fix this, gently pull the elastic thread to create even tension. If beads are uneven, re-thread them, ensuring each bead sits properly in its position. Use a needle to guide the thread through beads if needed. Adding a drop of clear nail polish to the ends can prevent beads from shifting. For minor gaps, tighten the bracelet slightly without over-stretching the elastic. If misalignment persists, consider re-making the row, ensuring consistent spacing and tension throughout. Proper alignment is key for a polished look, so take your time to adjust beads carefully.
Dealing with Broken Elastic
If the elastic breaks while working on your Tila bead bracelet, remain calm and carefully remove the broken section. Thread the beads onto a temporary surface, like a bead mat, to keep them organized. Measure and cut a new piece of elastic, ensuring it’s slightly longer than needed. Re-thread the beads in the correct order, starting from one end. Tie a secure knot and trim excess elastic. To prevent future breaks, use high-quality elastic and avoid over-stretching the bracelet. For added durability, apply a small dot of clear nail polish to the knots. This quick fix ensures your bracelet remains intact and wearable.
Care and Maintenance

To maintain your Tila bead bracelet, avoid exposure to harsh chemicals or water. Handle with care to prevent damage. Regular cleaning and proper storing will keep it looking its best.

How to Clean Your Tila Bead Bracelet
Cleaning your Tila bead bracelet requires gentle care to maintain its beauty. Use a soft, dry cloth to wipe away dirt or dust. For deeper cleaning, dampen the cloth slightly with water, but avoid soaking the bracelet. Never use harsh chemicals, abrasive materials, or ultrasonic cleaners, as they may damage the beads or elastic. Instead, mix a small amount of mild soap with warm water, dip a clean cloth into the solution, and gently scrub the beads. Rinse the cloth thoroughly and wipe the bracelet clean. Allow it to air dry completely before wearing. This method ensures your bracelet remains pristine and long-lasting.
Storing Your Beaded Jewelry
To preserve the beauty of your Tila bead bracelet, proper storage is essential. Store it in a cool, dry place away from direct sunlight to prevent fading or elastic degradation. Use a soft, velvet-lined jewelry box or a fabric pouch to protect the beads from scratching. Avoid stacking multiple bracelets together, as this can cause tangling or misalignment. For added protection, place a silica gel packet in the storage container to absorb moisture. Never store your bracelet in cardboard or plastic bags, as they may retain moisture or bend the elastic. Consider using a jewelry organizer or travel case for easy access and organization. By storing your bracelet with care, you ensure it remains in pristine condition for years to come.
Crafting a Tila bead bracelet is a rewarding DIY project that combines creativity with precision. With practice, you’ll master the techniques and create stunning, unique designs effortlessly.
Final Tips for Success
Success in creating Tila bead bracelets lies in patience and attention to detail. Start with simple projects to build confidence, then gradually experiment with intricate designs. Plan your design beforehand to ensure a polished look. Use high-quality beads and materials for durability. Practice basic stitches like the Herringbone and Brick Stitch before starting a project. Experiment with color combinations to create unique patterns. Keep your workspace organized to avoid losing beads. Embrace mistakes as opportunities to learn and improve. Finally, don’t be afraid to try new techniques—creativity is key to making standout bracelets. With dedication, your Tila bead jewelry will truly shine.
Inspiration for Future Projects
Once you’ve mastered the basics of Tila bead bracelets, explore endless creative possibilities. Try designing themed bracelets, such as seasonal patterns or holiday-inspired colors. Experiment with mixing Tila beads in different shapes or sizes for a unique texture. Consider creating matching jewelry sets, like earrings or necklaces, to complement your bracelets. For a personalized touch, incorporate meaningful charms or birthstone beads. You can also draw inspiration from nature, art, or cultural designs. Don’t hesitate to mix Tila beads with other bead types, like seed beads or gemstones, for added variety. Keep experimenting and sketching ideas to stay inspired and create one-of-a-kind pieces. Your creativity is the limit!